
RL V6-3.7L (2009)
Ignition Coil: Testing and Inspection
Ignition Coil Relay Circuit Troubleshooting
1. Check the No. 2 (15 A) fuse in the driver's under-dash fuse/relay box.
Is the fuse OK?
YES - Go to step 2.
NO - Replace the fuse. If the fuse continues to blow, locate and repair the short in the circuit between the under-dash fuse/relay box and the
ignition coils.
2. Remove the ignition coil relay from the driver's under-dash fuse/relay box, and test it. See: Power and Ground Distribution/Testing and
Inspection/Power Relay Test
Is the relay OK?
YES - Go to step 3.
NO - Replace the ignition coil relay.
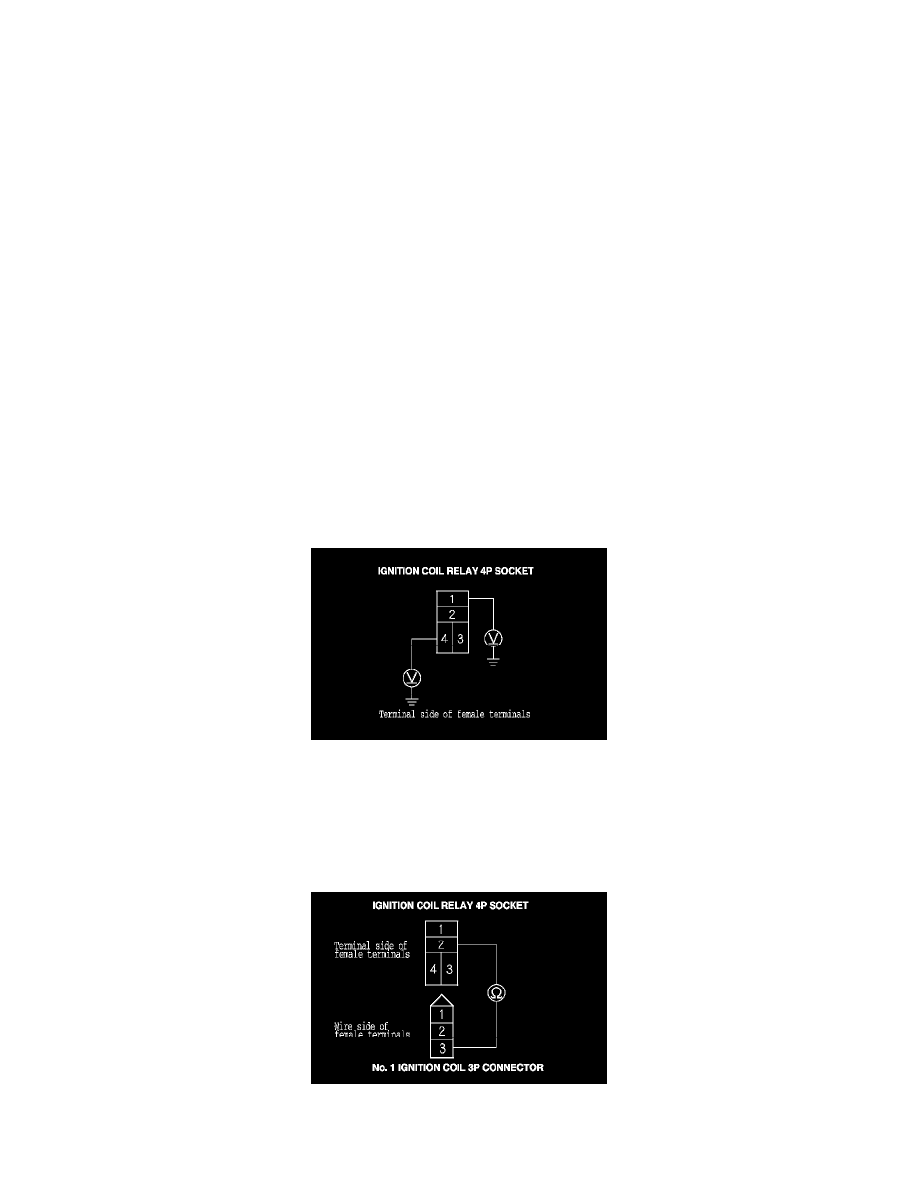
3. Measure the voltage between ignition coil relay 4P socket terminal No. 1 and body ground, then terminal No. 4 and body ground.
Is there battery voltage?
YES - Go to step 4.
NO - Replace the driver's under-dash fuse/relay box.
4. Check for continuity between ignition coil relay 4P socket terminal No. 2 and the No. 1 ignition coil 3P connector terminal No. 3.
Is there continuity?
YES - Go to step 5.
NO - Repair open in the wire between ignition coil relay 4P socket terminal No. 2 and No. 1 ignition coil 3P connector terminal No. 3.
5. Connect the Honda Diagnostic System (HDS) to the data link connector (DLC). See: Computers and Control Systems/Testing and
Inspection/Initial Inspection and Diagnostic Overview