
RL V6-3.7L (2009)
Distance Sensor: Service and Repair
Millimeter Wave Radar Removal/Installation
1. Remove the upper grille. See: Body and Frame/Grille/Service and Repair/Upper Grille Replacement
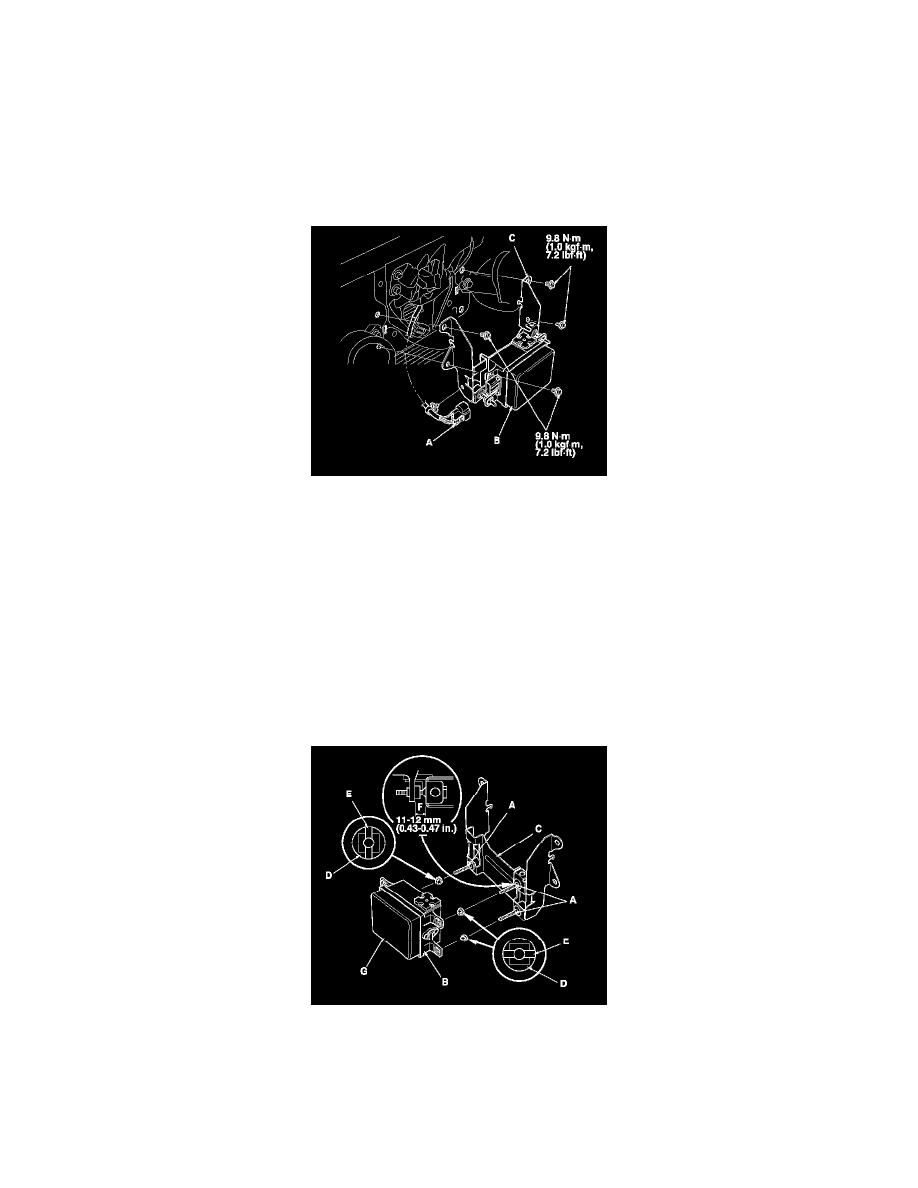
2. Disconnect the 5P connector (A) from the millimeter wave radar (B).
3. Remove the bolts and the millimeter wave radar.
NOTE: Go to step 7 if it is not necessary to disassemble the millimeter wave radar from the main bracket (C).
4. Loosen the aiming bolts (A) a little at a time, and remove the millimeter wave radar (B) from the main bracket (C).
NOTE:
-
Do not disassemble the millimeter wave radar.
-
If you disassemble the main bracket, always use new screw grommets (D).
5. Install new screw grommets on the millimeter wave radar. Position the left side grommet grooves (E) horizontally, and position the right side
grommet groove (E) vertically.
6. Tighten the main bracket bolts a little at a time until the clearance between the millimeter wave radar and the main bracket is 0.43-0.47 in. (11-12
mm) (F). Make sure the millimeter wave radar is parallel with the main bracket.
7. Clean the surface of the millimeter wave radar (G).
8. Install the millimeter wave radar (A), then tighten the bolts in the numbered sequence shown.
9. Connect the 5P connector (B) to the millimeter wave radar.
10. Install the upper grille. See: Body and Frame/Grille/Service and Repair/Upper Grille Replacement
11. Do the millimeter wave radar aiming. See: Adjustments