
RL V6-3.7L (2009)
Transmission Position Switch/Sensor: Service and Repair
Transmission Range Switch Replacement
Transmission Range Switch Replacement
1. Do the battery removal procedure. See: Starting and Charging/Battery/Service and Repair/Removal and Replacement
2. Remove the air cleaner. See: Engine, Cooling and Exhaust/Engine/Tune-up and Engine Performance Checks/Air Cleaner Housing/Service and
Repair
3. Remove the battery base.
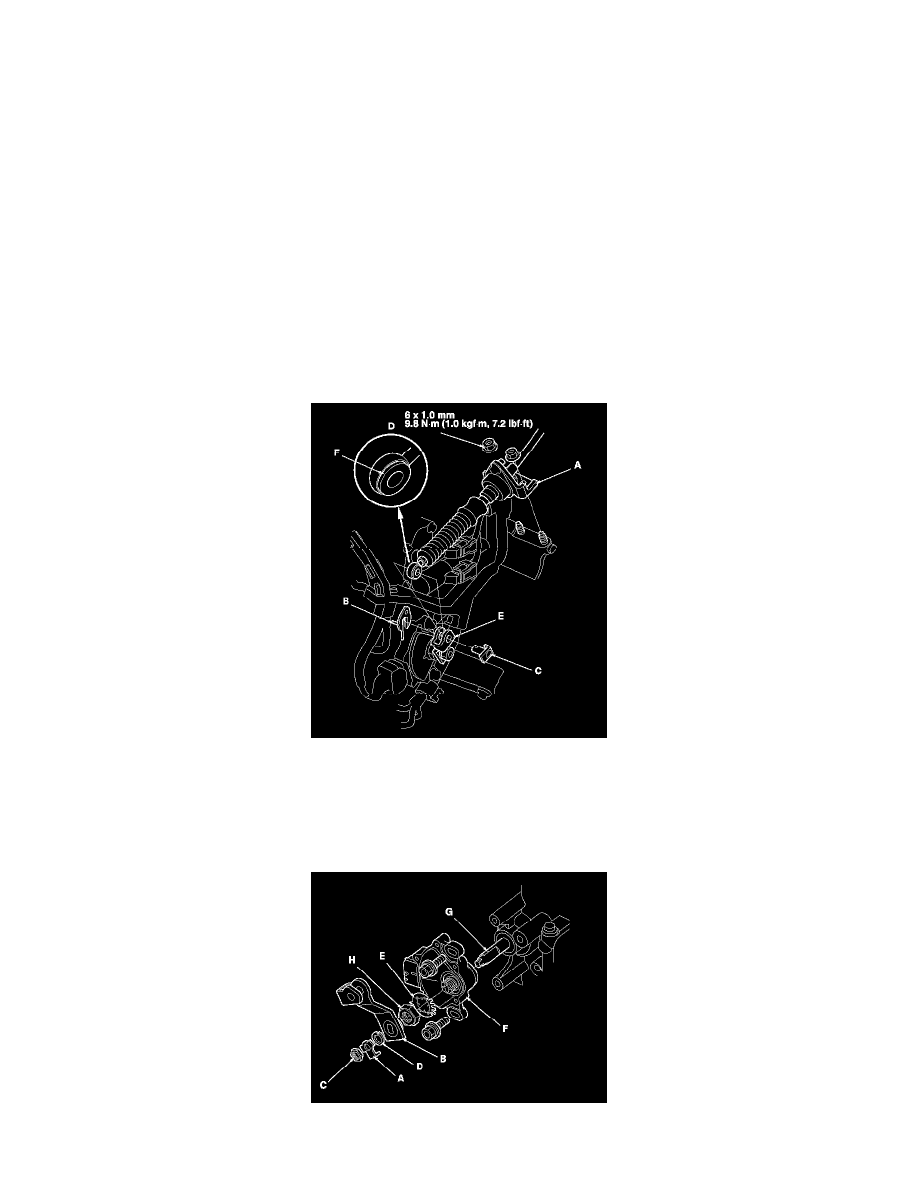
4. Remove the nuts securing the shift cable bracket (A).
5. Remove the spring clip/washer (B) and control pin (C), then separate the shift cable end (D) from the control lever (E).
6. Check the bushing (F) in the shift cable end for a proper fit and wear. If the bushing is loose or worn, replace the shift cable. See: Transmission
and Drivetrain/Automatic Transmission/Transaxle/Shift Linkage/Shift Cable/Service and Repair
7. Disconnect the transmission range switch connector.
8. Pry the lock tab of the lock washer (A) on the control lever (B), and remove the nut (C), lock washer, spring washer (D) and control lever.
9. Pry the lock tabs of the lock washer (E) on the transmission range switch (F), hold the selector control shaft (G) with a 6.0 mm wrench, and loosen
the locknut (H).
10. Remove the locknut and lock washer, then remove the transmission range switch (two bolts).
11. Set the new transmission range switch (A) to the N position. The transmission range switch clicks in the N position, and the control shaft hole (B)