
RL V6-3.7L (2009)
Alternator: Removal and Replacement
Alternator Removal and Installation
Removal
1. Do the battery terminal disconnection procedure. See: Battery/Service and Repair/Procedures
2. Remove the upper grille cover. See: Body and Frame/Grille/Service and Repair/Upper Grille Cover Replacement
3. Raise the vehicle on the lift to full height.
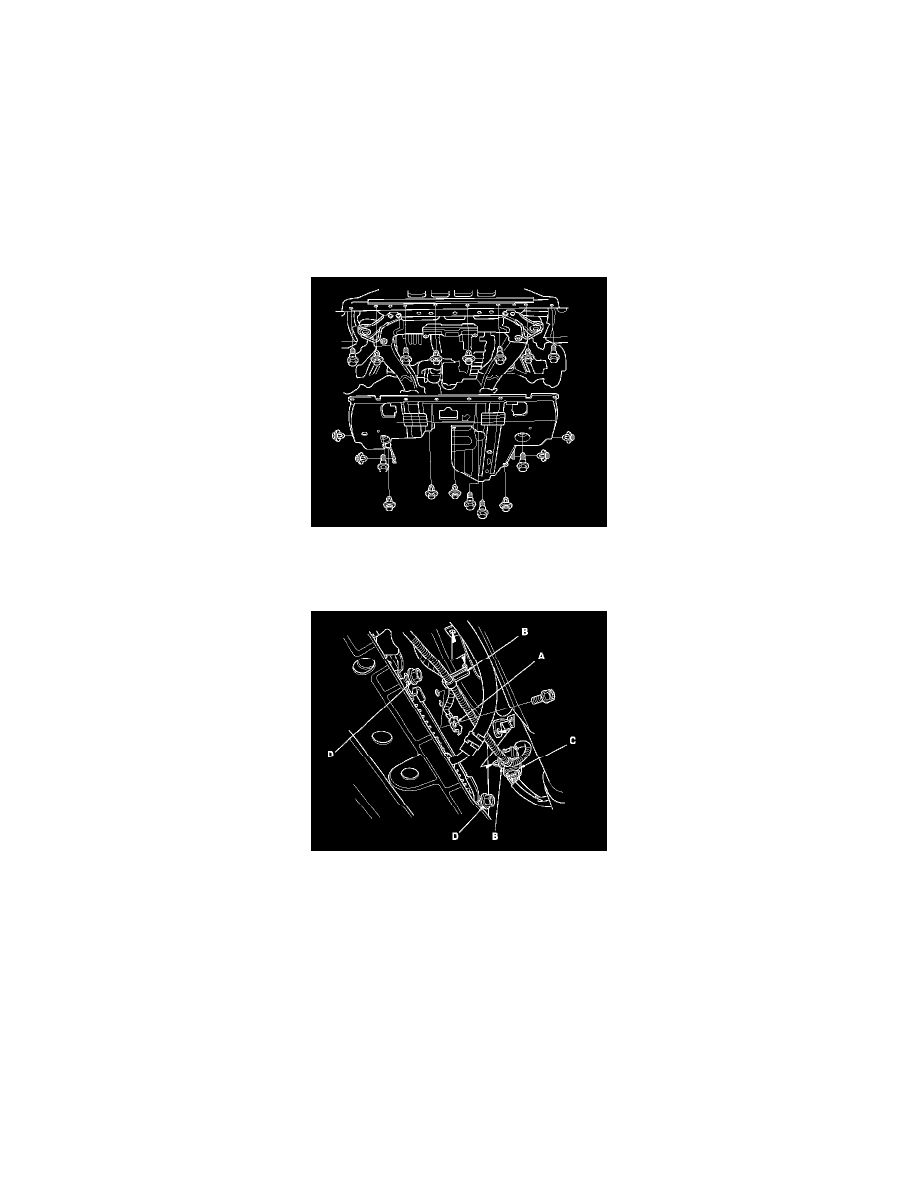
4. Remove the shield.
5. Remove the ground cable (A), the harness clamps (B), and the connector (C) from the A/C condenser fan shroud.
6. Loosen the two bolts (D) securing the A/C condenser fan shroud.
7. Lower the vehicle on the lift.
8. Remove the radiator fan control (RFC) unit. See: Accessories and Optional Equipment/Antitheft and Alarm Systems/Keyless Entry/Keyless Entry
Receiver/Service and Repair/RFC Unit Replacement
9. Remove the coolant reservoir (A).
10. Remove the two bolts (B), then remove the A/C condenser fan shroud.
11. Remove the drive belt. See: Engine, Cooling and Exhaust/Engine/Drive Belts, Mounts, Brackets and Accessories/Drive Belt/Service and Repair