
RL V6-3.7L (2009)
Control Arm: Service and Repair
Front Upper Arm Replacement
Front Upper Arm Replacement
Special Tools Required
-
Ball joint remover, 32 mm 07MAC-SL0A102
1. Remove the front damper. See: Suspension Strut / Shock Absorber/Service and Repair/Removal and Replacement
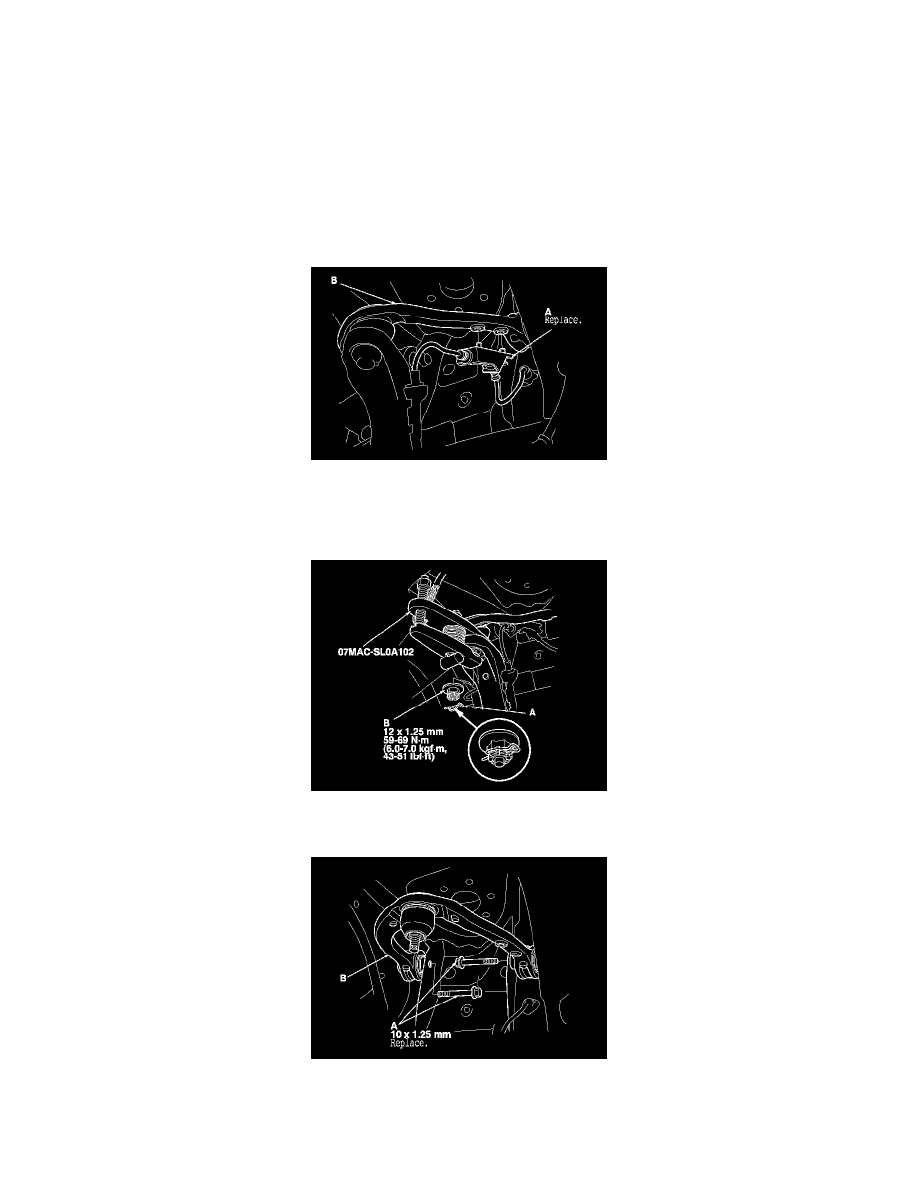
2. Remove the wheel speed sensor bracket (A) from the upper arm (B).
NOTE: Use a new wheel speed sensor bracket on reassembly.
3. Remove the lock pin (A) from the upper arm ball joint, then loosen the nut (B).
NOTE: During installation, install the new lock pin as shown after tightening the castle nut.
4. Disconnect the upper arm ball joint from the knuckle using the ball joint remover. See: Ball Joint/Service and Repair/Ball Joint Removal
5. Remove the upper arm mounting bolts (A), then remove the upper arm (B).
NOTE: Use the new upper arm mounting bolts during reassembly.
6. Install the upper arm by inserting a rod (A) of appropriate size (O.D. 6 mm/L: 300 mm) into the positioning holes (B), and place the upper arm (C)
on the rod to position it before tightening the upper arm mounting bolts.
7. Install the remaining parts in the reverse order of removal, and note these items: