
RL V6-3.7L (2009)
Subframe: Service and Repair
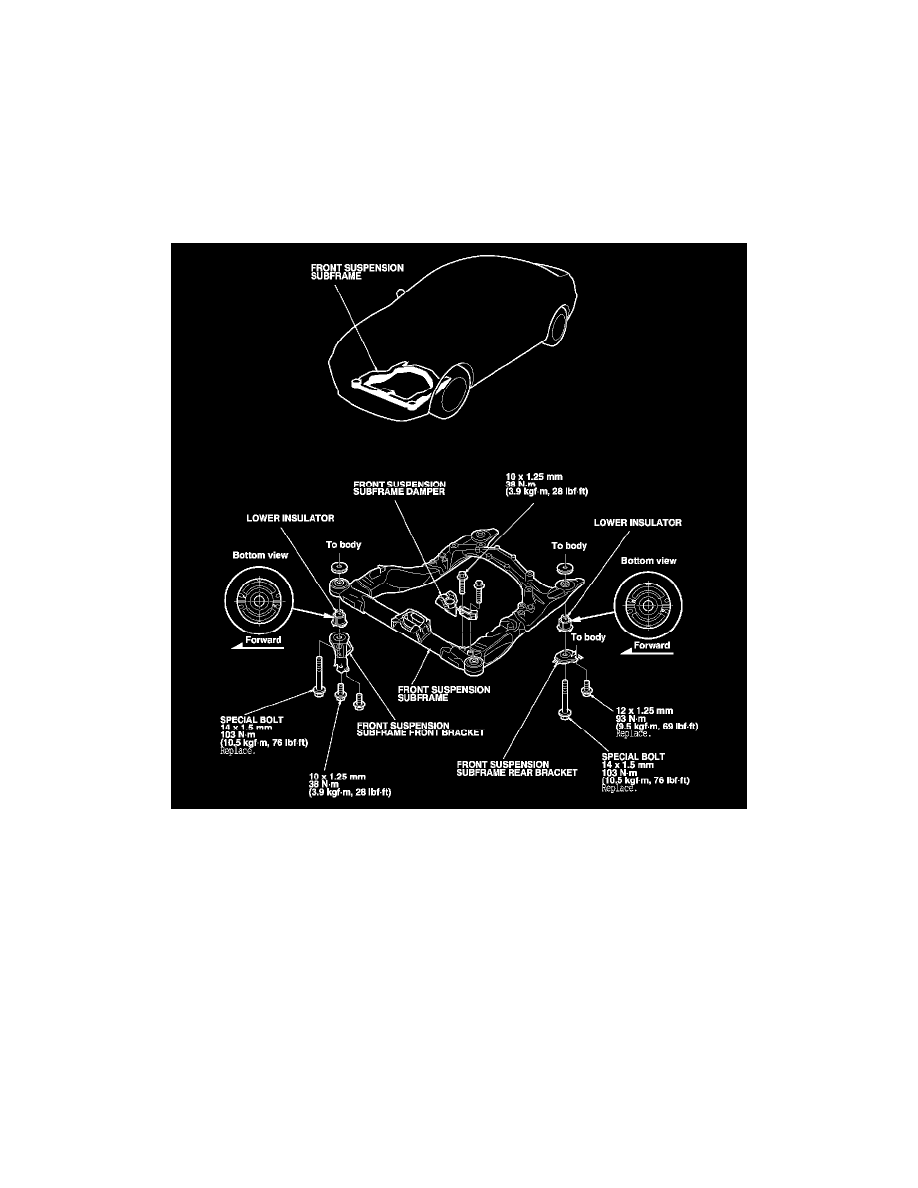
Subframe Replacement
Special Tools Required
-
Subframe alignment pin 070AG-SJAA10S
Front Subframe Torque
After removing the subframe mounting bolts and front suspension subframe rear bracket mounting bolts, be sure to replace them with new ones.
Front Subframe Alignment
NOTE: Using the special tool, align the suspension subframe using the following sequence.
1. Align the front suspension subframe (A).
-1 Lift the front suspension subframe up to the body, and loosely install new subframe mounting bolts and the brackets (B).
-2 Insert the alignment pin (C) into the alignment hole in the right rear of the subframe, then align the subframe with the body.
-3 Loosely tighten the subframe mounting bolt (D) at the right rear.
-4 Insert the alignment pin into the alignment hole in the left rear of the subframe, and then align the subframe with the body.
-5 Loosely tighten the subframe mounting bolt (E) at the left rear.
-6 Loosely tighten both front subframe mounting bolts (F).
-7 Insert the alignment pin into the alignment hole in the right rear of the subframe.
-8 Loosen the subframe mounting bolt at the right rear, and fit the lower insulator (G), in the subframe, then tighten the mounting bolt to the
specified torque.
-9 Tighten the remaining subframe mounting bolts and the bracket mounting bolts (H) to the specified torque.
2. After reinstalling all removed parts, check and adjust the front wheel alignment. See: Alignment/Service and Repair