
RL V6-37L (2009) Rear Suspension: Removal and Replacement
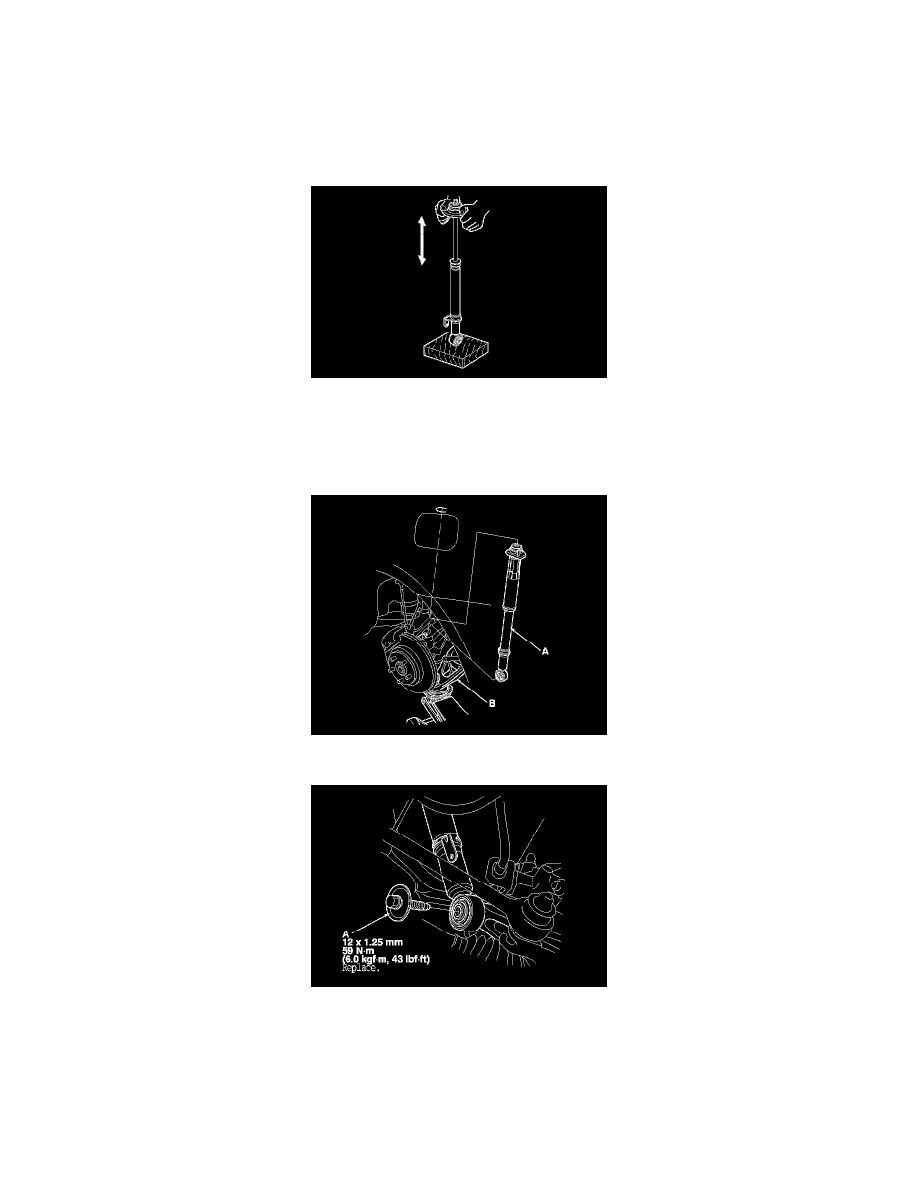
3. Push on the damper by hand as shown.
4. Compress the damper assembly by hand, and check for smooth operation through a full stroke, both compression and extension. The damper
should extend in a smooth, continuous motion when the compression is released. If it does not (no compression or no extension), the gas is
leaking, and the damper should be replaced.
5. Check for oil leaks, abnormal noises, or binding during these tests.
Installation
1. Place a floor jack at the connecting point of lower arm B and the stabilizer link.
2. Compress the damper (A) by hand, and move it into position.
3. Loosely tighten a new damper lower mounting bolt (A).
4. Loosely install new flange nuts.
5. Raise the rear suspension with a floor jack to load it with the vehicle's weight.
6. Tighten the flange nuts and the damper lower mounting bolt to the specified torque value.