
RL V6-3.7L (2009)
Window Shade: Removal and Replacement
Rear Window Sunshade Removal/Installation
NOTE:
-
Put on gloves to protect your hands.
-
Take care not to hit the rear window when removing or loosing the bolts.
-
Take care not to scratch the trim and panels.
1. Remove the rear shelf. See: Body and Frame/Interior Moulding / Trim/Rear Shelf/Service and Repair
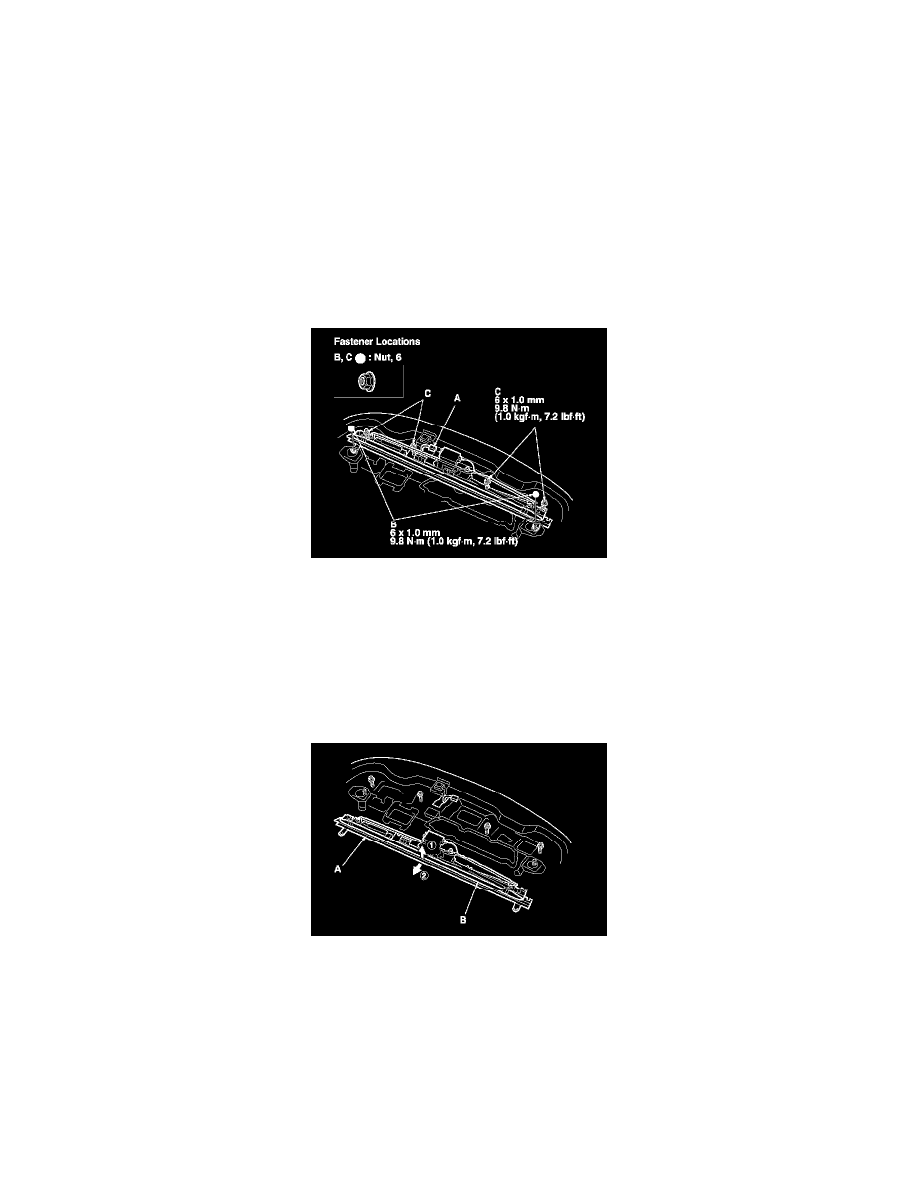
2. Disconnect the rear window sunshade control unit connector (A). Remove the two nuts (B), and loosen the four nuts (C) securing the rear window
sunshade.
3. While lifting at the front edge of the rear window sunshade (A), slide it forward, then remove it. Do not catch the screen portion (B) while
removing the sunshade.
4. Install the sunshade in the reverse order of removal, and note these items:
-
Be sure there is no gap between the bracket and the rear parcel shelf, then tighten the mounting nuts securely.
-
Make sure the control unit connector is plugged in properly.
-
Check the rear window sunshade operation.