
RL V6-3474cc 3.5L (1998)
19. Remove the 36 mm sealing bolt.
20. Disconnect the extension shaft from the differential with the special tool.
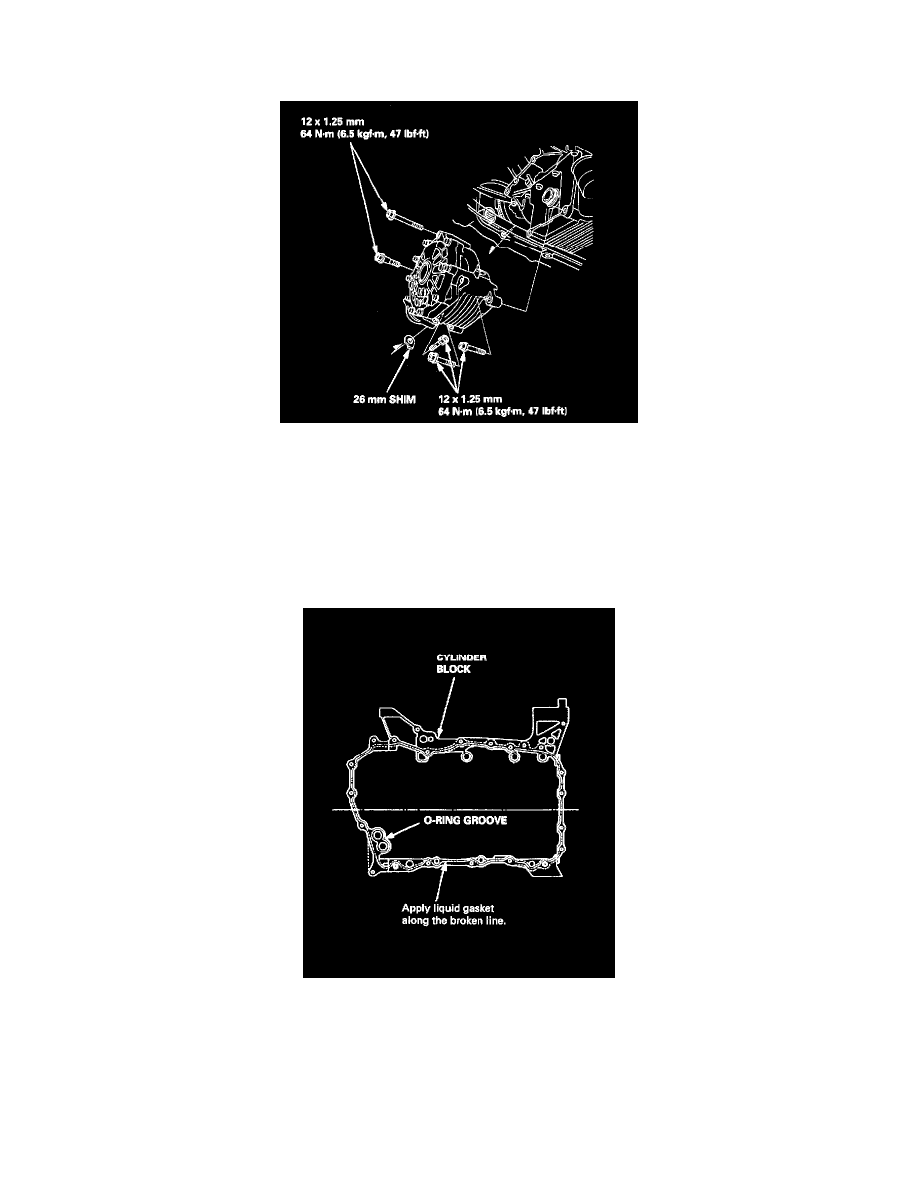
21. Remove the differential mounting bolts and 26 mm shim, then remove the differential assembly.
22. Remove the stiffener.
23. Remove the drive plate cover.
24. Remove the oil pan.
Installation
Install the oil pan in the reverse order of removal:
-
Always use new O-rings.
-
Oil pan and cylinder block mating surface must be clean.
1. Apply liquid gasket to the cylinder block, then install the oil pan.
NOTE:
-
Use liquid gasket, Part No. 08718-0001 or 08718-0003.
-
Check that the mating surfaces are clean and dry before applying liquid gasket.
-
Apply liquid gasket evenly, being careful to cover all the mating surface.
-
Do not apply liquid gasket to O-ring grooves.
-
To prevent oil leakage, apply liquid gasket to the inner threads of the bolt holes.
-
Do not install the parts if 5 minutes or more have elapsed since applying liquid gasket. Instead, reapply liquid gasket after removing old