
RL V6-3474cc 3.5L (1998)
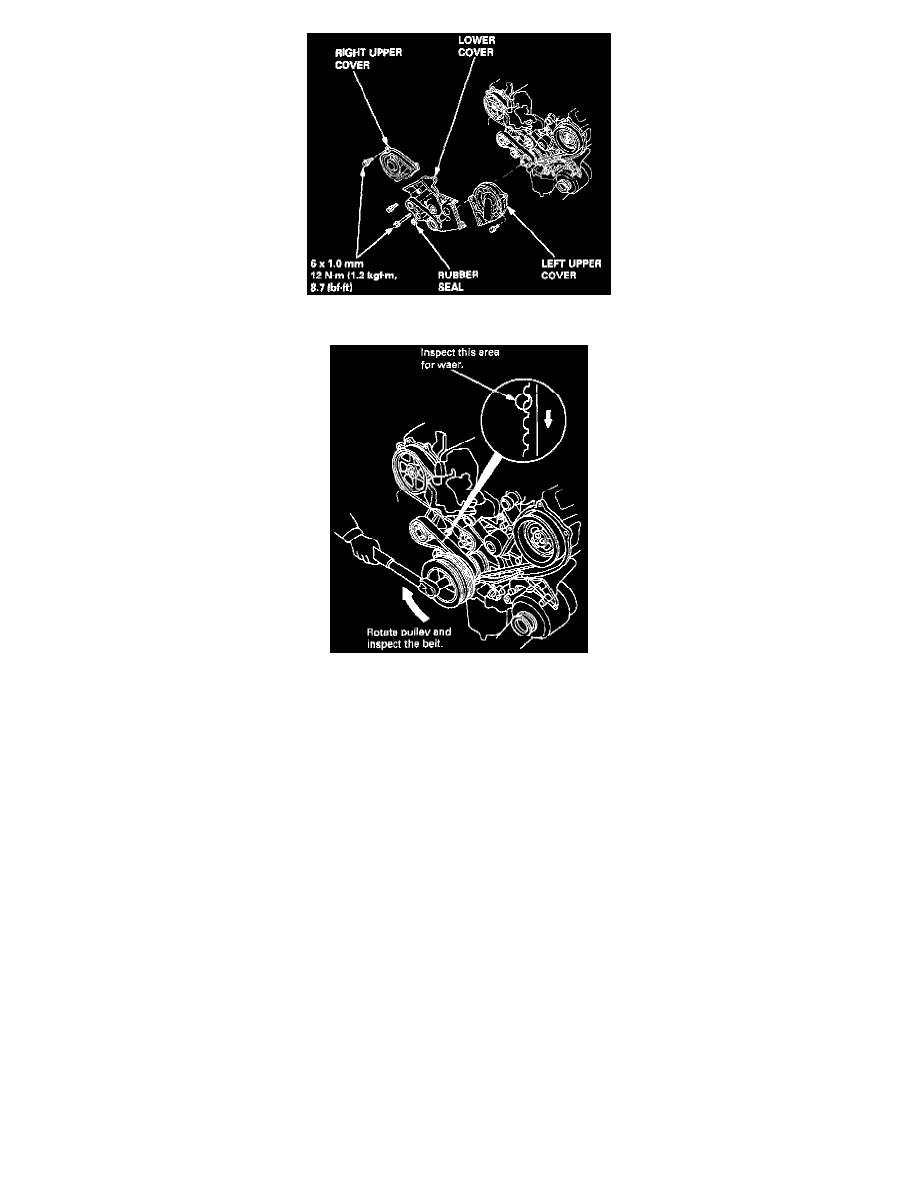
13. Remove the upper and lower covers.
14. Inspect the balancer belt for cracks and oil or coolant soaking.
NOTE:
-
Replace the belt if oil or coolant soaked.
-
Remove any oil or solvent that gets on the belt.
Tension Adjustment
CAUTION:
-
Always adjust the balancer belt tension with the engine cold.
-
Do not rotate the crankshaft when the adjusting bolt is loose.
NOTE:
-
The tensioner is spring-loaded to apply tension to the belt automatically after making the following adjustment.
-
Inspect the balancer belt before adjusting the belt tension
-
Always rotate the crankshaft clockwise when viewed from the pulley side. Rotating it counterclockwise may result in improper adjustment of the
belt tension.
1. Remove the engine cover.
2. Remove the intake air duct and air cleaner housing assembly.
3. Loosen the mounting bolt, lock bolt and adjusting rod, then remove the alternator belt.
4. Loosen the idler pulley center nut and adjusting bolt, then remove the Air Conditioning (A/C) compressor belt.
5. Loosen the adjusting bolt, locknut and mounting bolt, then remove the Power Steering (P/S) pump belt.
6. Remove the TCS control valve upper and lower brackets.
7. Disconnect the TCS throttle sensor connector and TCS throttle actuator connector, then remove the TCS control valve assembly.
8. Disconnect the Vehicle Speed Sensor (VSS) sub-harness connector, then remove the wire harness holder.
9. Remove the breather hose and vacuum hoses.
10. Remove the vacuum hoses and Ignition Control Module (ICM) bracket.