
RL V6-3474cc 3.5L (1998)
Brake Fluid: Service and Repair
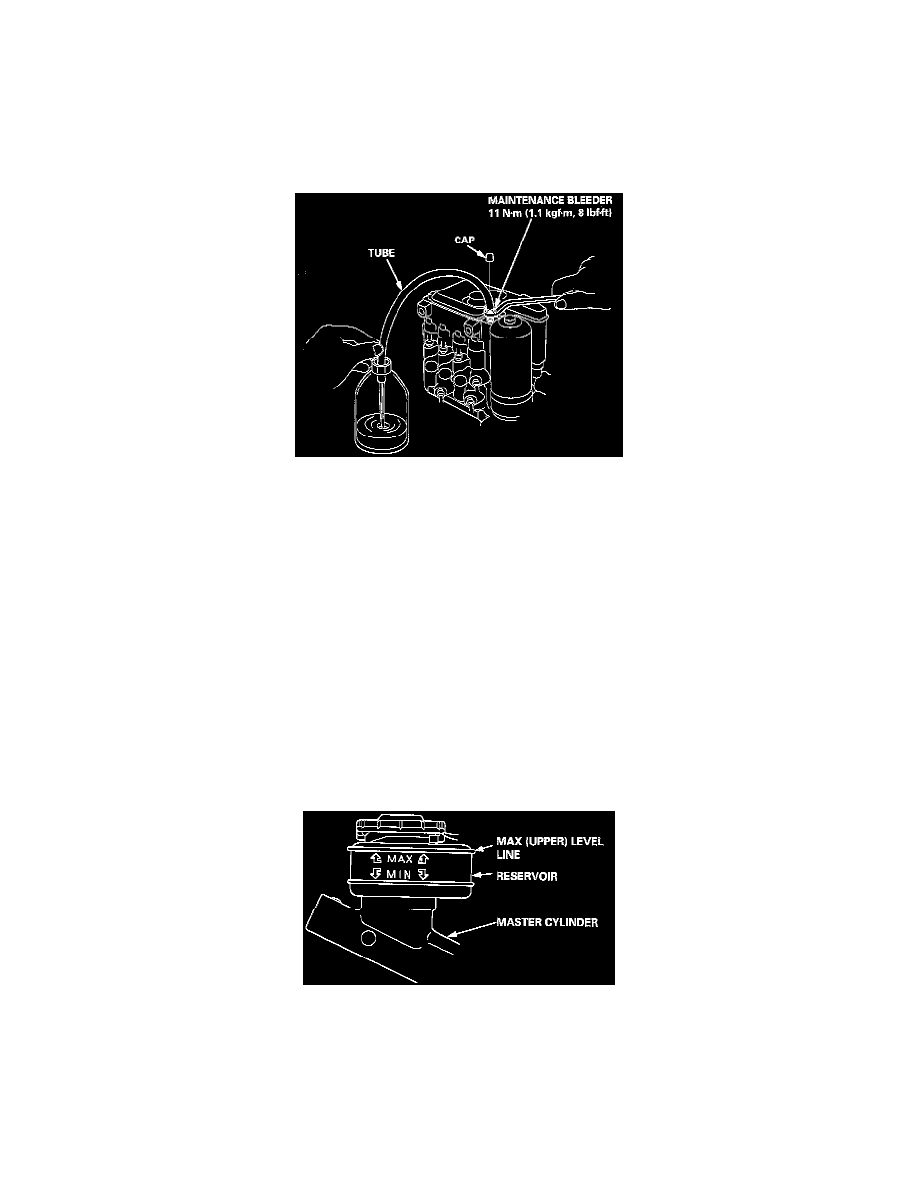
CAUTION: Do not loosen the relief plug on the accumulator.
1. Start the engine and let it idle for a minute. Stop the engine.
2. Check the brake fluid level in the reservoir. It should be below the MAX (upper) level line.
3. Use the steps below to drain the rest of the brake fluid from the modulator unit.
NOTE: Approximately 35 - 45 ml (1 1/6 - 1 1/2 fl. oz) of the fluid is drained at each try.
Maintenance Bleeder
A) Attach a wrench to the maintenance bleeder.
B) Connect a rubber tube of the appropriate diameter to the maintenance bleeder, and set the other end of the rubber tube in a suitable container.
C) While holding the rubber tube with your hand, slowly loosen the maintenance bleeder 1/8 to 1/4 turn to collect the brake fluid in the container.
CAUTION: Do not loosen the maintenance bleeder too much. The high-pressure brake fluid can burst out.
D) Start the engine and let it idle for a minute. Stop the engine.
E) Check the brake fluid level in the reservoir. It should be below the MAX (upper) level line.
F) Tighten the maintenance bleeder.
4. Remove the cap, and refill the reservoir to the MAX (upper) level with fresh brake fluid.
NOTE: Pour the brake fluid slowly so that it does not foam, and wait for a few minutes.
Reservoir
5. Repeat steps A through F twice, and refill the reservoir to the MAX (upper) level with fresh brake fluid.
6. Tighten the maintenance bleeder to the specified torque.
7. After replacement, start the engine and make sure that the ABS indicator light goes off.
Specs:
Maintenance Bleeder 11 Nm (8 ft. lb.)