
RL V6-3474cc 3.5L (1998)
NOTE:
-
For easier installation, turn the right camshaft pulley clockwise about a half tooth from the TDC position.
-
Make sure the timing belt drive pulley and camshaft pulleys are at TDC.
6. Loosen and retighten the timing belt adjusting bolt to tension the timing belt.
7. Install the lower cover and crankshaft pulley.
8. Rotate the crankshaft pulley about 5 or 6 turns clock wise so the timing belt positions on the pulleys.
9. Adjust the timing belt tension.
10. Remove the crankshaft pulley and lower cover.
11. Install the timing belt guide plate and balancer belt drive pulley.
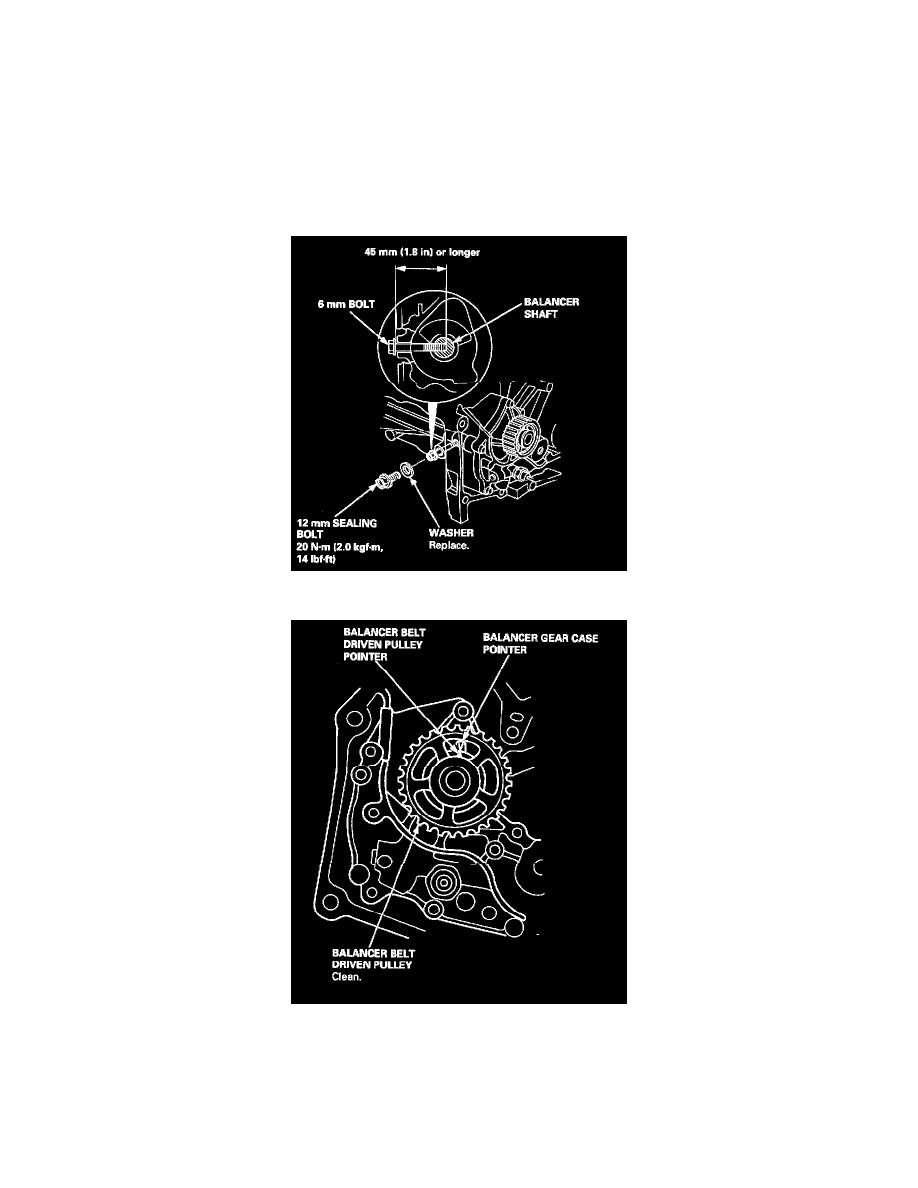
12. Align the maintenance hole and the balancer shaft hole. Insert a 6 mm bolt that is at least 45 mm (1.8 inch) long into the balancer shaft.
13. Check alignment of the pointers.
14. Set the timing belt drive pulley so that the No. 1 piston is at TDC.
15. Install the balancer belt drive pulley, then install the balancer belt.
16. Loosen and retighten the balancer belt adjusting bolt to tension the balancer belt.
17. Remove the 6 mm bolt. Install the sealing bolt in the maintenance hole. Use a new washer.
18. Install the crankshaft pulley, then rotate the crankshaft pulley about 5 or 6 turns clockwise so that the balancer belt positions on the pulleys.
19. Adjust the balancer belt tension.