
RL V6-3474cc 3.5L (1998)
Air Bag Control Module: Service and Repair
Passenger's Airbag
CAUTION:
-
Before disconnecting any part of the SRS wire harness, disconnect the airbag connectors, seat belt tensioner connectors and side airbag
connectors.
-
During installation or replacement, do not bump (impact wrench, hammer etc.) the area near the SRS unit.
-
Do not damage the SRS unit terminals or connectors.
-
Do not disassemble the SRS unit; it has no serviceable parts.
-
Store the SRS unit in a clean, dry area.
-
Do not use any SRS unit which has been subjected to water damage or shows signs of being dropped or improperly handled, such as dents, cracks
or deformation.
1. Make sure you have the anti-theft code for the radio, then write down the frequencies for the radio's preset buttons.
2. Disconnect the battery negative cable, then disconnect the positive cable from the battery, and wait at least three minutes.
3. Disconnect the airbag connectors, seat belt tensioner connectors and side airbag connectors.
4. Remove the glove box.
5. Disconnect the 2P connector between the front passenger's airbag and SRS main harness.
NOTE: When disconnected, the airbag connector is automatically shorted.
6. Remove the radio panel assembly, then remove the bracket.
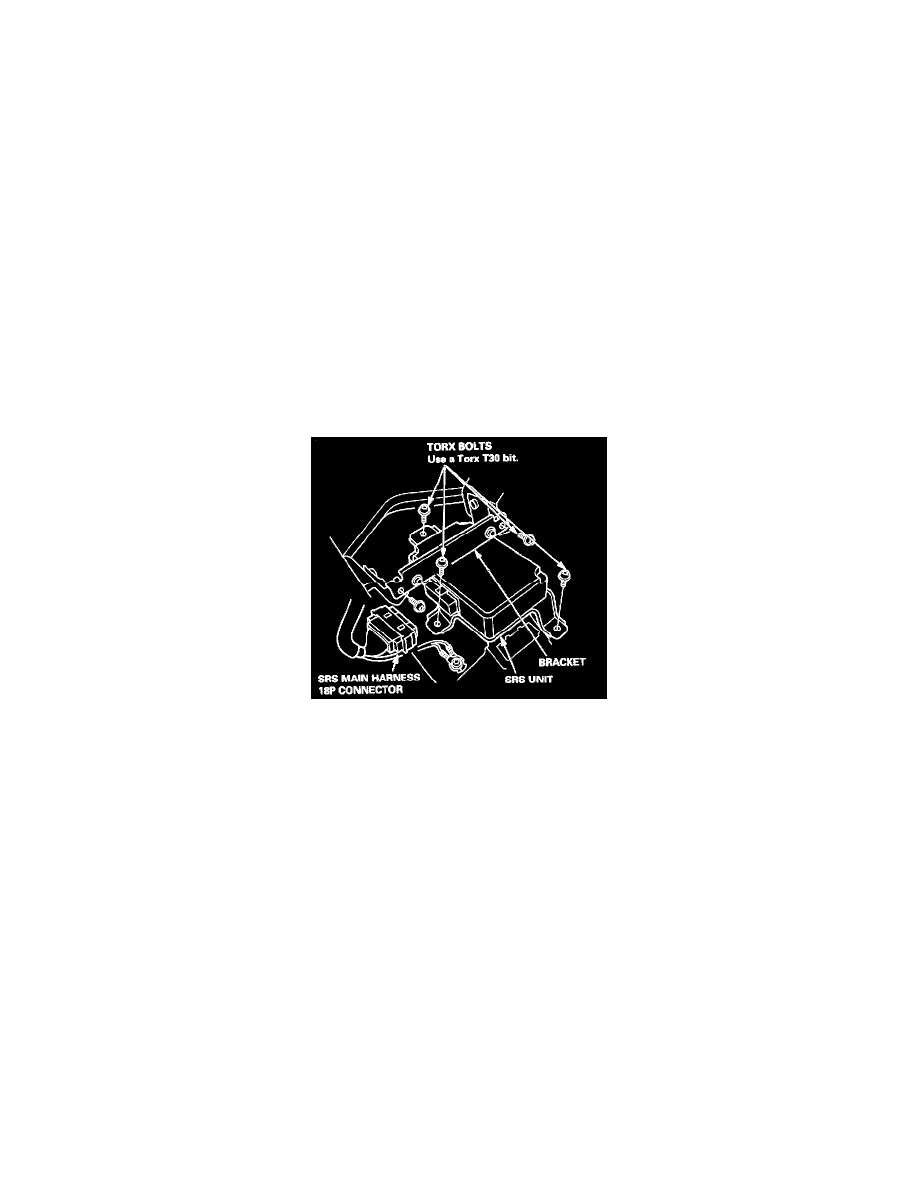
7. Disconnect the SRS main harness 18P connector from the SRS unit.
8. Remove the three Torx bolts from the SRS unit, then pull out the SRS unit.
CAUTION:
-
Be sure to install the SRS wiring so that it Is not pinched or interfering with other vehicle parts.
-
When tightening the Torx bolts to the specified torque after replacement, be careful to turn them in so that their heads rest squarely on the
brackets.