
RSX L4-2.0L (2005)
Electronic Brake Control Module: Service and Repair
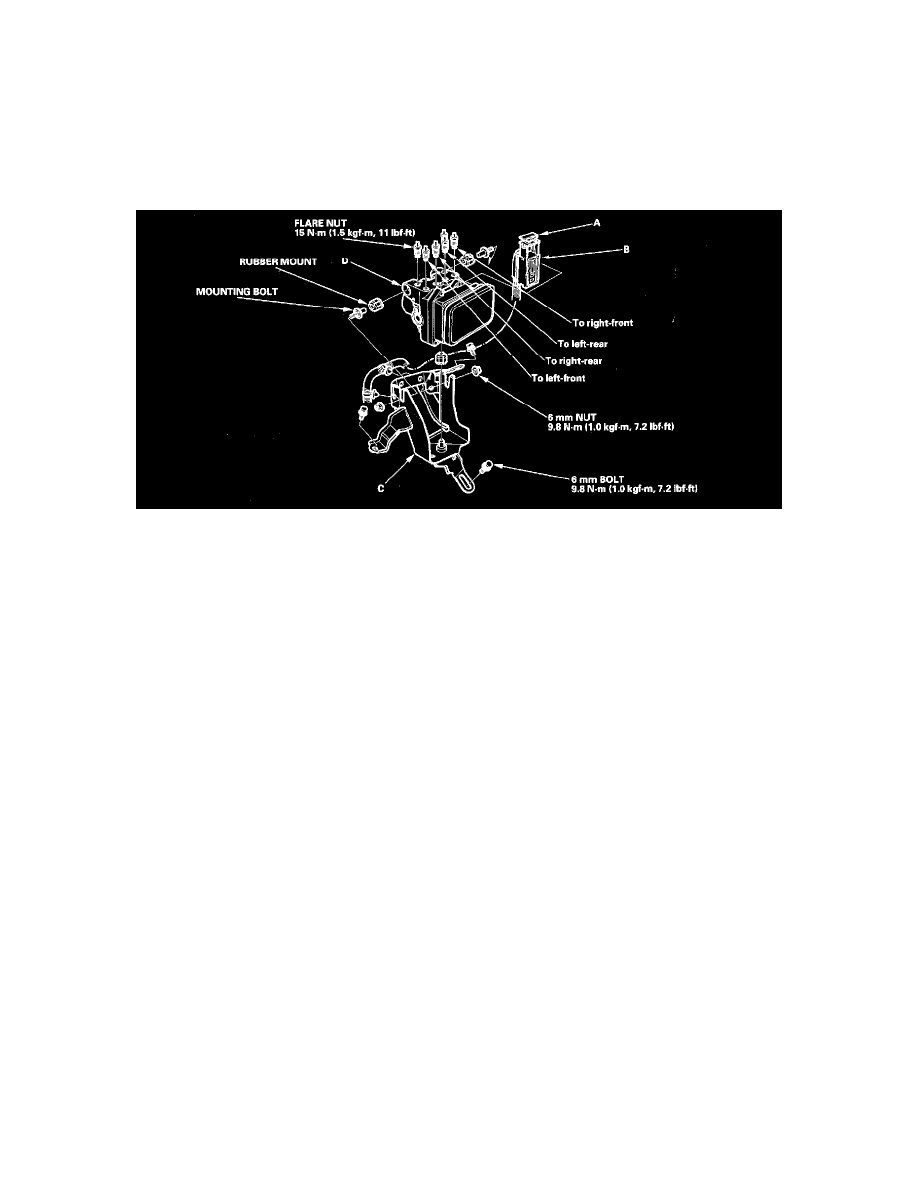
ABS Modulator-Control Unit Removal and Installation
NOTE:
^
Do not spill brake fluid on the vehicle; it may damage the paint; if brake fluid gets on the paint, wash it off immediately with water.
^
Take care not to damage or deform the brake lines during removal and installation.
^
To prevent the brake fluid from flowing, plug and cover the hose ends and joints with a shop towel or equivalent material.
Removal
1. Pull up the lock (A) of the ABS control unit 25P connector (B), and the connector disconnects itself.
2. Disconnect the six brake lines.
3. Remove the three 6 mm bolts, and remove the ABS modulator-control unit bracket (C) from the body.
4. Separate the ABS modulator-control unit (D) from the bracket by removing the two 6 mm nuts.
Installation
1. Install the ABS modulator-control unit on the bracket with two 6 mm nuts.
2. Install the ABS modulator-control unit bracket on the body with three 6 mm bolts.
3. Reconnect the six brake lines, then tighten the nuts.
4. Align the connecting surface of the ABS control unit 25P connector.
5. Push in the lock of the ABS control unit 25P connector until you hear it click into place, then connect the connector.
6. Bleed the brake system, starting with the front wheels.
7. Start the engine, and check that the ABS indicator goes off.
8. Test-drive the vehicle, and check that the ABS indicator does not come on.