
RSX L4-2.0L (2005)
Oil Pan: Service and Repair
Oil Pan Removal
Oil Pan Removal
K20A3 Engine
1. If the engine is still in the vehicle, remove the subframe.
^
1 Drain the engine oil.
^
2 Attach the chain hoist to the engine.
^
3 Disconnect the suspension lower arm ball joints.
^
4 Remove the rear mount mounting bolts.
^
5 Remove the front mount mounting bolt.
^
6 Remove the automatic transmission (ATF) filter mounting bolt (A/T).
^
7 Use a marker to make alignment marks on the reference lines that align with the centers of the rear subframe mounting bolts. Remove the
front subframe.
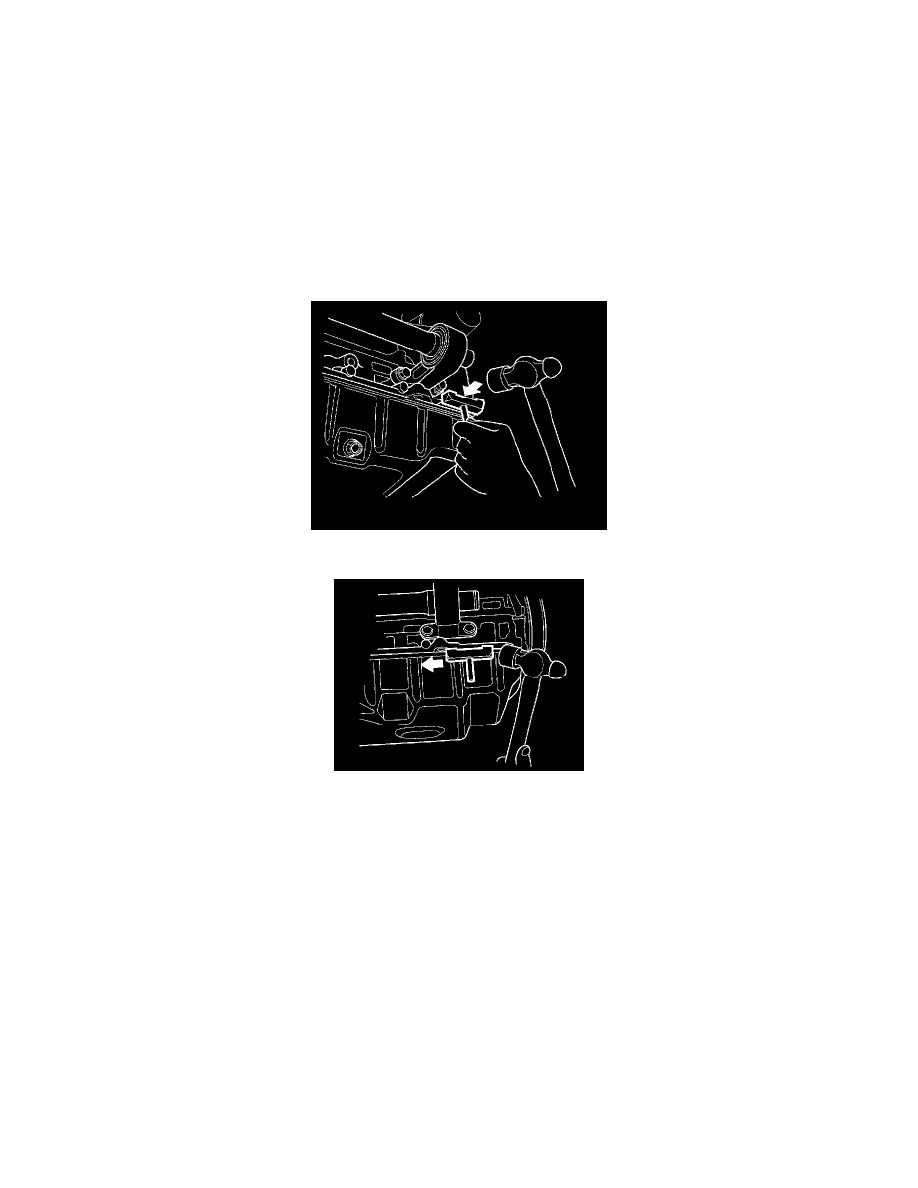
2. Remove the bolts/nuts securing the oil pan.
3. Drive an oil pan seal cutter between the oil pan and engine block.
4. Cut the oil pan seal by striking the side of the cutter to slide the cutter along the oil pan.
5. Remove the oil pan.
K20A2, K20Z1 Engines
1. If the engine is still in the vehicle, remove the subframe.
^
1 Drain the engine oil.
^
2 Attach the chain hoist to the engine.
^
3 Disconnect the suspension lower arm ball joints.
^
4 Remove the rear mount mounting bolts.
^
5 Remove the front mount mounting bolt.
^
6 Use a marker to make alignment marks on the reference lines that align with the centers of the rear subframe mounting bolts. Remove the
front subframe.