
RSX L4-2.0L (2005)
Fuel Gauge Sender: Testing and Inspection
Fuel Gauge Sending Unit Test
Special Tools Required
Fuel sender wrench 07AAA-S0XA100
NOTE: For the fuel gauge system circuit diagram, refer to the Gauges Circuit Diagram.
1. Check the No.10 METER (7.5 A) fuse in the under dash fuse/relay box before testing.
2. Do the gauge drive circuit check.
-
If the fuel gauge needle sweeps from the minimum to maximum position and then returns to the minimum position, the gauge is OK Go to step
3.
-
If the fuel gauge needle does not sweep from the minimum to maximum position and then return to the minimum position, replace the gauge
assembly and retest.
3. Turn the ignition switch OFF.
4. Remove the rear seat cushion.
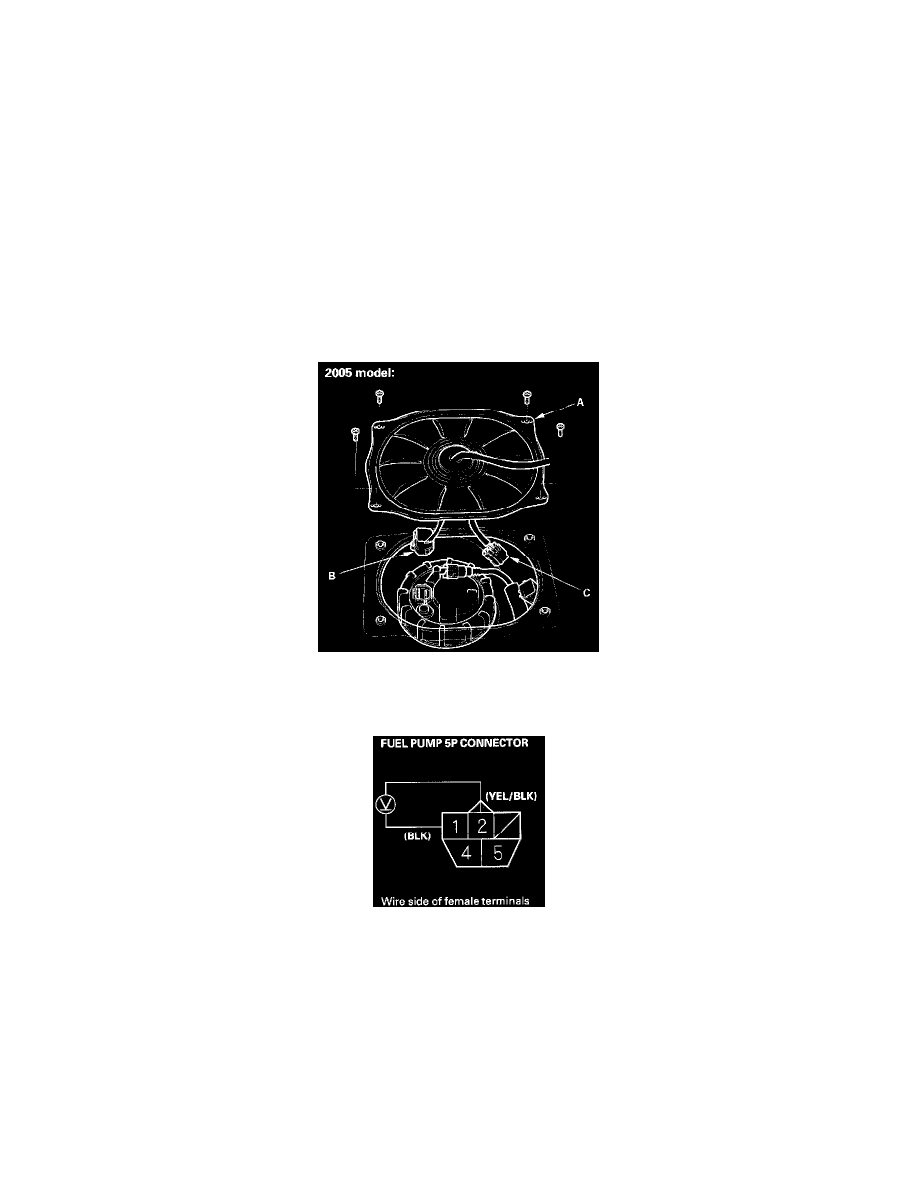
5. Remove the access panel (A) from the floor.
6. Disconnect the fuel pump 5P connector (B).
7. Disconnect the EVAP canister vent shut valve and fuel tank pressure sensor subharness 6P connector (C).
8. Measure voltage between the fuel pump 5P connector terminals No.1 and No.2 with the ignition switch ON (II). There should be battery voltage.
-
If the voltage is as specified, go to step 9.
-
If the voltage is not as specified, check for:
-
an open in the YEL/BLK or BLK wire.
-
poor ground (G501).
9. Turn the ignition switch OFF. Remove the No.9 BACK UP (7.5 A) fuse from the under-hood fuse/relay box for at least 10 seconds, and reinstall
it.