
RSX L4-2.0L (2005)
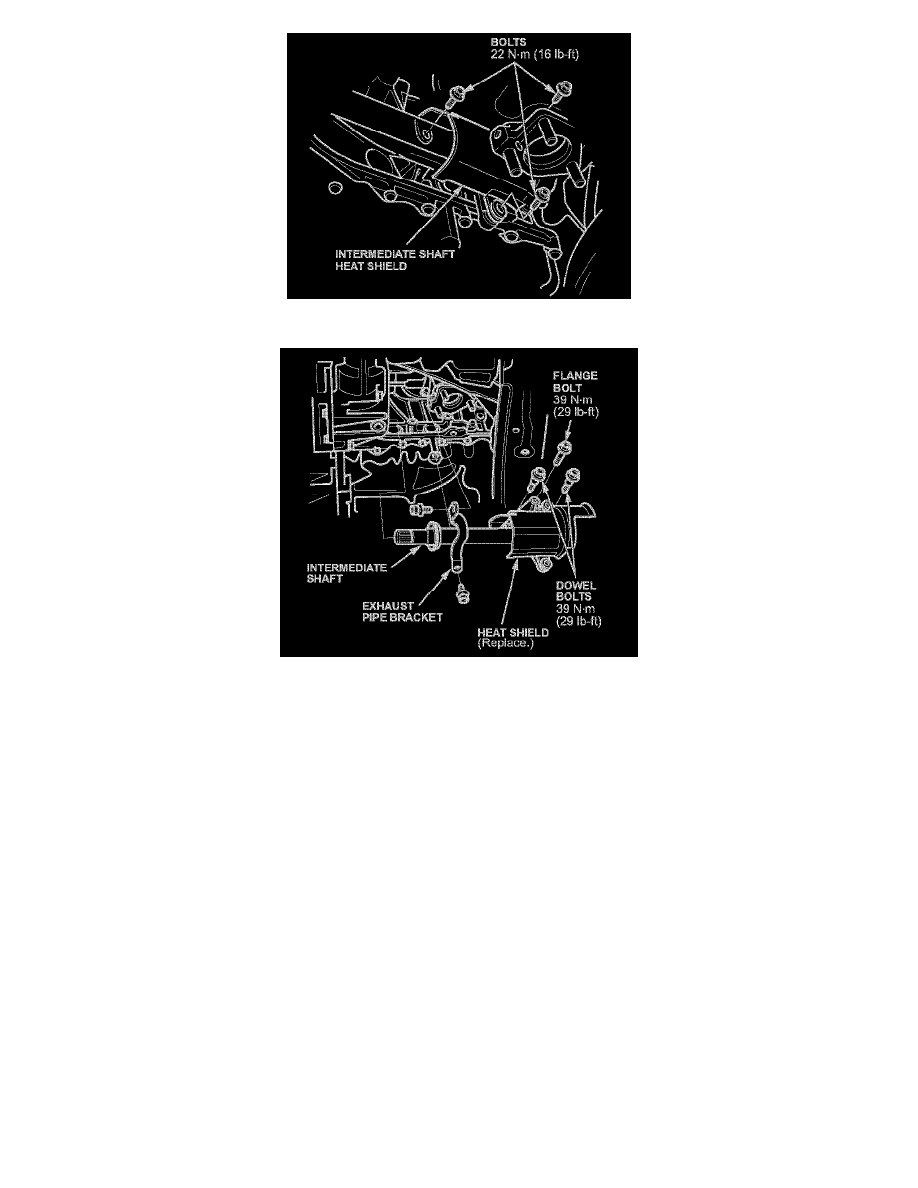
9. Remove the three bolts from the intermediate shaft heat shield.
10.
Remove the intermediate shaft bolts (one flange bolt and two dowel bolts).
11.
Remove the exhaust pipe bracket (two bolts).
12.
With its heat shield attached, carefully slide the intermediate shaft out of the differential.
13.
Remove the heat shield from the intermediate shaft, and place a new one on the shaft.
14.
Carefully slide the end of the intermediate shaft back into the differential, making sure not to damage the differential oil seal.
15.
Reinstall the exhaust pipe bracket, and torque its bolts to 22 N.m (16 lb.ft).
16.
Reinstall the intermediate shaft bolts, and torque them to 39 N.m (29 lb.ft).
17.
Reinstall the intermediate shaft heat shield bolts, and torque them to 22 N.m (16 lb.ft).
18.
Reattach exhaust pipe A to the warm-up catalytic converters with two new front gaskets and six new nuts. Torque the nuts to 54 N.m (40 lb.ft).
19.
Reattach exhaust pipe A to the TWC with a new rear gasket and three new nuts. Torque the nuts to 33 N.m (25 lb.ft).
20.
Reconnect exhaust pipe A to its rubber hanger.
21.
Slide the inboard end of the driveshaft into the intermediate shaft until the driveshaft set ring locks in place. Slide the outboard end of the
driveshaft into the wheel hub.
22.
Reattach the knuckle to the damper assembly, then install new damper bolts and nuts. Make sure the reference marks you made on the damper
assembly line up with the bolts. Torque the damper nuts to 157 N.m (116 lb-ft).