
RSX L4-2.0L (2005)
Pressure Regulating Solenoid: Testing and Inspection
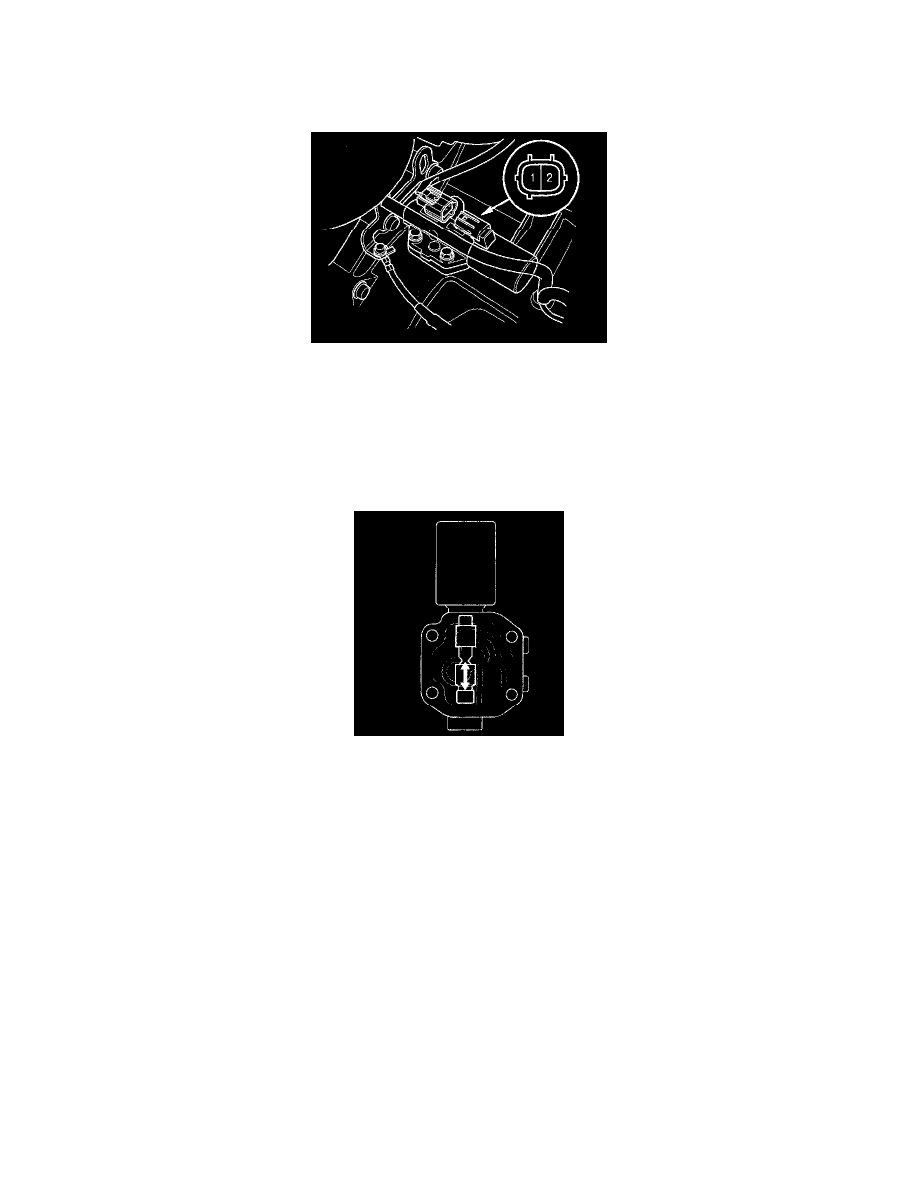
Clutch Pressure Control Solenoid Valve A Test
A/T Clutch Pressure Control Solenoid Valve A Test
1. Remove the air cleaner housing.
2. Disconnect the A/T clutch pressure control solenoid valve A connector.
3. Measure A/T clutch pressure control solenoid valve A resistance between the solenoid valve A terminals No. 1 and No. 2.
Standard: 3 - 10 Ohms
4. If the resistance is out of standard, replace the A/T clutch pressure control solenoid valve A.
5. Connect the battery positive terminal to the No. 1 terminal of the A/T clutch pressure control solenoid valve A connector, and connect the battery
negative terminal to the No. 2 terminal. A clicking sound should be heard.
6. If no sound is heard, remove the A/T clutch pressure control solenoid valve A.
7. Check the fluid passage of the A/T clutch pressure control solenoid valve for dust or dirt.
8. Connect the No. 1 terminal of the A/T clutch pressure control solenoid valve A connector to the battery positive terminal, and connect the No. 2
terminal to the battery negative terminal. Make sure the A/T clutch pressure control solenoid valve moves.
9. Disconnect one of the battery terminals and check for valve movement.
NOTE: You can see valve movement through the fluid passage in the mounting surface of the A/T clutch pressure control solenoid valve A body.
10. If the valve binds or moves sluggishly, or if the solenoid valve does not operate, replace the A/T clutch pressure control solenoid valve A.