
RSX L4-2.0L (2005)
Shift Solenoid: Service and Repair
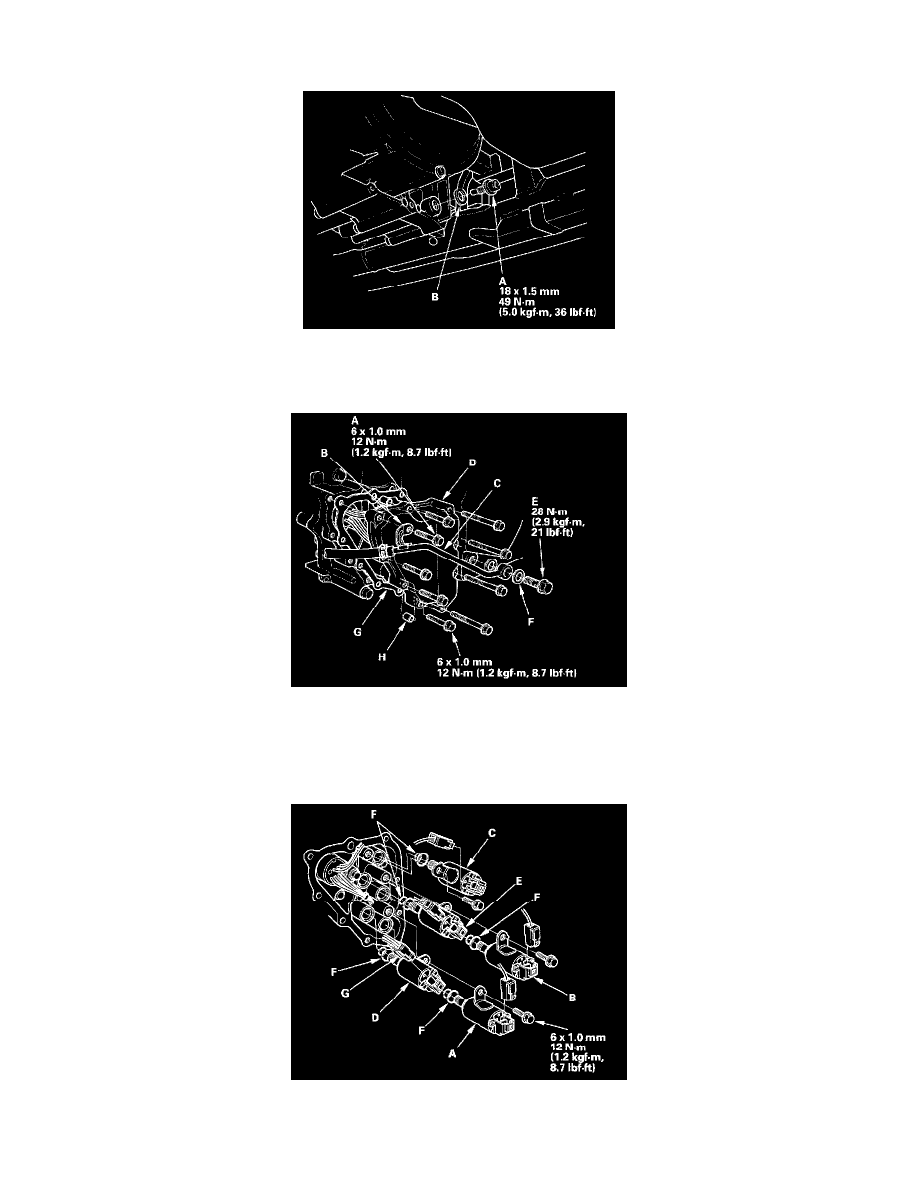
Shift Solenoid Valve Replacement
1. Remove the drain plug (A), and drain the automatic transmission fluid (ATF).
2. Reinstall the drain plug with a new sealing washer (B).
3. Place the transmission jack under the transmission, and lift it up to create clearance between the transmission and front subframe.
4. Remove the bolt (A) securing the bracket (B) of the ATF cooler inlet line (C) on the shift solenoid valve cover (D), and remove the line bolt (E)
with sealing washers (F).
5. Remove the shift solenoid valve cover, gasket (G), and dowel pins (H).
6. Disconnect the shift solenoid valve connectors.
7. Remove the bolts, and hold the shift solenoid valve body, then remove them. Do not hold the connector to remove.
8. Install the new O-rings (two per solenoid valve) (F) on the replacement solenoid valve.
9. Install shift solenoid valve C, D, and E. While holding the shift solenoid valve body, be sure to install the solenoid valves until their mounting bolt
brackets contact the servo body.