
RSX L4-2.0L (2005)
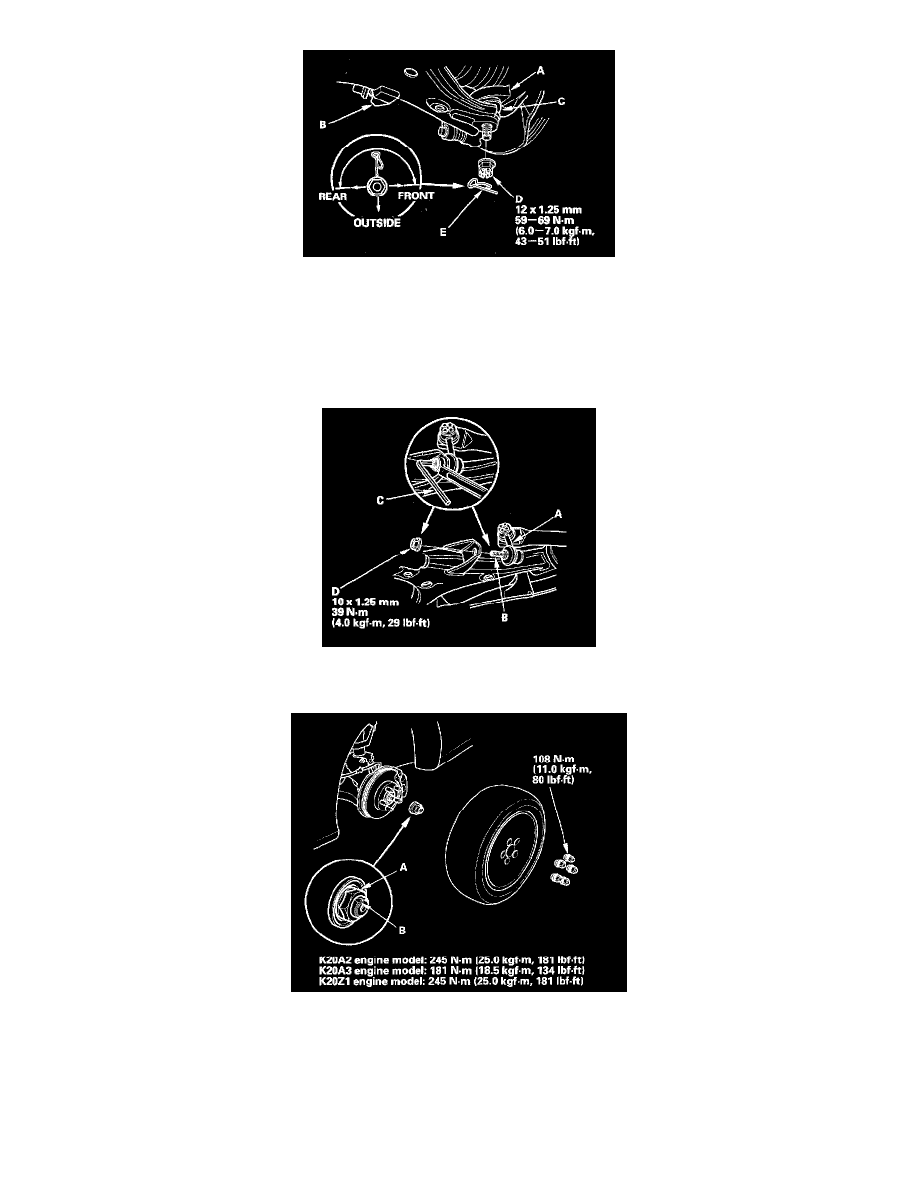
5. Install the knuckle (A) onto the lower arm (B). Be careful not to damage the ball joint boot (C). Wipe off the grease before tightening the nut at the
ball joint. Torque the castle nut (D) to the lower torque specification, then tighten it only far enough to align the slot with the ball joint pin hole.
Do not align the nut by loosening it.
NOTE: Make sure the ball joint boot is not damaged or cracked.
6. Install the new lock pin (E) into the pin hole from the inside of the vehicle.
7. Connect the front stabilizer link (A) to the lower arm. Hold the stabilizer link ball joint pin (B) with a hex wrench (C), and tighten the new flange
nut (D).
8. Install a new spindle nut (A), then tighten the nut. After tightening, use a drift to stake the spindle nut shoulder (B) against the driveshaft.
9. Clean the mating surfaces of the brake disc and the front wheel, then install the front wheel with the wheel nuts.
10. Turn the front wheel by hand, and make sure there is no interference between the driveshaft and surrounding parts.
11. Refill the transmission with recommended transmission fluid:
-
Manual transmission
-
Automatic transmission
12. Check the front wheel alignment, and adjust it if necessary.