
SLX V6-3.2L SOHC (1996)
1.
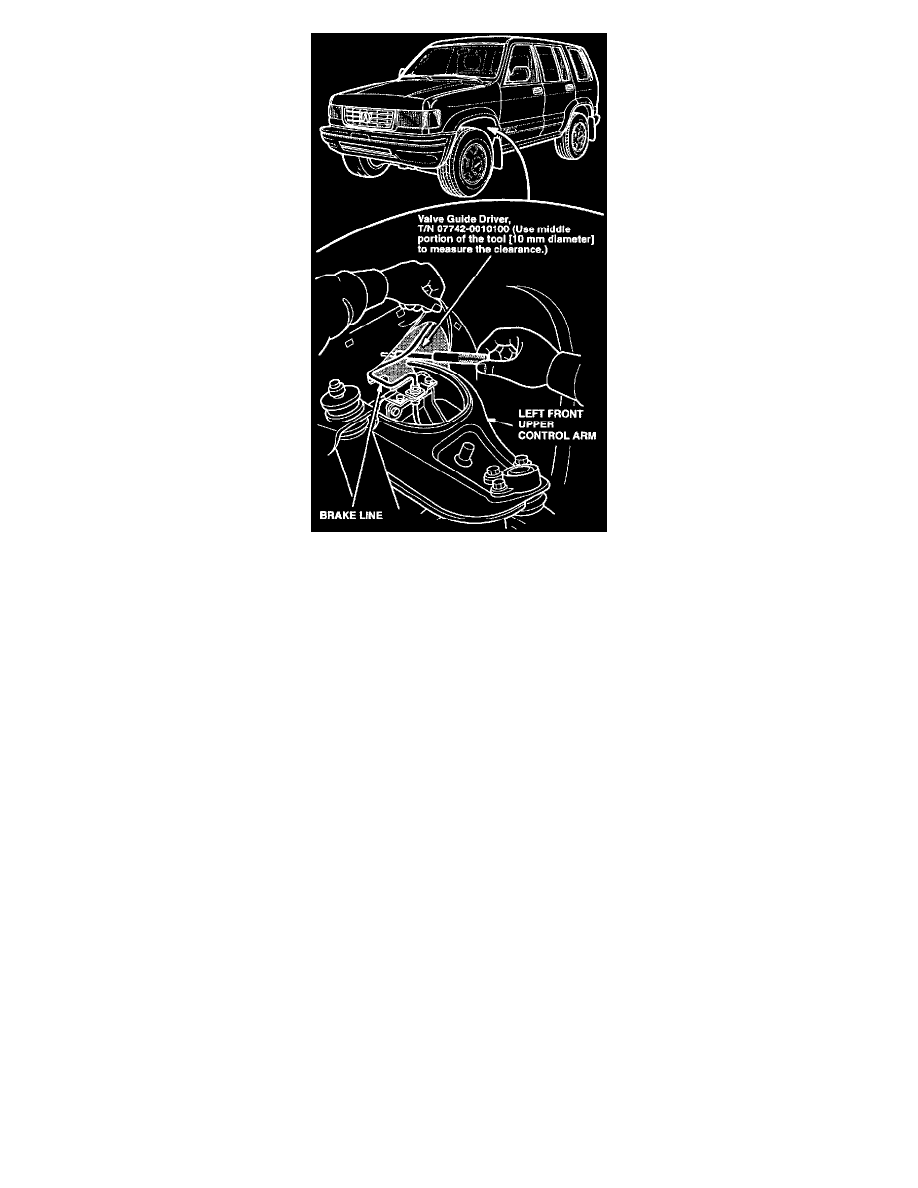
Using the special tool, measure the clearance between the brake line and the left front upper control arm. To get the proper measurement, the
vehicle must be sitting on the ground at the proper ride height.
^
If there is a minimum of 10 mm clearance (the middle part of the special tool passes between the brake line and the control arm), no repair is
needed. Go to step 36 to complete the campaign.
^
If there is not a minimum of 10 mm clearance (the middle part of the special tool will not pass between the brake line and the control arm),
continue to step 2 to replace the brake line.
2.
Raise the vehicle. Remove the left front wheel.
3.
Remove the inner mud flap.
4.
Remove the battery hold-down bracket.
5.
Disconnect the window washer tube from the hood.
6.
Remove the anti-theft horn bracket and A/T vent tube.
7.
Remove the cruise control actuator cable clamp bolt.
8.
Remove the A/C suction line clamp bolt.
9.
Unclamp the A/C high pressure line from the bulkhead.
10.
Disconnect the vapor hose from the charcoal canister (see Engine Driveability and Emissions manual).
11.
Disconnect the air cleaner cover from the housing. Remove the cover, mass air flow sensor, and intake duct.
12.
Remove the charcoal canister and bracket.
13.
Disconnect the vacuum hose from the power brake booster.
14.
Disconnect the electrical connector from the brake master cylinder.