
SLX V6-3.2L SOHC (1996)
Camshaft: Service and Repair
1. Relieve fuel system pressure as outlined under Technician Safety Information. On models with airbag system, refer to Technician Safety
Information for system disarming and arming procedures.
2. Disconnect battery ground cable, then insulate cable end with electrical tape, or equivalent.
3. Remove air cleaner assembly.
4. Remove upper and lower radiator fan shroud from radiator.
5. Remove cooling fan assembly, then disconnect accelerator cable from throttle body.
6. Mark position of vacuum hoses for installation, then remove from common chamber and throttle body.
7. Mark position of electrical connectors for installation, then disconnect connectors from common chamber.
8. Disconnect spark plug wires from valve covers, then the three electrical connectors from DIS module.
9. Remove DIS module and spark plug wires as an assembly.
10. Remove EGR valve assembly, then the common chamber.
11. Disconnect fuel supply and return hoses from fuel rail assembly.
12. Remove drive belts, then power steering pump. Do not disconnect pressure lines from power steering pump.
13. Remove fan pulley assembly, then the timing belt.
14. Remove valve cover, then the camshaft pulley.
15. Remove front plate, then the camshaft retaining bracket.
16. Remove camshaft, then the rocker arm assembly.
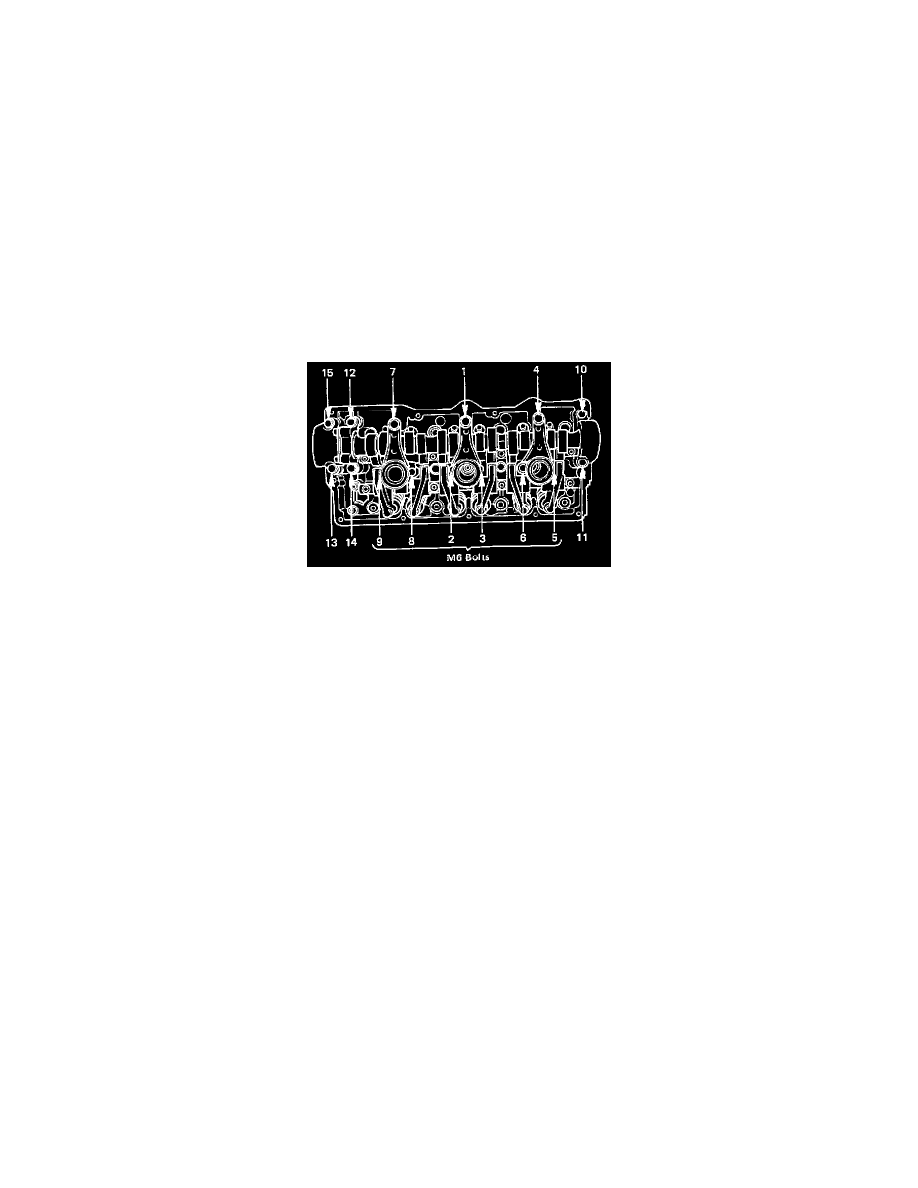
Fig. 47 Rocker Arm Assembly Tightening Sequence
17. Reverse procedure to install, noting the following:
a. Using sequence shown in Fig. 47, torque rocker arm assembly retaining bolts to 13 ft. lbs.
b. Torque camshaft bracket retaining bolt M8 to 13 ft. lbs., then the camshaft bracket retaining bolt M6 to 6 ft. lbs.
c. Tighten front plate retaining bolts to specification.
d. Tighten camshaft pulley retaining bolts to specification.