
SLX V6-3.2L SOHC (1996)
5. Disconnect electrical connector to evaporator relay.
6. Remove evaporator retaining nuts, then the evaporator assembly, Fig. 4.
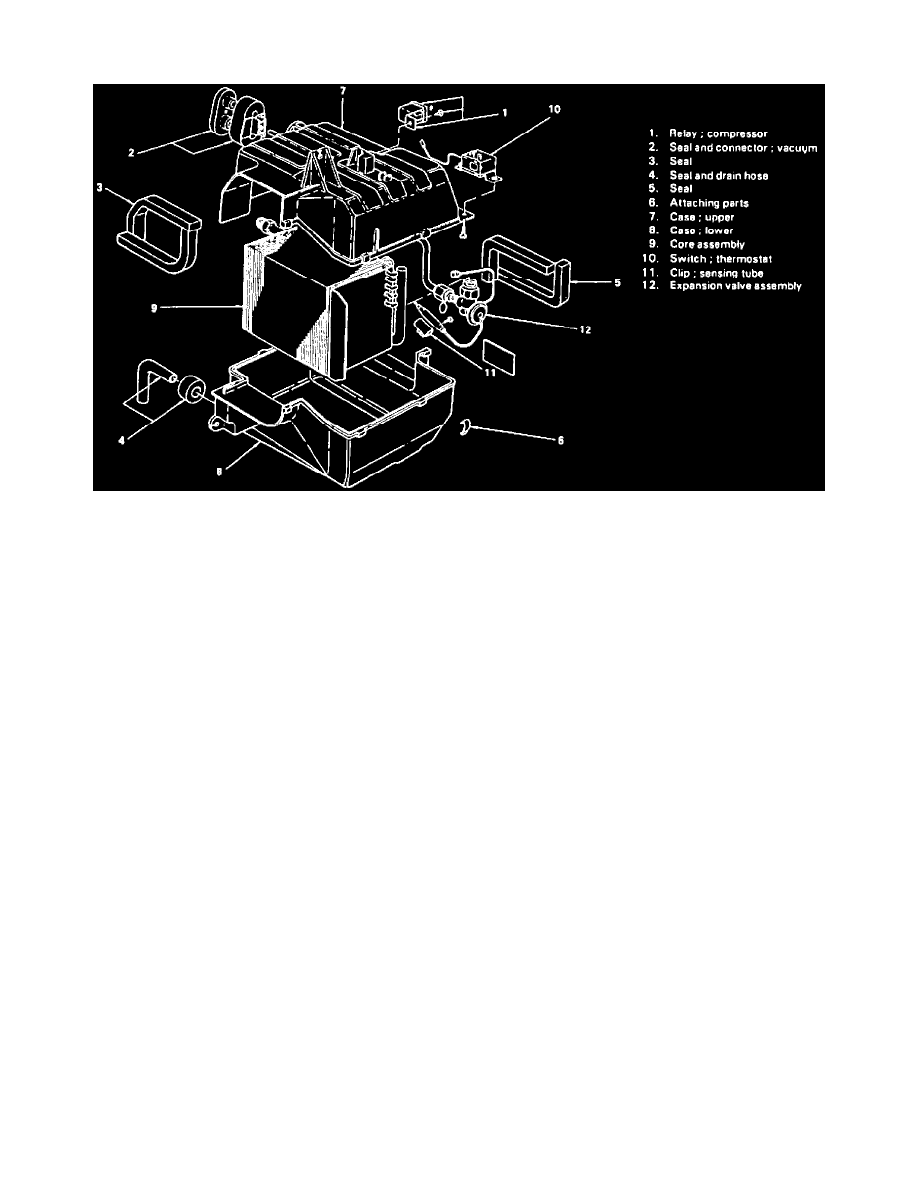
Fig. 5 Exploded View Of Heater/Evaporator Case
7. Carefully remove foam insulation from evaporator case inlet and outlet, Fig. 4.
8. Remove case retaining clips and separate upper and lower case halves, taking care not to damage thermostatic sensor.
9. Remove evaporator along with expansion valve from lower case.
10. Remove expansion valve capillary bulb from evaporator core.
11. Disconnect expansion valve and equalizer tube from evaporator, then remove valve and discard O-rings. If evaporator is to be replaced, add 1.7
oz. new refrigeration oil to replacement evaporator.
12. Reverse procedure to install, noting the following:
a. Use new O-rings lightly lubricated with refrigeration oil when making refrigerant line connections.
b. Ensure sensor bulb and case seals are properly aligned prior to installation.
13. Evacuate and recharge system, then check for leaks.
14. On models equipped with airbag system, refer to Technician Safety Information for system disarming and arming procedures.