
SLX V6-3.2L SOHC (1996)
Wheel Bearing: Service and Repair
Manual Locking Hub
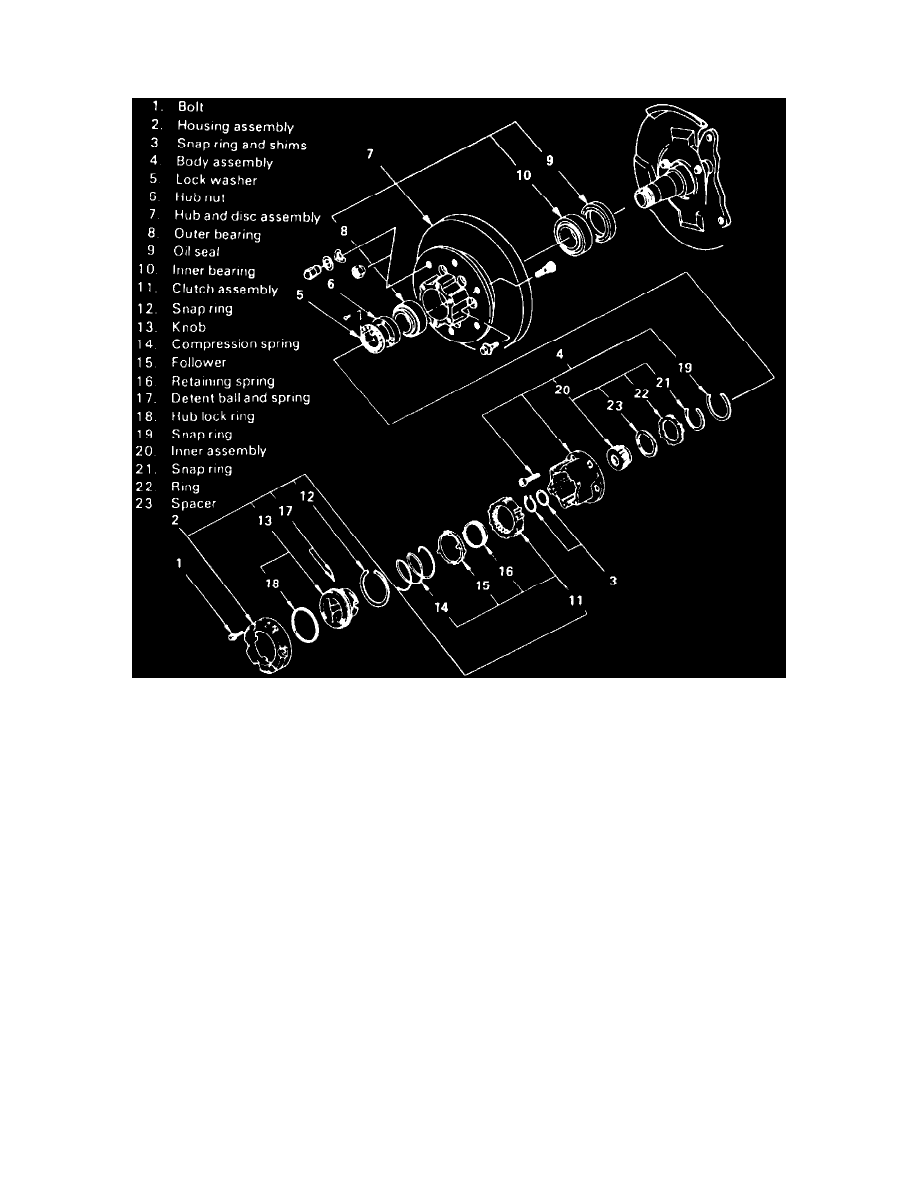
Fig. 2 Exploded View Of Manual Locking Hub Assembly
1. Shift transfer lever to the 2H position and set free wheeling hub into FREE position.
2. Raise and support vehicle, then remove wheel and tire assemblies.
3. Remove housing assembly retaining bolts then the housing assembly, Fig. 2.
4. Remove snap ring and shims.
5. Remove body assembly and lock washer.
6. Using a spring scale, adjust bearing preload to 3.03 lbs.
7. Install lock washer with larger diameter of the tapered bore to the outer side of vehicle. If bolt holes in the lock plate are not aligned with the
corresponding holes in the nut, reverse the lock plate. If bolt holes are still out of alignment, turn nut enough to obtain alignment. Ensure
screw is fastened tightly so head is lower than surface of washer.
8. Apply Loctite 515 or equivalent, to body assembly and install.
9. Install snap ring and shims, then adjust clearance between free wheeling hub body and snap ring. Clearance should be 0.01 inch. Available
adjusting shim are .008, .011, .020 and .039.
10. Align and install cover assembly. Torque bolts to 8.7 ft. lbs.