
SLX V6-3.2L SOHC (1996)
10.
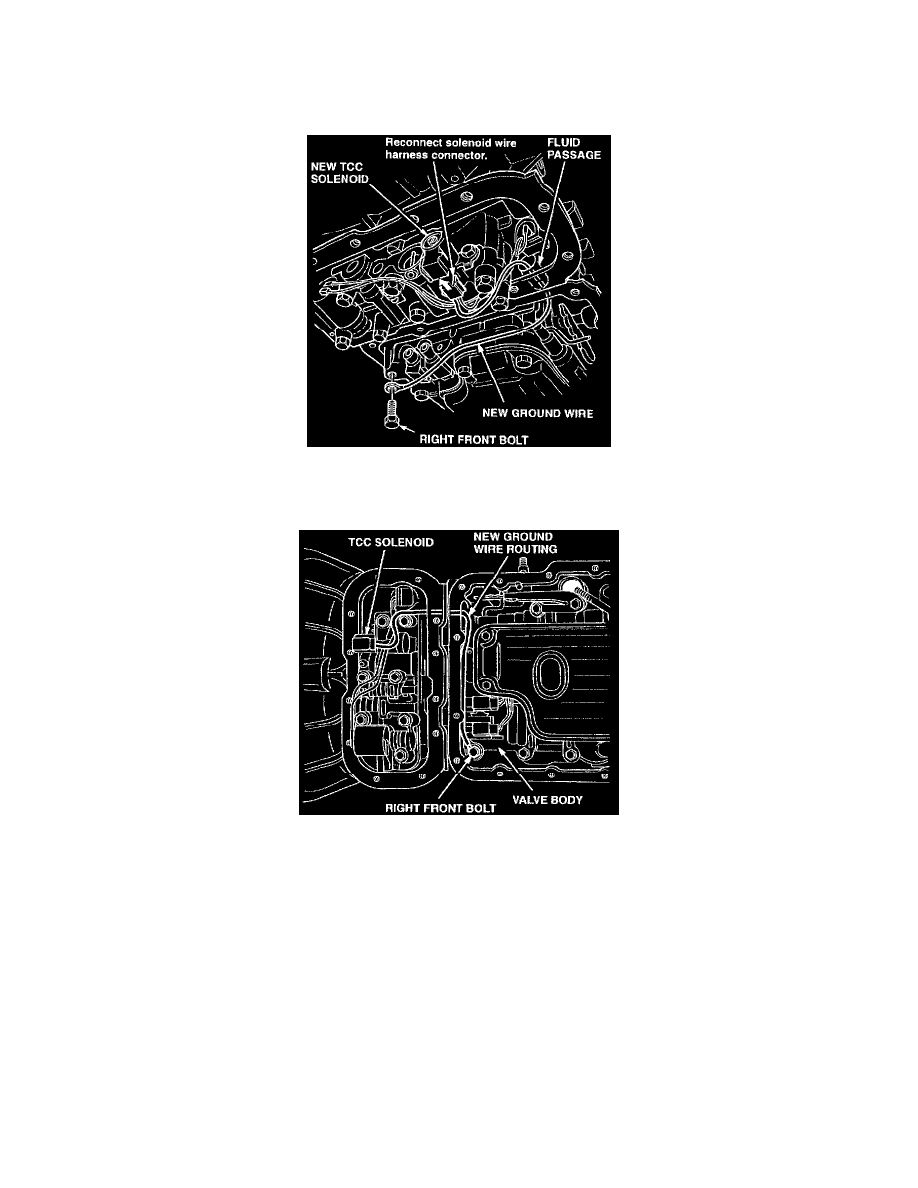
Lubricate the two O-rings on the new solenoid with petroleum jelly, then push the solenoid into the valve body. Reinstall the bolt, and torque it to
10 N.m (89 lb-in).
11.
Reconnect the solenoid wire harness connector.
12.
Route the new ground wire through the fluid passage between the adapter case and the main case.
13.
Remove the right front bolt from the main case valve body.
14.
Slip the ground wire terminal around the bolt, then reinstall the bolt, and torque it to 20 N.m (15 lb-ft) Make sure the ground wire runs along the
front of the main case valve body.
15.
Reinstall the main case and adapter case oil pans with new pan gaskets and new bolts. Torque the bolts to 11 N.m (97 lb-in).
16.
Reinstall the third crossmember, and torque its bolts to 50 N.m (37 lb-ft).
17.
Remove the jack stand from the transfer case.
18.
Reinstall the transmission's two rear mount nuts, and torque them to 41 N.m (30 lb-ft).
19.
Reinstall the oxygen sensor harness clips.
20.
Reinstall the transfer protector, and torque the bolts to 37 N.m (27 lb-ft).
21.
Put a new gasket on the transmission drain plug, lubricate the gasket with clean ATF; then reinstall the plug, and torque it to 38 N.m (28 lb-ft).
22.
Lower the vehicle, and reconnect the negative cable to the battery.