
TL L5-2451cc 2.5L SOHC MFI (1997)
Transmission Cooler: Service and Repair
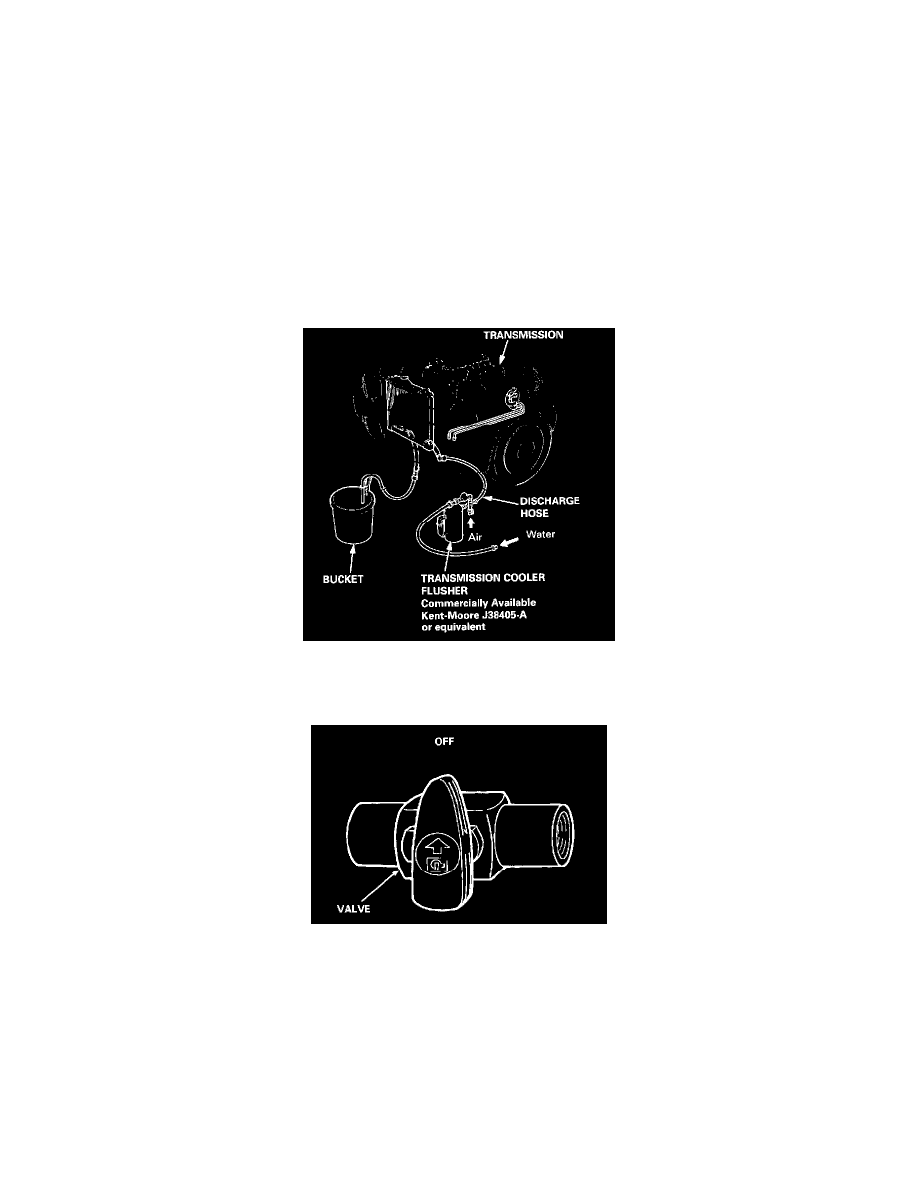
COOLER FLUSHING
WARNING: To prevent injury to face and eyes, always wear safety glasses or a face shield when using the transmission flusher.
NOTE: This procedure should be performed before reinstalling the transmission.
1. Check tool and hoses for wear or cracks before using. If wear or cracks are found, replace the hoses before using.
2. Using the measuring cup, fill the tank with 21 ounces (approximately 2/3 full) of biodegradable flushing fluid 035944 - 20). Do not substitute with
any other fluid. Follow the handling procedure on the fluid container.
3. Secure the flusher filler cap, and pressurize the tank with compressed air to between 550 - 829 kpa (5.6 -8.45 kgf/cM2 , 80 - 120psi).
NOTE: The air line should be equipped with a water trap to ensure a dry air system.
4. Hang the tool under the vehicle.
5. Attach the tank's discharge hose to the return line of the transmission cooler using a clamp.
6. Connect the drain hose to the inlet line on the transmission cooler using a clamp.
IMPORTANT: Securely clamp the opposite end of the drain hose to a bucket or floor drain.
7. With the water and air valves off, attach the water and air supplies to the flusher. (Hot water if available.)
8. Turn on the flusher water valve so water will flow through the cooler for 10 seconds.
NOTE: If water does not flow through the cooler, it is completely plugged, cannot be flushed, and must be replaced.
9. Depress the trigger to mix the flushing fluid into the water flow. Use the wire clip to hold the trigger down.
10. While flushing with the water and flushing fluid for 2 minutes, turn the air valve on for 5 seconds every 15 - 20 seconds to create a surging action.
AIR PRESSURE: MAX 845 kpa (8.45 kgf/cm2, 120 psi)
11. Turn the water valve off. Release the trigger, then reverse the hoses to the cooler so you can flush in the opposite direction. Repeat steps 8 through
10.