
TL V6-3.2L (2004)
Rear Door Panel: Service and Repair
Rear Door Panel Removal/Installation
Special Tools Required
-
KTC trim tool set SOJATP2014 *
-
Trim pad remover, Snap-on A 177A or equivalent, commercially available
* Available through the American Honda Tool and Equipment Program
NOTE: Use the appropriate tool from the KTC trim tool set to avoid damage when prying components.
1. Lower the glass fully.
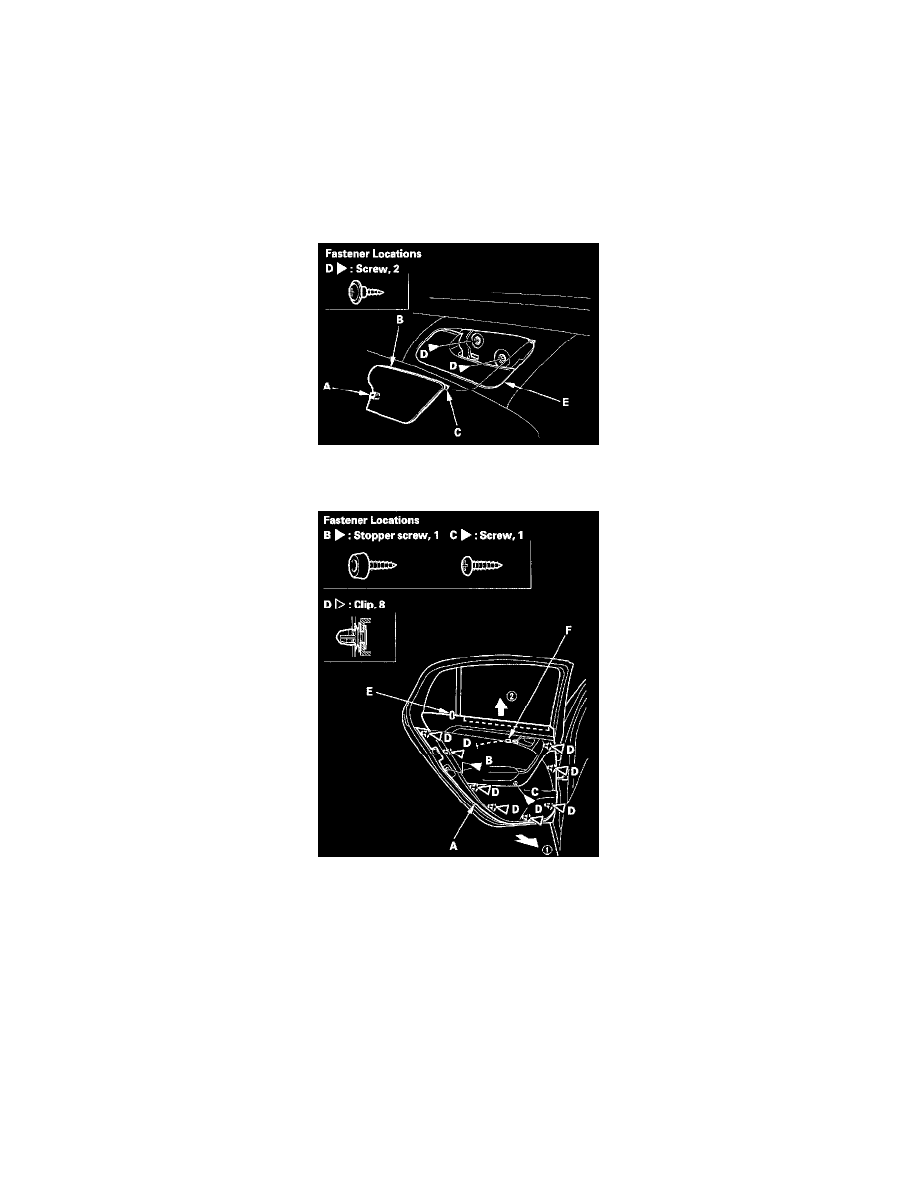
2. Using a trim tool, push on the rear hook (A) and pivot the cover (B) on the front hook (C), then remove the cover and the screws (D) securing the
inner handle (E).
3. Remove the door panel (A) with as little bending as possible to avoid creasing or breaking it.
1. Remove the stopper (B) and screw (C) from the door panel.
2. Release the clips (D) that hold the door panel with a commercially available trim pad remover.
3. Starting at the rear, pull the door panel upward, then release the lock knob (E).
NOTE: The inner handle cable (F) is connected to the door panel. Do not pull the door panel up too far, or the inner handle cable will be
damaged.