
TL V6-3.2L (2004)
No - Disregard this service bulletin, and look for other causes of the noise.
2. Remove the rear shelf, and do all the necessary REPAIR PROCEDURES 1 thru 7 on the applicable vehicles (see CORRECTIVE ACTION AND
VEHICLES AFFECTED for VIN information). To remove the rear shelf:
^
Refer to the Body section of the appropriate service manual, or
^
Online, enter keyword SHELF, and select Interior Trim Removal/Installation-Rear Shelf Area from the list.
3. Test-drive the vehicle with the rear shelf removed. Is the noise coming from the rear shelf area gone? Yes - The repair is complete. Reinstall all
removed parts.
No - Do REPAIR PROCEDURES 8 and 9 on the applicable vehicles. The repair is complete. Reinstall all removed parts.
REPAIR PROCEDURE 1
2004-06 Models - All;
2007 Models thru VIN 19U......7A004013:
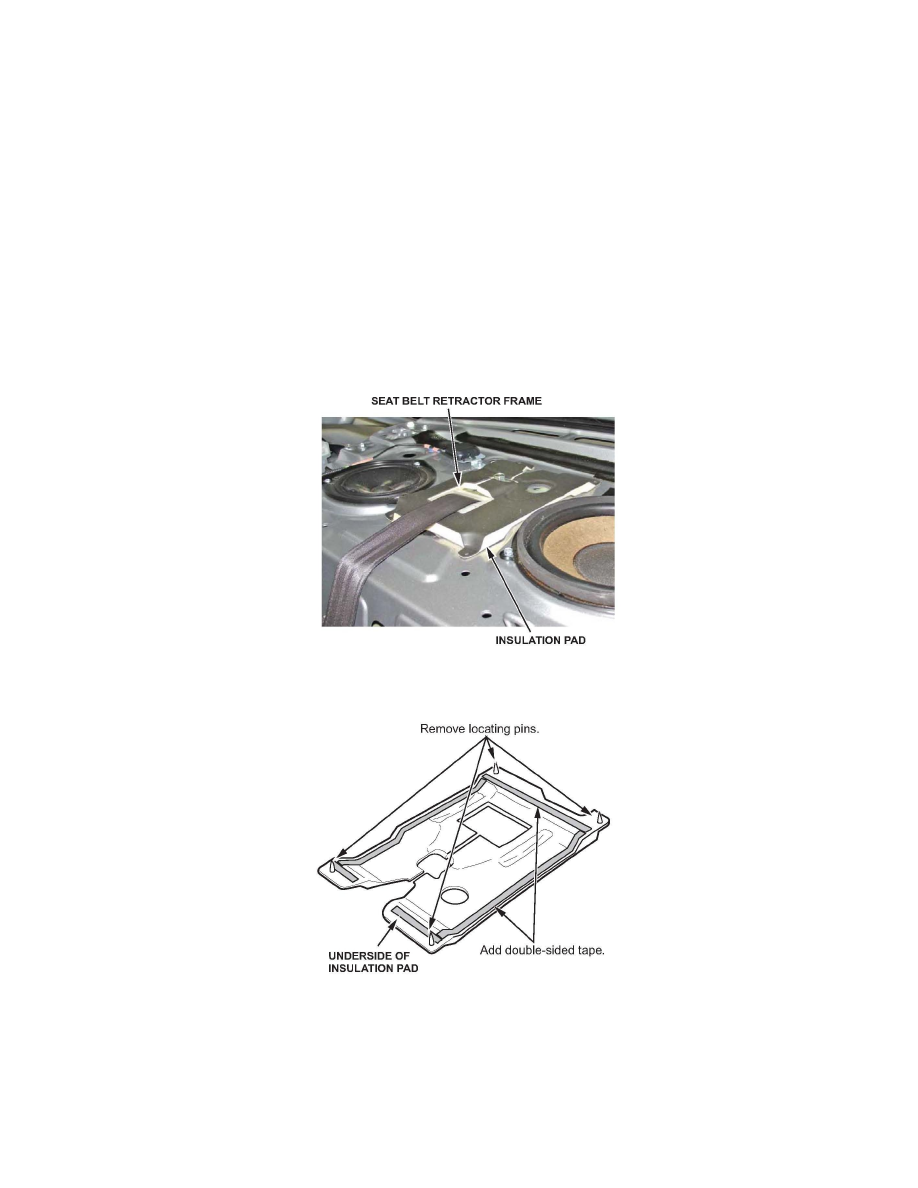
1. Before installing the insulation pad, test-fit it without the double-sided tape to familiarize yourself with how the pad rests under the front of the seat
belt retractor frame.
2. Remove the locating pins on the pad, and add the double-sided tape as shown.
3. Clean the area of the rear shelf where the insulation pad will be attached with alcohol to ensure a good bond.
4. Place the insulation pad in the proper location, and press it down firmly to secure it to the rear shelf.
5. Pull and retract the seat belt several times to make sure that the belt operates smoothly and doesn't contact the insulation pad. If there is any
interference between the seat belt and the insulation pad, reposition the insulation pad.