
TL V6-3.2L (2004)
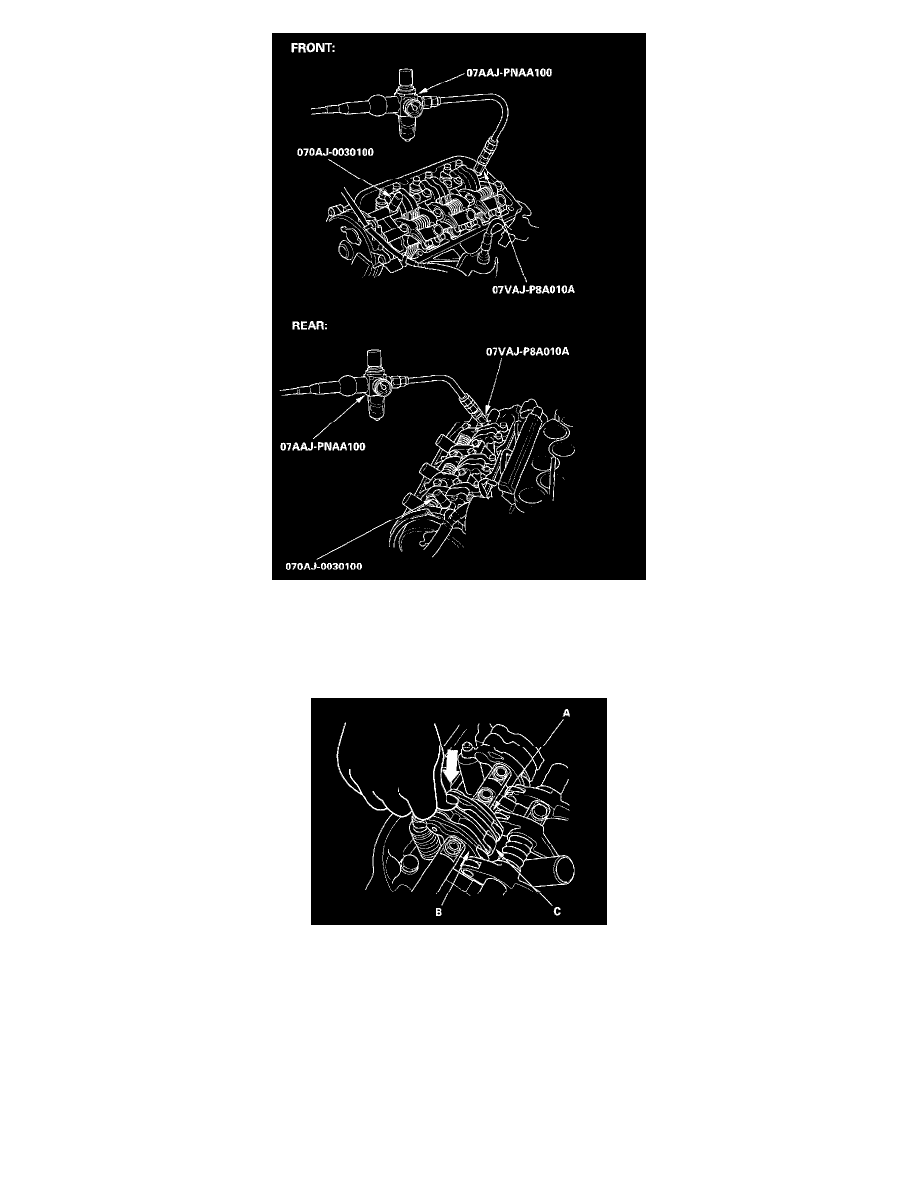
7. Remove the No. 1 and No. 6 intake rocker shaft mounting bolts, then install and connect the special tools as shown.
8. Loosen the valve on the regulator, and apply the specified air pressure.
Specified Air Pressure: 440 - 540 kPa (4.5 - 5.5 kgf/cm2, 64 - 78 psi)
NOTE: If the synchronizing pistons do not move after applying air pressure, move the primary or secondary rocker arm up and down manually.
9. Make sure that the intake primary rocker arm (A) and intake secondary rocker arm (B) are mechanically connected by the piston and that the mid
rocker arm (C) does not move when pushed manually. If any intake mid rocker arm moves independently of the primary and secondary rocker
arms, replace the rocker arms as a set.
10. Remove the special tools.
11. Tighten the rocker shaft bolts to 24 Nm (2.4 kgf-cm, 17 ft. lbs.)
12. Install the cylinder head covers.