
TL V6-3.2L (2004)
to the terminal so you will have room to make each remaining cut about 20 mm (3/4 inch) farther down on the next pigtail.
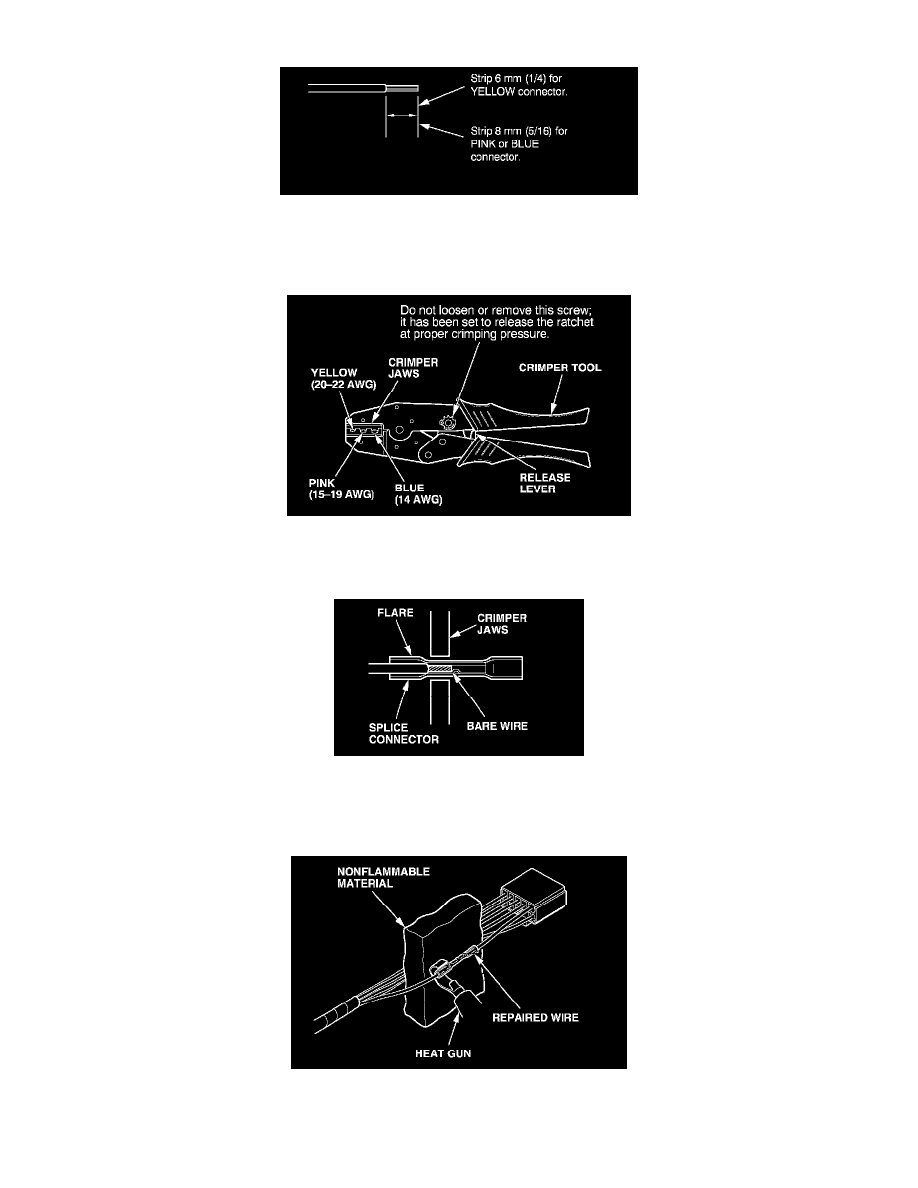
7. If you are using a yellow splice connector, strip about 6 mm (1/4 inch) of insulation off the ends of both wires. If you are using a pink or blue
splice connector, strip off about 8 mm (5/16 inch) of insulation.
NOTE: If you nick or cut off any strands of wire, try again with the next larger size hole on the stripper.
8. Put the splice connector in the proper size slot in the Crimper Tool, slide it to one end (where the flare begins), and close the crimper handles far
enough to hold it in place. To release the ratchet mechanism at any point after the first click, squeeze the handles slightly and push the release
lever, then let the handles open.
9. Insert one of the bare wires into the splice connector end that is in the crimper jaws. Push the wire all the way into the splice connector, and
squeeze the crimper handles. Keep squeezing until the jaws touch, and hold it at that position until the ratchet clicks again.
10. Crimp the other wire in the same way into the other end of the splice connector.
11. After crimping, gently pull on the wires in the opposite directions to make sure they are secure in the connector.
12. Separate the other wires in the harness from the repaired wire(s), and shield them with nonflammable material.