
TL V6-3.2L (2004)
3.
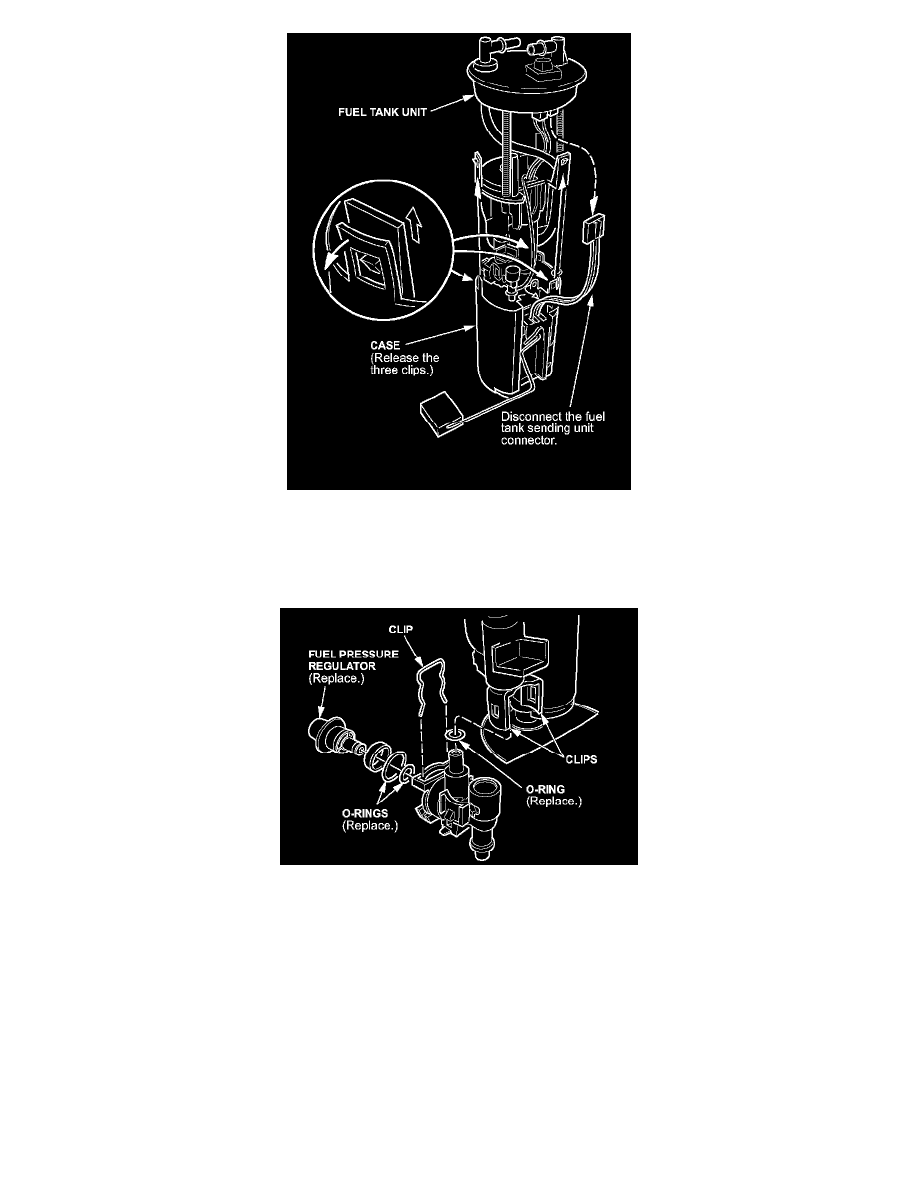
Remove the fuel tank unit from the case.
^
Disconnect the fuel tank sending unit connector.
^
Release the three clips, and then pull out the fuel tank unit from the case.
4.
Release the clips, then remove the fuel pressure regulator mount from the fuel tank unit.
5.
Remove the clip, then remove the fuel pressure regulator. Install the new regulator with new 0-rings. Reassemble the fuel tank unit.
6.
Place the new gasket onto the tank body.
7.
Align the marks on the fuel tank unit and the fuel tank. (See page 11-447, step 8 of the service manual.) Install the fuel tank unit into the tank
without dislodging the gasket. Using hand pressure only, slide the fuel tank unit into the tank until it is seated properly.
8.
Using the fuel sender wrench, torque the fuel tank locknut to 93 N.m (69 lb-ft).
NOTE:
Do not use the locknut to force the pump into the tank.
9.
Reinstall all removed parts.