
TL V6-3.2L (2004)
Shift Solenoid: Service and Repair
Shift Solenoid Valve A Replacement
Shift Solenoid Valve A Replacement
1. Make sure you have the customer's radio and navigation anti-theft codes, and write down the XM radio channel presets.
2. Remove the left side engine compartment cover.
3. Make sure the ignition switch is OFF. Disconnect the battery negative terminal, then disconnect the battery positive terminal.
4. Remove the battery hold-down bracket, then remove the battery and battery tray.
5. Remove the air intake cover and air intake tube.
6. Remove the intake air duct and air cleaner housing.
7. Remove the two bolts securing the battery base from under the vehicle, and remove the two bolts securing the battery base in the engine
compartment, then remove the battery base.
8. REmove the starter.
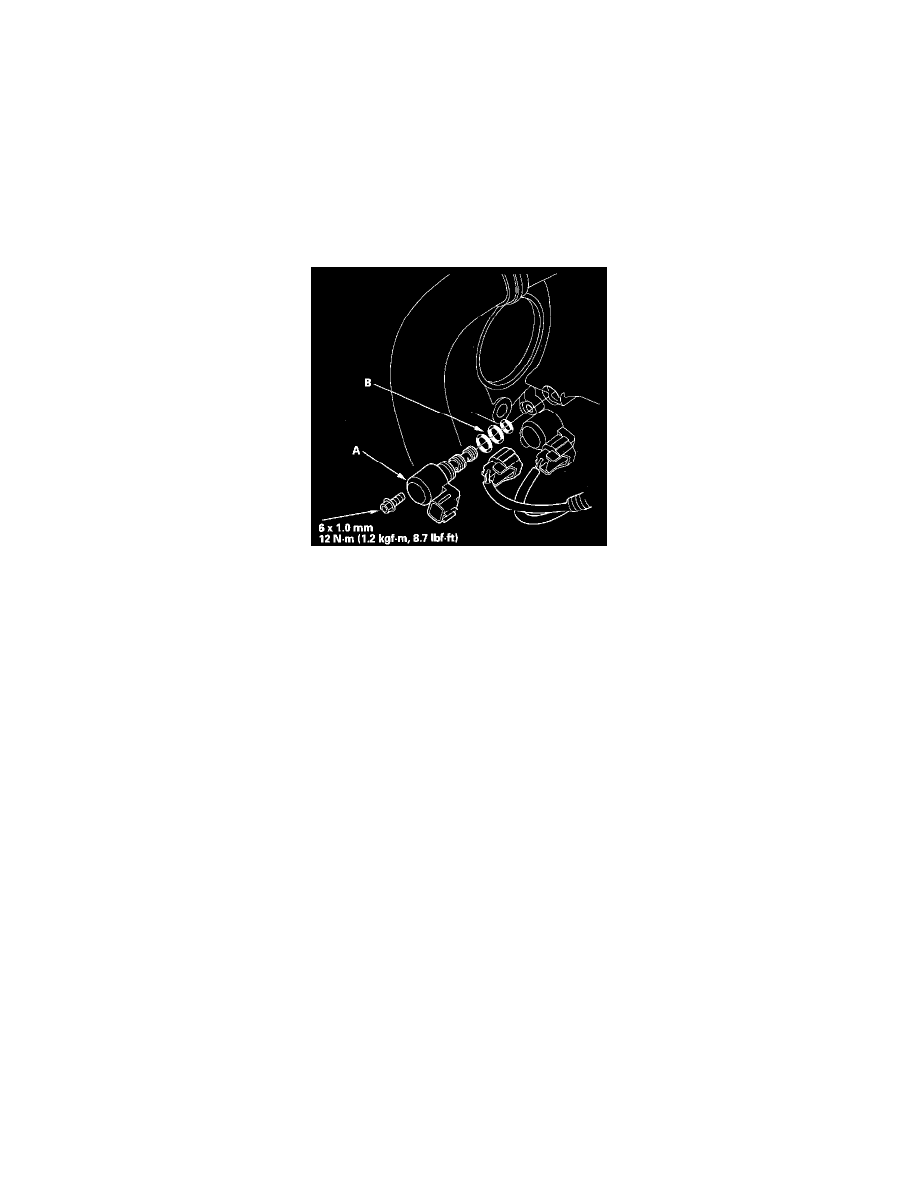
9. Disconnect shift solenoid valve A connector, and remove shift solenoid valve A.
10. Install a new shift solenoid valve A with new O-rings (B). While installing the solenoid valve, do not allow dust or other foreign particles to enter
the transmission.
11. Check the connector for corrosion, dirt, and oil, then connect the connector.
12. Install the starter.
13. Install the battery base, then install the air cleaner housing and intake air duct.
14. Install the air intake cover and air intake tube.
15. Install the battery tray, battery, and battery hold-down bracket then connect battery terminals.
16. Install the left side engine compartment cover.
17. Enter the radio and navigation anti-theft codes, and set the XM radio channel presets and the clock.