
TL V6-3.2L (2004)
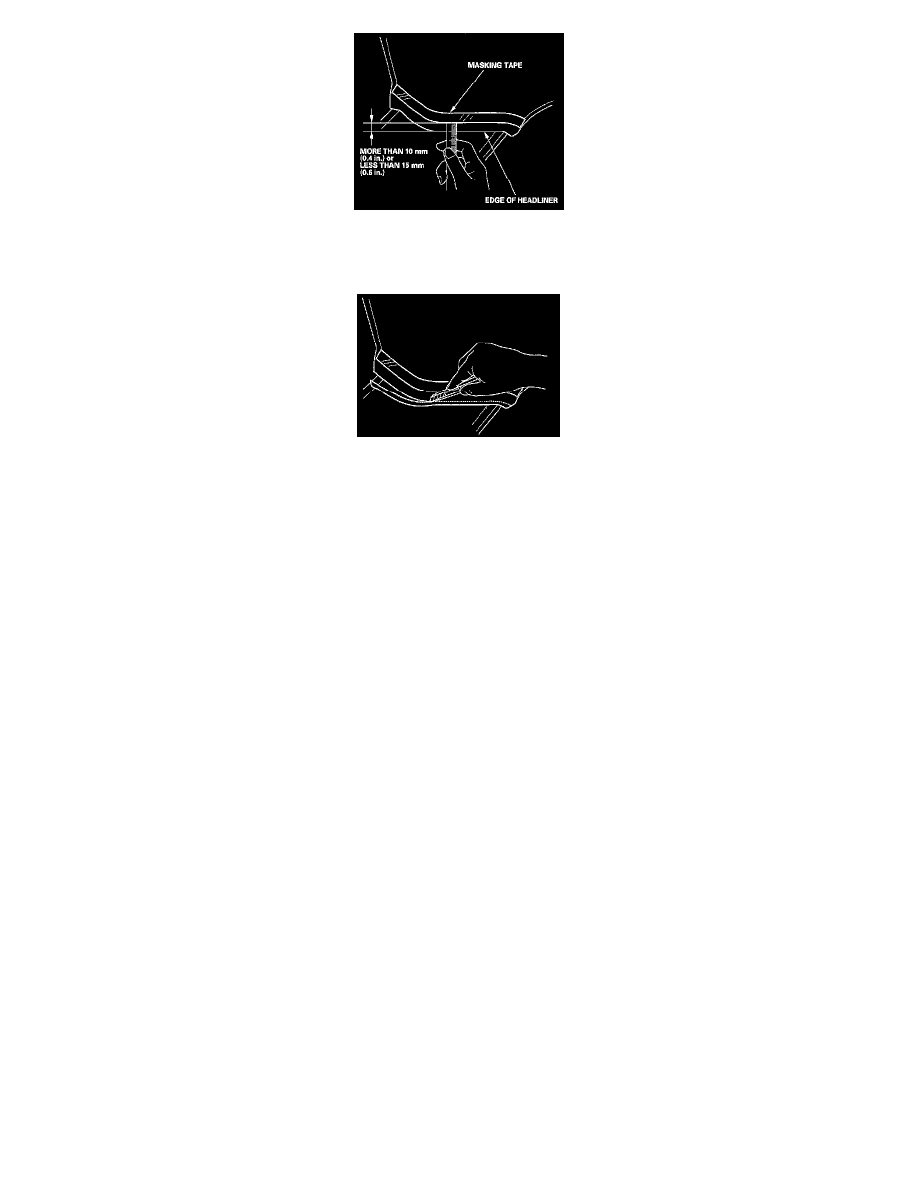
3. Remove the pillar trim, end measure the headliner overlap.
-
If the overlap it more than 10 mm 10.4 in.), and less than 15 mm 10.6 in.), remove the tape, and install the pillar trims.
-
If the overlap is 10 mm 10.4 in.) or less, or 5 mm 10.6 in.) or more, go to step 4.
4. Carefully trim the headliner with a utility knife, reducing the overlap to more than 10 mm (0.4 in.), or less than 15 mm (0.6 in.).
5. Remove the tape, and install the pillar trim.
After the vehicle is completely repaired, turn the ignition switch ON (II). If the SRS indicator comes on for about 6 seconds and then goes off, the SRS is
OK. If the indicator does not function properly, use the HDS SRS Menu Method to read the DTC. If you can not retrieve a code, go to SRS Symptom
Troubleshooting.
1. Disconnect the battery negative cable, and wait at least 3 minutes before beginning work.
2. Remove the headliner.
Headliner Removal and Installation
Special Tools Required
KTC trim tool set SOJATP2O14 *
* Available through the American Honda Tool and Equipment Program; call 888-424-6857