
TL V6-3.2L (2004)
Pressure Plate: Service and Repair
Clutch Replacement
Special Tools Required:
-
Pressure plate compressor 07AAE-P8EA000
-
Clutch alignment shaft 07AAF-P8EA000
-
Pressure plate compressor adapter 07MK-P8EA000
-
Ring gear holder 07LAB-PV00100 or 07924-PD20003
-
Attachment, 37 x 40 mm 07746-0010200
-
Driver 07749-0010000
NOTICE: You must use the special tools required to remove and install the clutch pressure plate or you will irreversibly damage it.
Pressure Plate and Clutch Disc Removal
1. Check the height of the diaphragm spring fingers using the special tool and a feeler gauge. If the height is more than the service limit, replace the
pressure plate and clutch disc as a set.
Standard (New): 0.6 mm (0.02 inch) max.
Service Limit: 0.8 mm (0.03 inch)
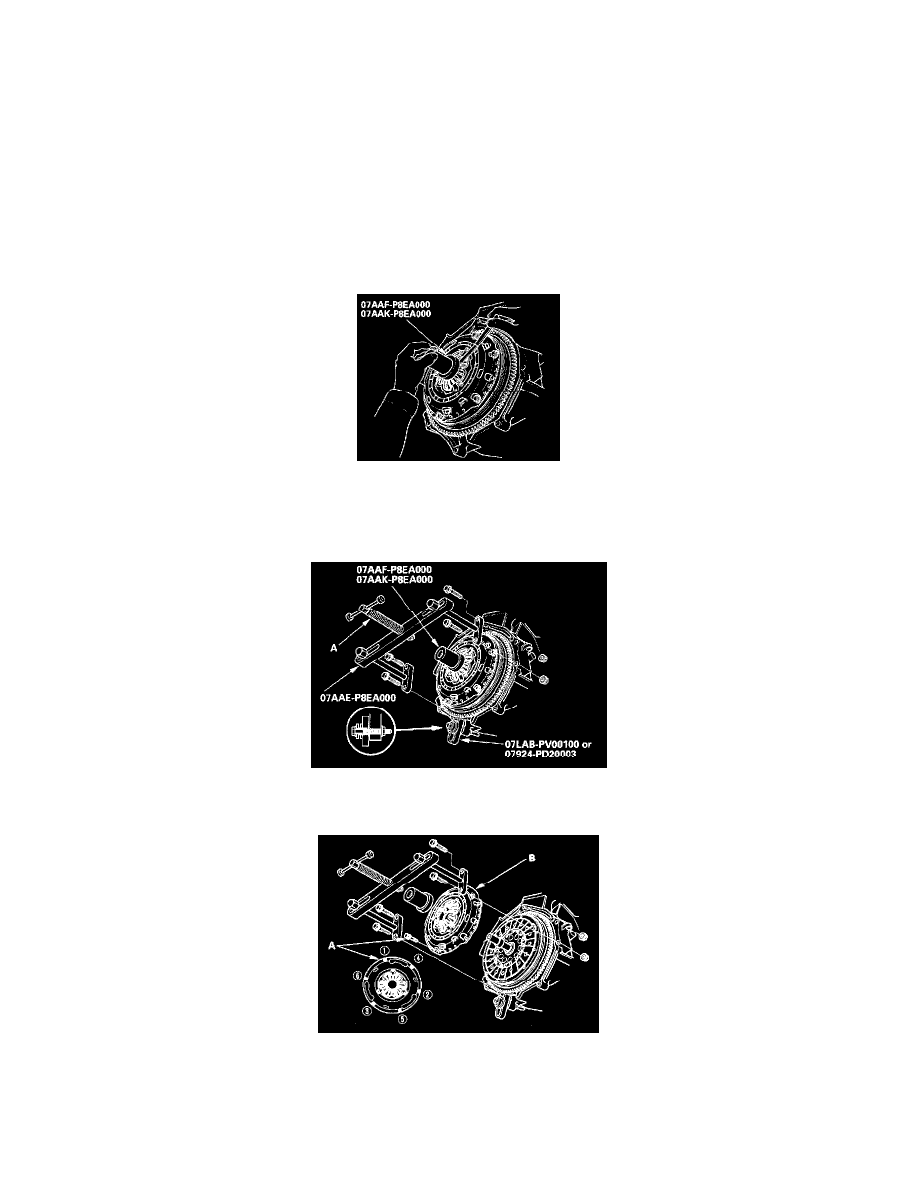
2. Install the special tools.
3. Turn the center screw (A) clockwise by hand to apply pressure on the diaphragm spring. Continue turning the center screw until it stops.
4. Loosen the pressure plate mounting bolts (A) in the pattern shown in several steps, then remove the bolts.
5. Turn the center screw on the pressure plate compressor counterclockwise by hand to release the pressure, then install two pressure plate mounting
bolts, hand-tight, to hold the pressure plate (B). Remove the special tools and the pressure plate.