
TL V6-3.2L (2004)
6.
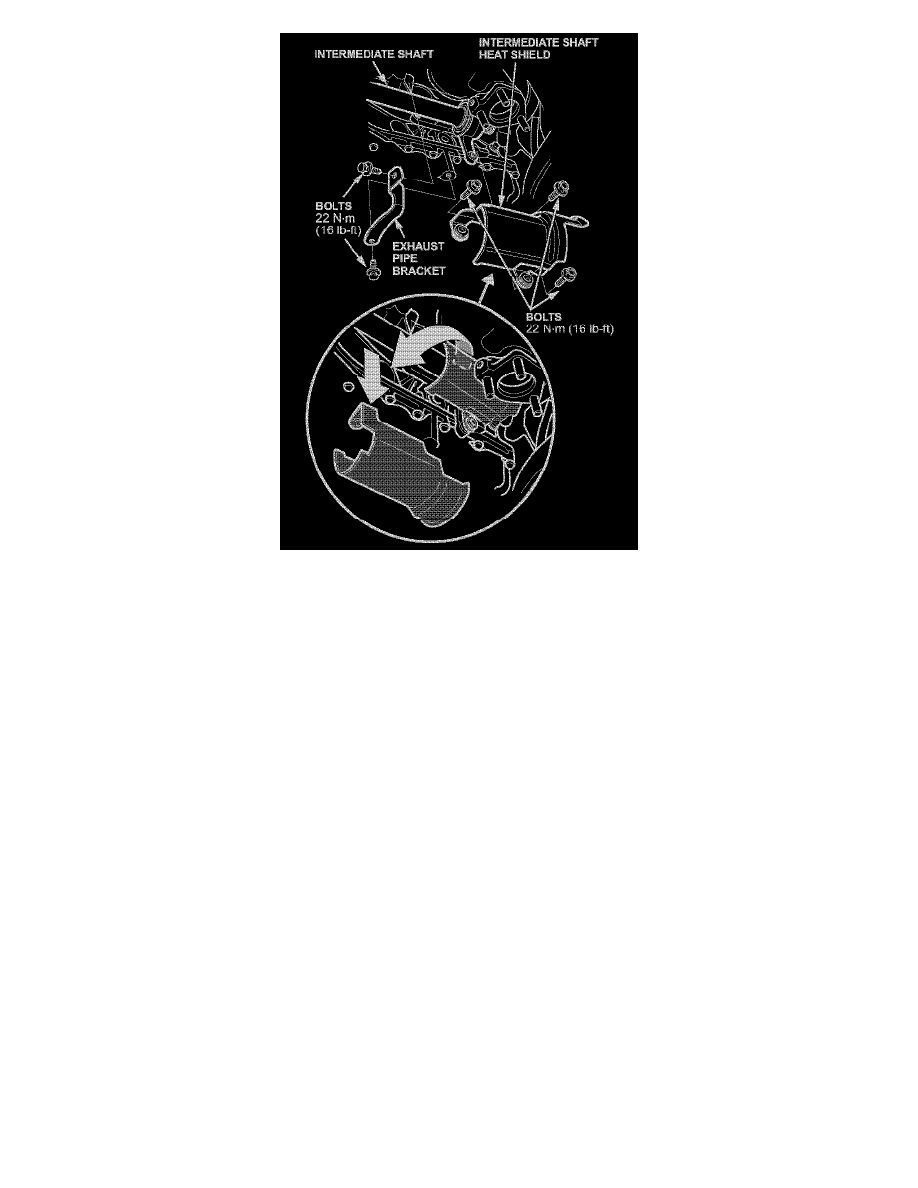
Remove the three bolts attaching the intermediate shaft heat shield to the intermediate shaft.
7.
Remove the exhaust pipe bracket (two bolts).
8.
Remove the heat shield by sliding it toward the transmission and then rotating it.
9.
Install a new heat shield by rotating it and then sliding it away from the transmission.
10.
Reinstall the exhaust pipe bracket, and torque its bolts to 22 N.m (16 lb.ft).
11. Reinstall the original heat shield bolts, and torque them to 22 N.m (16 lb.ft).
12.
With its dowel pin installed on the transmission, reinstall the transfer assembly and torque its bolts to 51 N.m (38 lb.ft).
13.
Reconnect the breather tube to the breather pipe on the transfer assembly. Torque the breather tube bracket bolt to 12 N.m (8.7 lb.ft).
14.
Reattach the propeller shaft to the transfer companion flange, and align the marks you made in step 3. Torque the four nuts to 74 N.m (54 lb.ft).
15.
Reattach exhaust pipe A to the warm-up catalytic converters with two new front gaskets and six new nuts. Torque the nuts to 54 N.m (40 lb.ft).
16.
Reattach exhaust pipe A to the TWC with a new rear gasket and three new nuts. Torque the nuts to 33 N.m (25 lb.ft).
17.
Reconnect exhaust pipe A to its rubber hanger.
18.
Check the ATF level, and refill as needed using Acura ATF-Z1 Automatic Transmission Fluid.
REPAIR PROCEDURE D: MDX
1.
Raise the vehicle on a lift, and make sure it is securely supported.