
TL V6-3.2L (2004)
8. Remove the cotter pin (A) from the lower arm ball joint, and remove the nut (B).
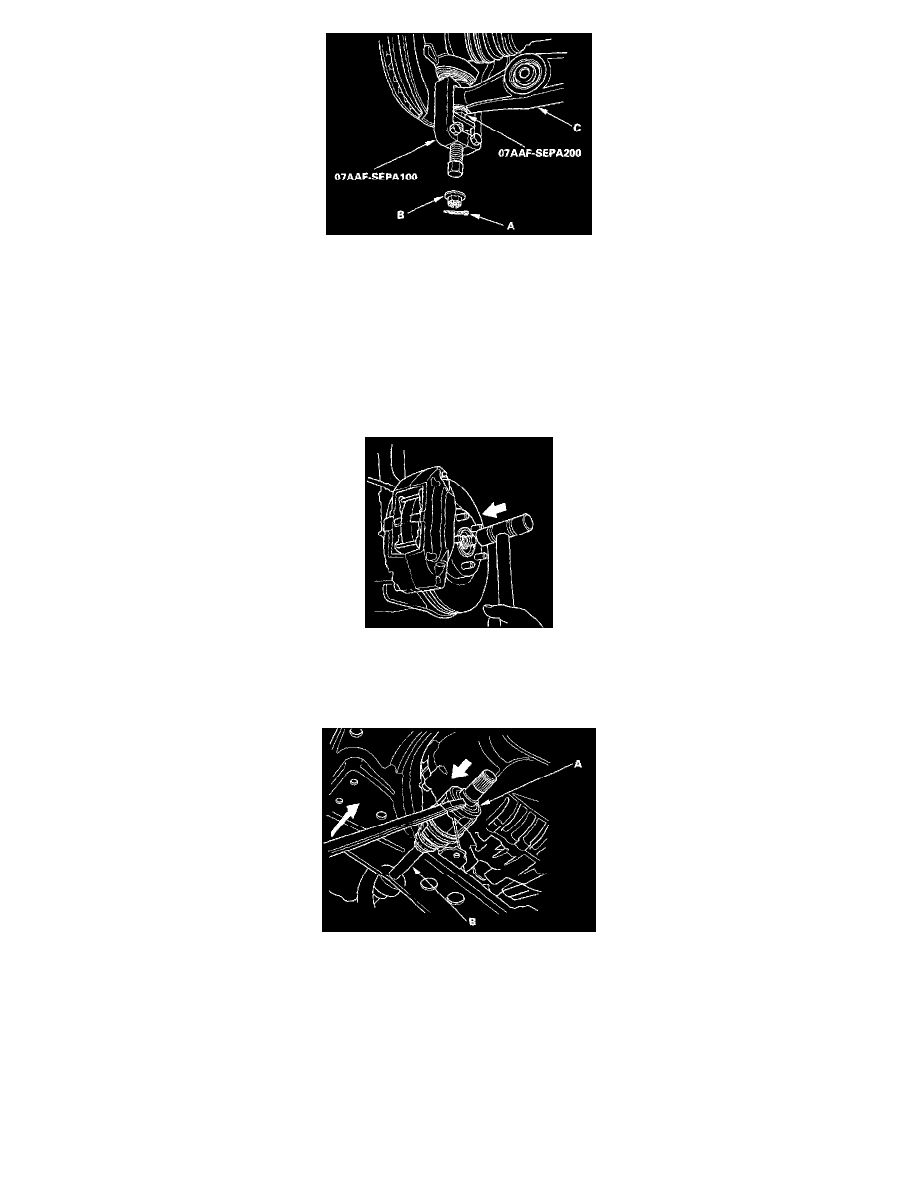
NOTE:
-
To avoid damaging the ball joint, install the special tools on the threads of the ball joint.
-
Be careful not to damage the ball joint boot when installing the remover.
-
Do not force or hammer on the lower arm, or pry between the lower arm and the knuckle. You could damage the ball joint.
9. Disconnect the lower ball joint from the lower arm using the special tools.
NOTE: The collar on the lower arm is removed with ball joint, the lower arm must be replaced.
10. Pull the knuckle outward, and remove the outboard joint from the front wheel hub using a plastic hammer.
11. Left driveshaft: Pry the inboard joint (A) from the differential case with a prybar. Right driveshaft: Drive the inboard joint (A) off of the
intermediate shaft with a drift and hammer. Remove the driveshaft as an assembly. Do not pull on the driveshaft (B), because the inboard joint
may come apart. Pull the driveshaft straight out to avoid damaging the oil seal.
Left driveshaft