
TL V6-3.2L (2004)
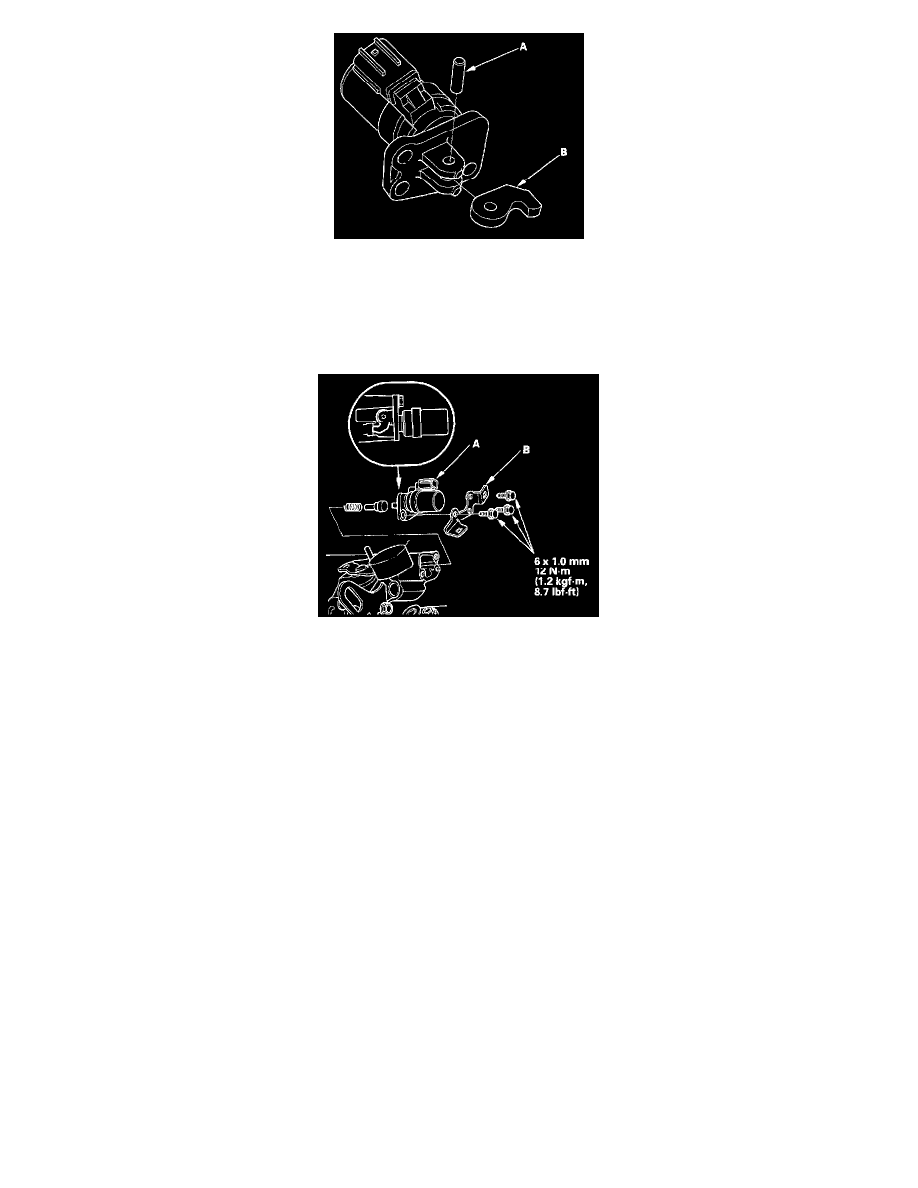
8. Remove the roller (A) and select lock cam (B).
9. Install in the reverse order of removal.
10. Remove the dirt and oil from the sealing surface. Apply liquid gasket (P/N 08718-0001) to the sealing surface.
NOTE: If 4 minutes have passed after applying the liquid gasket, reapply it, and install the solenoid. Allow it to cure at least 20 minutes after
assembly before filling the transmission with oil.
11. Install the reverse lockout solenoid assembly (A) and transmission harness stay (B).
12. Connect the reverse lockout solenoid connector.
13. Install the cable bracket, select cable, and shift cable.
14. Install the battery base.
15. Install the air cleaner housing.
16. Install the battery. Connect the positive (+) cable first, then the negative (-) cable to the battery.
17. Install the left rear engine compartment cover and the left side engine compartment cover.
18. Enter the anti-theft codes for the radio and navigation system, then enter the customer's XM radio channel presets.
NOTE: The radio presets are no longer lost when the battery is disconnected.