
TL V6-3.5L (2007)
Back Light, LCD, Switch Light Check
Turn the combination light switch ON.
-
Turn on the LCD back light.
-
Turn on all LCD segments.
-
Brings screen to full bright (with navigation).
If the display panel control unit fails to complete any of the functions of the self-diagnostic function, go to the display panel control unit input test. See:
Component Tests and General Diagnostics/Display Panel Control Unit Input Test
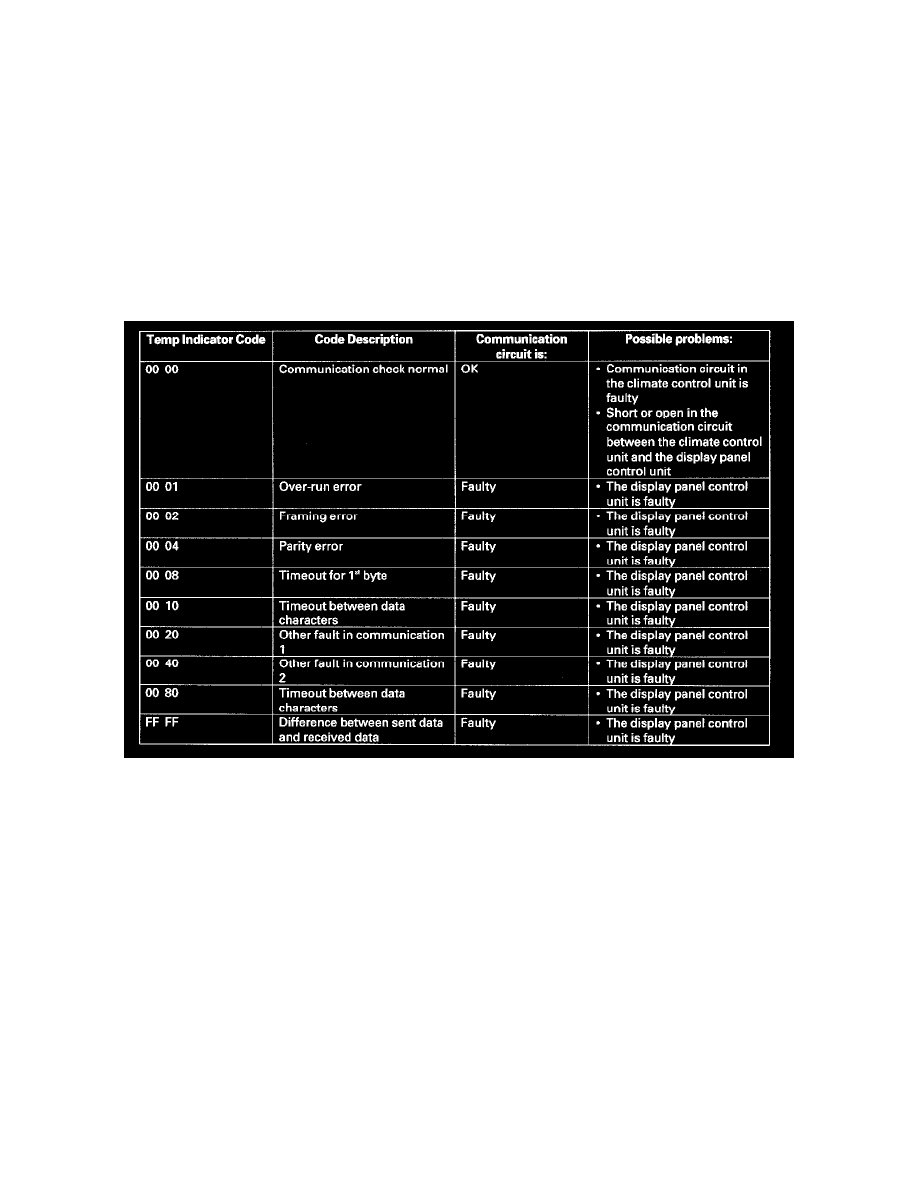
Communication Circuit Test
1. Remove the dashboard center vent.
2. Disconnect the display panel control unit connector B (6P) and connect the special tool (07AAZ-SEPA100) to display panel control unit.
3. Push and hold the driver's "AUTO" button for 5 seconds.
4. The driver's temperature and passenger's temperature indicators will display a code. Check the code in the list above. If the code is considered OK,
then the center panel module's communication circuit is OK. If the code is considered a fault, replace the center panel module.
If the display module control unit fails to complete any of the functions of the self-diagnostic function, go to the display panel control unit input
test. See: Component Tests and General Diagnostics/Display Panel Control Unit Input Test
Exiting the Self-diagnostic Function
-
Press and hold the passenger's "AUTO" button for 3 seconds.
-
Turn the ignition switch OFF.