
TL V6-3.5L (2007)
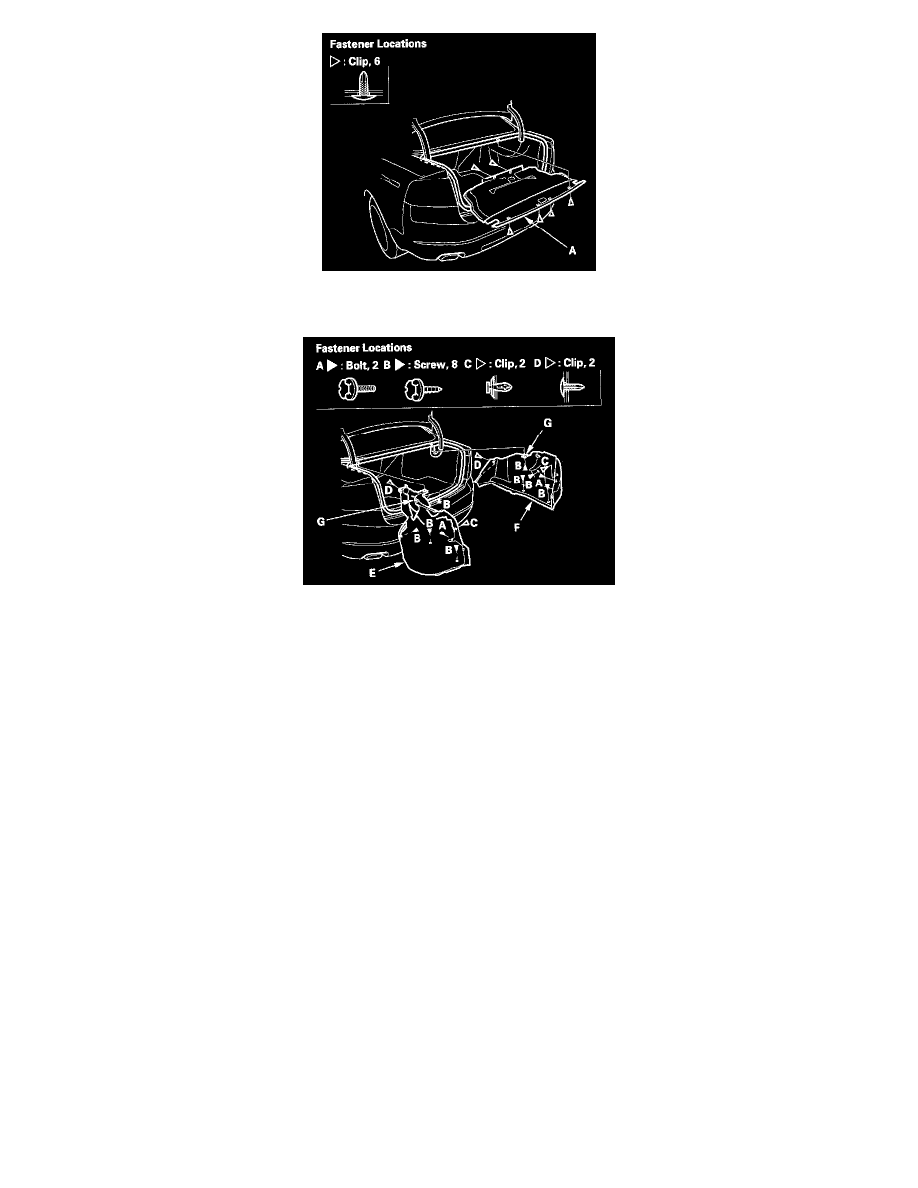
5. Remove the clips, then remove the rear shelf under cover (A).
6. Remove the cargo net from the right trunk side trim panel.
7. Remove the bolt (A), screws (B), and clips (C, D), then remove the left trunk side trim panel (E) and right trunk side trim panel (F) while passing
each trunk lid hinge through the slit (G).
8. Install the trim in the reverse order of removal, and note these items:
-
Check if the clips are damaged or stress-whitened, and if necessary, replace them with new ones.
-
When installing the trunk side trim panel, slip the trunk lid hinge through the slits in the trim panel.
-
Push the clips into place securely.