
TL V6-3.5L (2007)
17. Install the brake hose mounting bolts, and tighten them to the specified torque.
18. Press the brake pedal several times to make sure the brakes work.
NOTE: Engagement of the brake may require a greater pedal stroke immediately after the brake pads have been replaced as a set. Several
applications of the brake pedal will restore the normal pedal stroke.
19. Add brake fluid as needed.
20. After installation, check for leaks at hose and line joints or connections, and retighten if necessary. Test-drive the vehicle, then check for leaks.
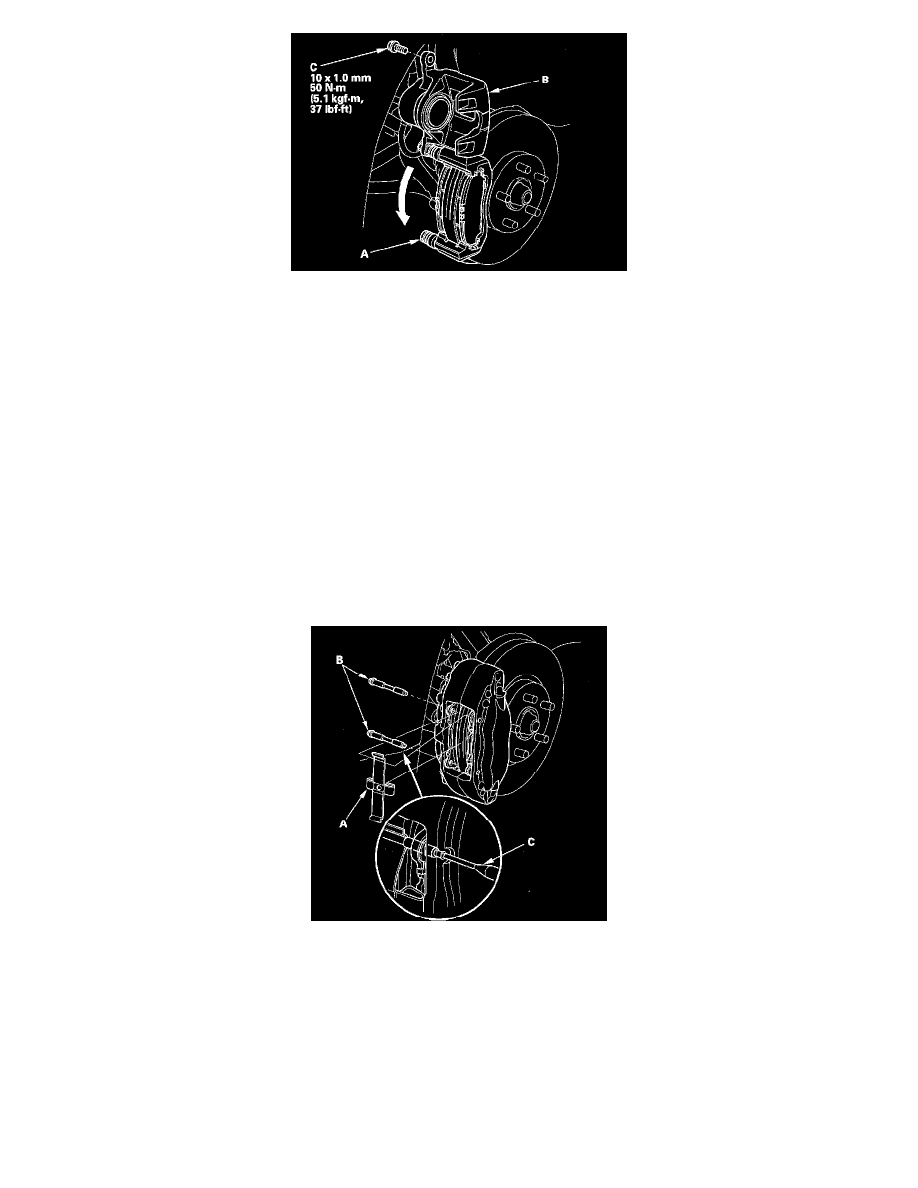
Replacement - Type S Model (4-piston caliper type)
NOTE: Due to the high performance nature of the brake system on Type S model, the rotors and pads may wear faster than on except Type S model.
Be sure to inspect the front rotor thickness anytime the front pads are replaced.
1. Remove some brake fluid from the master cylinder.
2. Raise the front of the vehicle, and support it with safety stands in the proper locations.
3. Remove the front wheels. Take care not to scratch the calipers.
4. Depress pad spring (A). Remove pad pins (B) from caliper by pushing from the outside to the inside with a commercially available 5/32 " pin
punch (C).
5. Remove the pad shims (A) and the brake pads (B).