
TL V6-3.5L (2007)
Camshaft: Removal and Replacement
Camshaft Replacement
Camshaft Replacement
Front
1. Make sure you have the anti-theft codes for the audio system and navigation system (if equipped). Make sure the ignition switch is OFF.
2. Remove the left side engine compartment cover.
3. Disconnect the negative cable from the battery first, then disconnect the positive cable.
4. Remove the battery.
5. Drain the engine coolant.
6. Remove the upper radiator hose.
7. Remove the exhaust gas recirculation (EGR) valve.
8. Remove the timing belt.
9. Remove the rocker arm assembly.
10. Remove the front camshaft pulley.
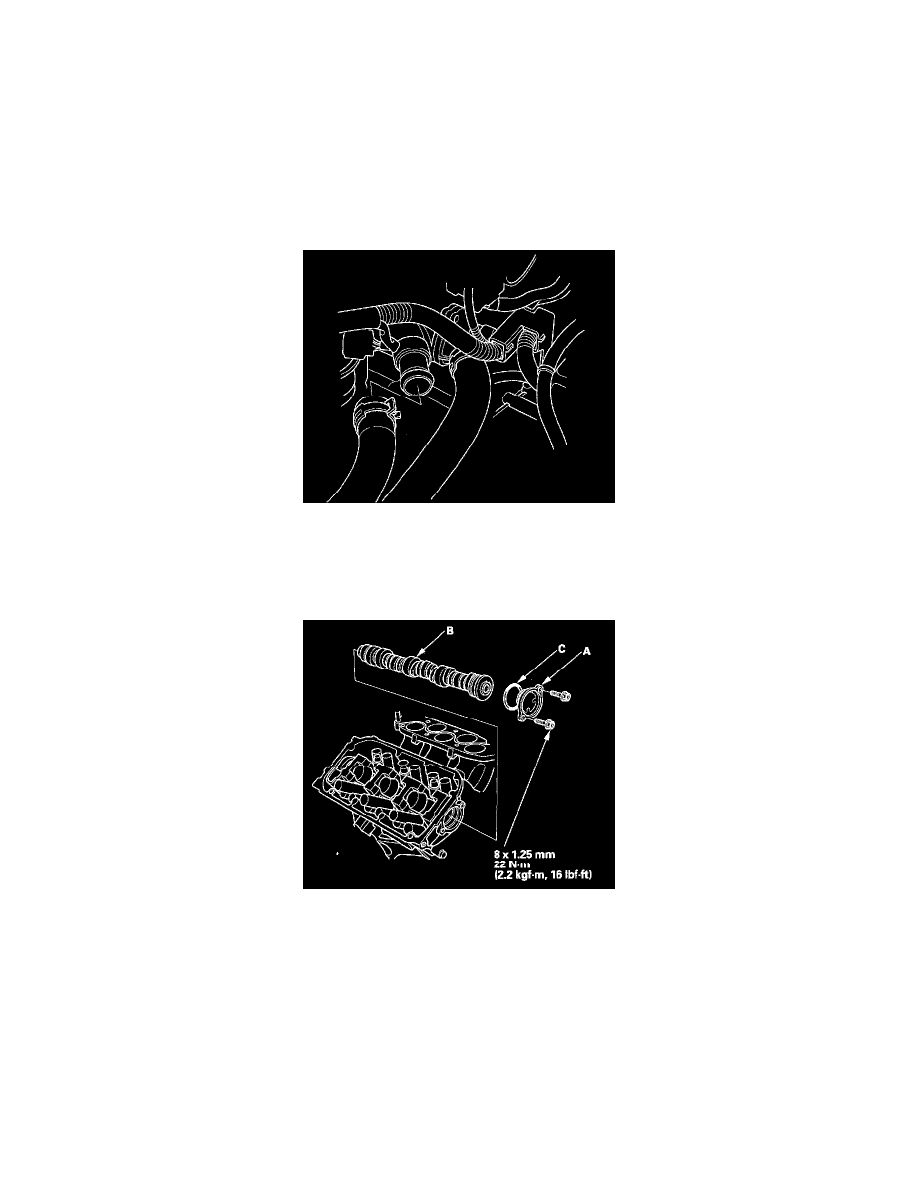
11. Remove the thrust cover (A), then remove the front camshaft (B).
12. Install the front camshaft in the reverse order of removal. Always use a new O-ring (C). Apply new engine oil to the journals and cam lobes.
13. Apply new engine oil to the threads of the camshaft pulley mounting bolt, then install the front camshaft pulley.
14. Install the rocker arm assembly, then tighten the mounting bolts.
15. Install the timing belt.
16. Adjust the valve clearance.
17. Install the battery. Clean the battery posts and cable terminals with sandpaper, then assemble them and apply grease to prevent corrosion.
18. Fill the radiator with engine coolant and bleed the air out.
19. Do the crankshaft position (CKP) pattern clear/CKP pattern learn procedure.
20. Enter the anti-theft codes for the audio system and navigation system (if equipped).
21. Set the clock.
Rear
1. Make sure you have the anti-theft codes for the audio system and navigation system (if equipped). Make sure the ignition switch is OFF.
2. Relieve the fuel pressure.