
TL V6-3.5L (2007)
Backup Lamp Switch: Testing and Inspection
Back-up Light Switch Test
NOTE: Use fender covers to avoid damaging painted surfaces.
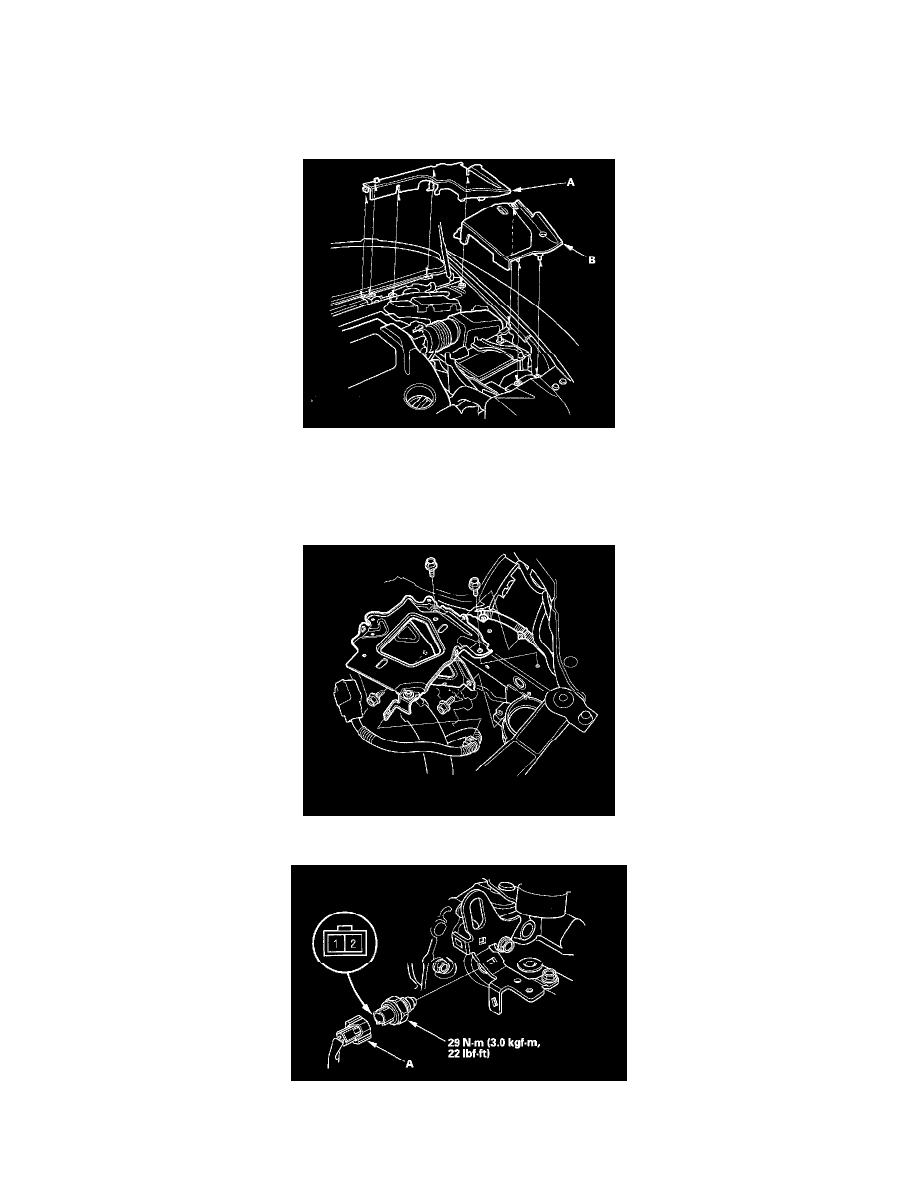
1. Remove the left rear engine compartment cover (A) and the left side engine compartment cover (B).
2. Make sure you have the anti-theft codes for the audio unit and the navigation system, then write down the audio presets.
3. Disconnect the negative cable from the battery, then disconnect the positive cable.
4. Remove the battery.
5. Remove the air cleaner assembly.
6. Remove the battery base.
7. Disconnect the back-up light switch (A) 2P connector.
8. Check for continuity between the back-up light switch 2P connector terminals No. 1 and No. 2. There should be continuity when the shift lever is
only in reverse.
9. If necessary, replace the back-up light switch. Apply liquid gasket (P/N 08718-0001) to threads of the switch, and install it on the transmission