
TL V6-3.5L (2007)
Air Filter Element: Testing and Inspection
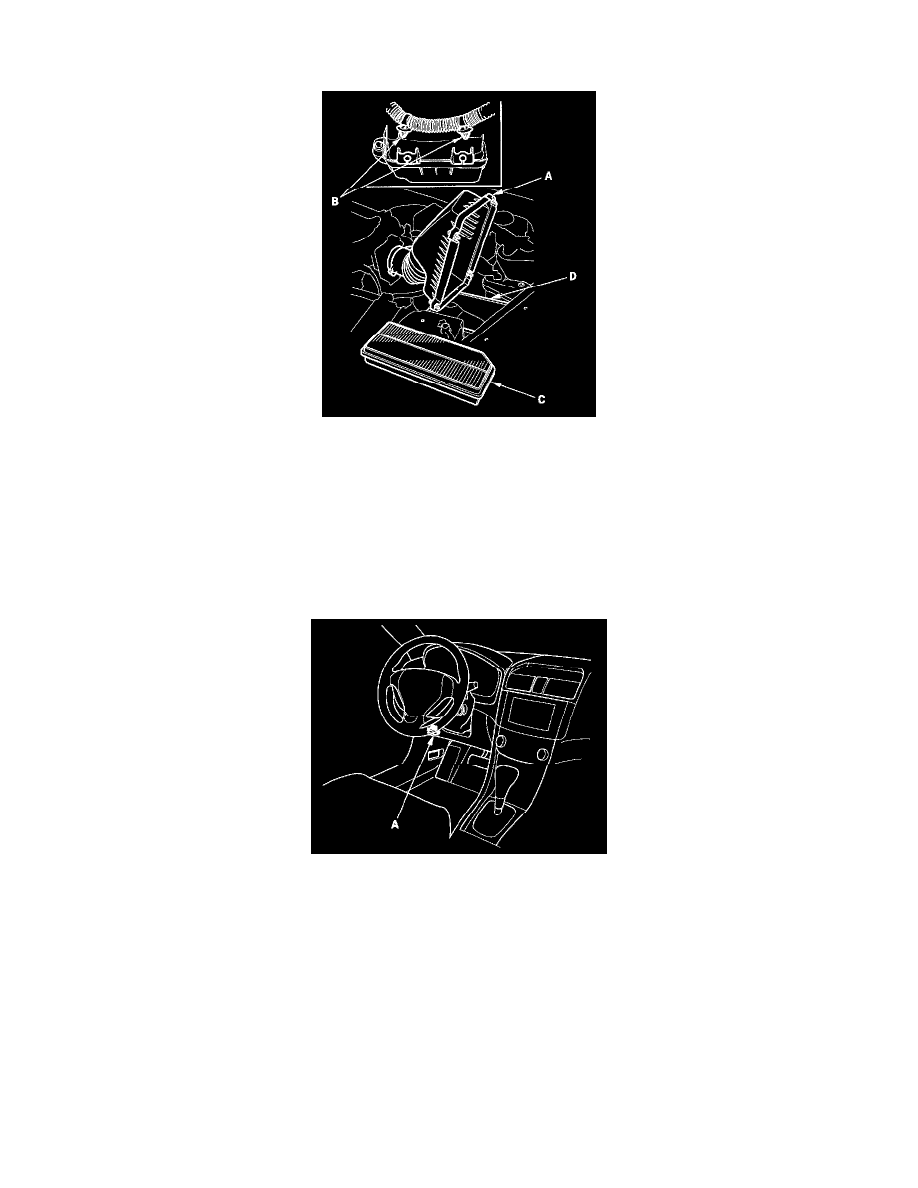
Air Cleaner Element Inspection/Replacement
1. Open the air cleaner housing cover (A), and remove the clamps (B).
2. Remove the air cleaner element (C) from the air cleaner housing (D).
3. Check the air cleaner element for damage or clogging. If it is damaged or clogged, replace it.
NOTE: Do not use compressed air to clean the air cleaner element.
4. Clean and remove any debris from inside the air cleaner housing.
5. Install the parts in the reverse order of removal.
6. If the maintenance minder required to replace the air cleaner element, reset the maintenance minder, and this procedure is complete. If the
maintenance minder did not require to replace the air cleaner element, go to step 8.
7. Connect the HDS to the data link connector (DLC) (A) located under the driver's side of the dashboard.
8. Turn the ignition switch ON (II).
9. Make sure the HDS communicates with the ECM/PCM and other vehicle systems. If it does not, go to the DLC circuit troubleshooting. See:
Powertrain Management/Computers and Control Systems/Testing and Inspection/Component Tests and General Diagnostics/DLC Circuit
Troubleshooting
10. Select BODY ELECTRICAL with the HDS.
11. Select ADJUSTMENT in the GAUGES MENU with the HDS.
12. Select RESET in the MAINTENANCE MINDER with the HDS.
13. Select MAINTENANCE SUB ITEM 2 RESET with the HDS.