
TL V6-3.5L (2007)
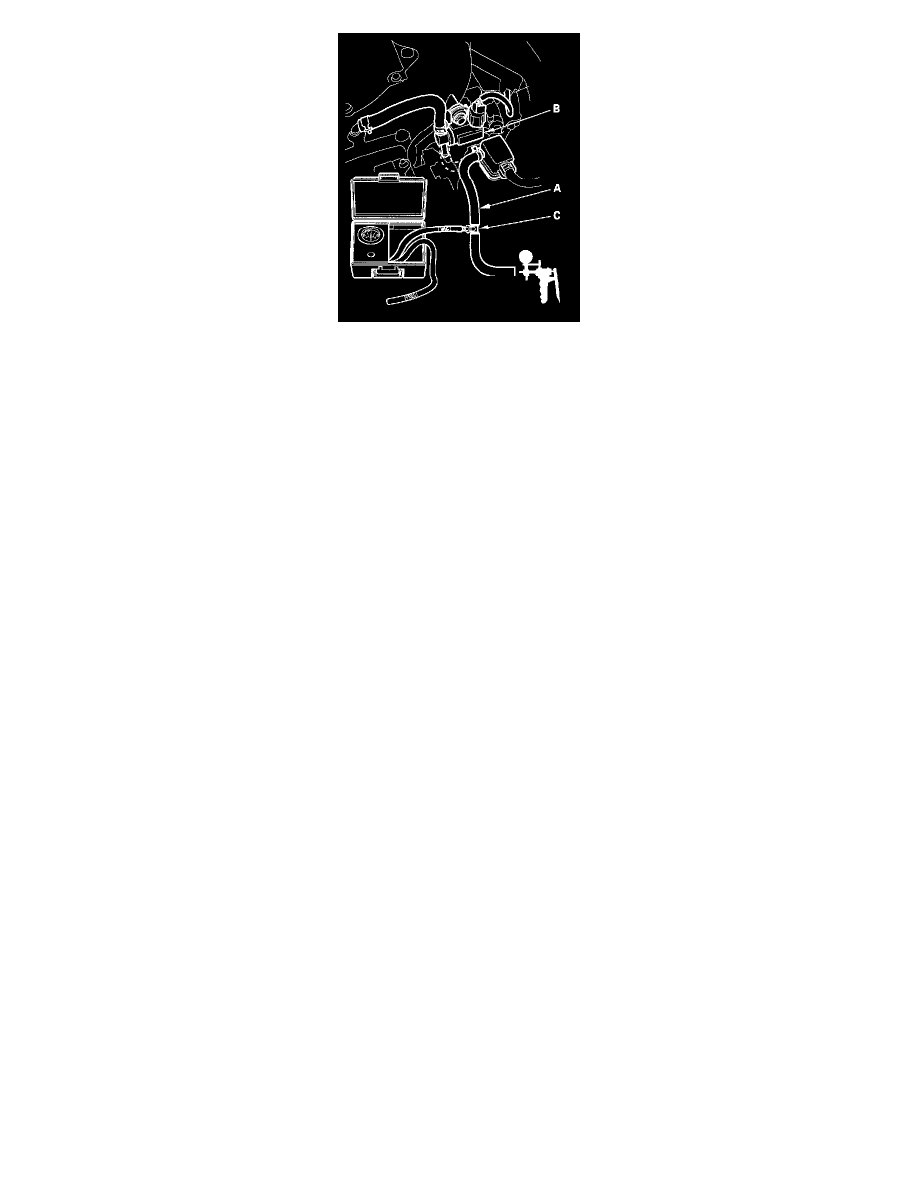
8. Disconnect the vacuum hose (A) from the EVAP canister purge valve (B) in the engine compartment, and connect a T-fitting (C) from the vacuum
gauge and the vacuum pump/gauge 0 - 30 in.Hg, to the EVAP canister purge valve as shown.
9. Apply about 2 kPa (0.6 in.Hg, 15 mmHg) vacuum to the hose.
10. Turn the ignition switch ON (II).
11. Select the EVAP PCS ON in the INSPECTION MENU with the HDS.
Does it hold vacuum?
YES - Replace the EVAP canister purge valve, then go to step 12.
NO - Check for blockages in the vacuum hose between EVAP canister purge valve and the EVAP canister, then go to step 12.
12. Install the parts in the reverse order of removal.
13. Turn the ignition switch ON (II).
14. Reset the ECM/PCM with the HDS.
15. Do the ECM/PCM idle learn procedure.
16. Start the engine. Hold the engine speed at 3,000 rpm without load (in Park or neutral) until the radiator fan comes on, then let it idle for 1 minute.
17. Test drive at 45 mph (72 km/h) for 1 minute or more.
Is the fuel cap message on?
YES - Go to step 1 and recheck.
NO - Troubleshooting is complete.