
TL V6-3.5L (2007)
Gear Lockout Solenoid: Service and Repair
Reverse Lockout Solenoid Disassembly/Reassembly
NOTE: Use fender covers to avoid damaging painted surfaces.
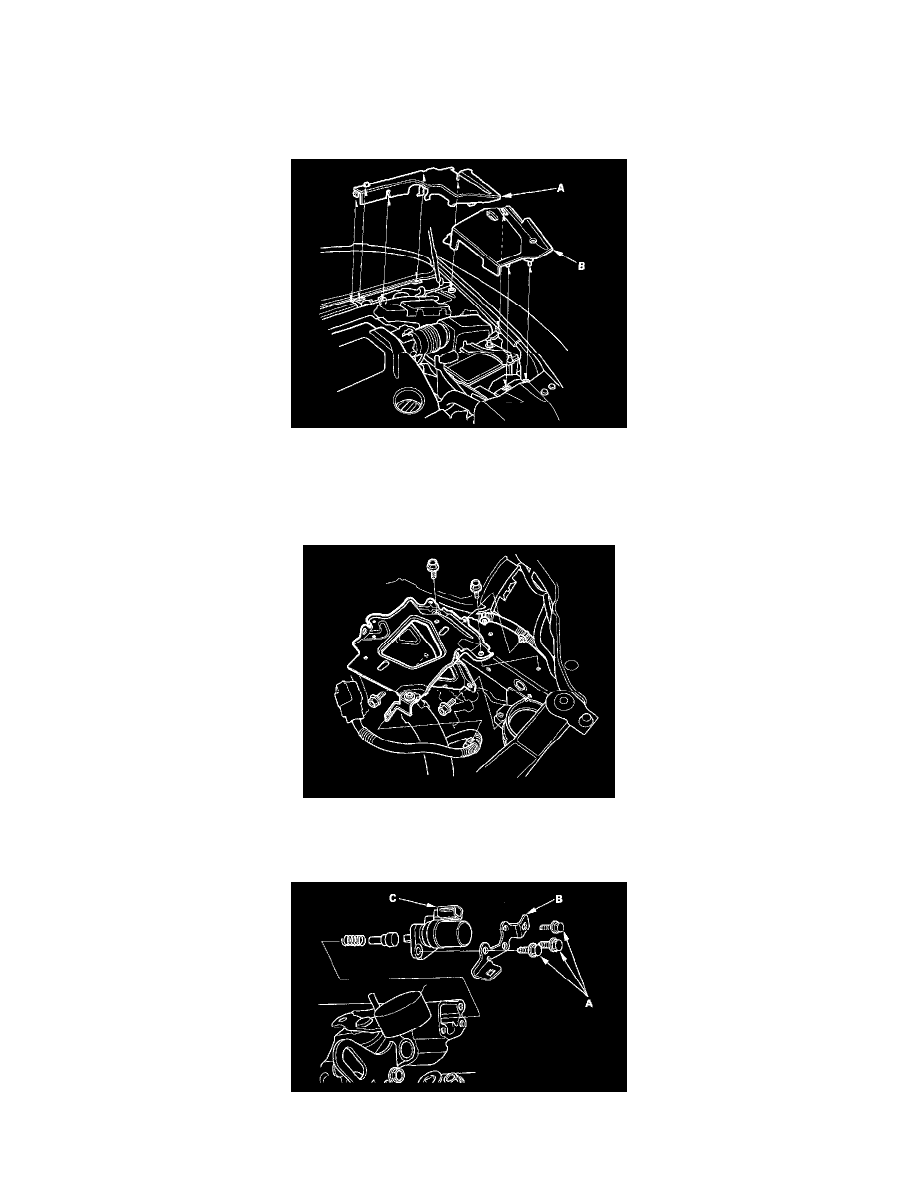
1. Remove the left rear engine compartment cover (A) and the left side engine compartment cover (B).
2. Make sure you have the anti-theft codes for the audio unit and the navigation system, then write down the audio presets.
3. Disconnect the negative cable from the battery, then disconnect the positive cable.
4. Remove the battery.
5. Remove the air cleaner assembly.
6. Remove the battery base.
7. Carefully remove the shift cable bracket to avoid bending the shift cables.
8. Disconnect the reverse lockout solenoid connector.
9. Remove the bolts (A), transmission harness bracket(B), and reverse lockout solenoid assembly (C).
10. Remove the roller (A) and select lock cam (B).