
TL V6-3.5L (2007)
Seat Occupant Sensor: Service and Repair
Front Passenger's Weight Sensor
Front Passenger's Weight Sensor Replacement
Removal
NOTE: Removal of the front passenger's weight sensors must be performed according to the SRS precautions/procedures.
1. Disconnect the negative cable from the battery, and wait at least 3 minutes before beginning work.
2. Remove the front passenger's seat assembly.
3. Remove the cushion cover/pad from the seat cushion frame.
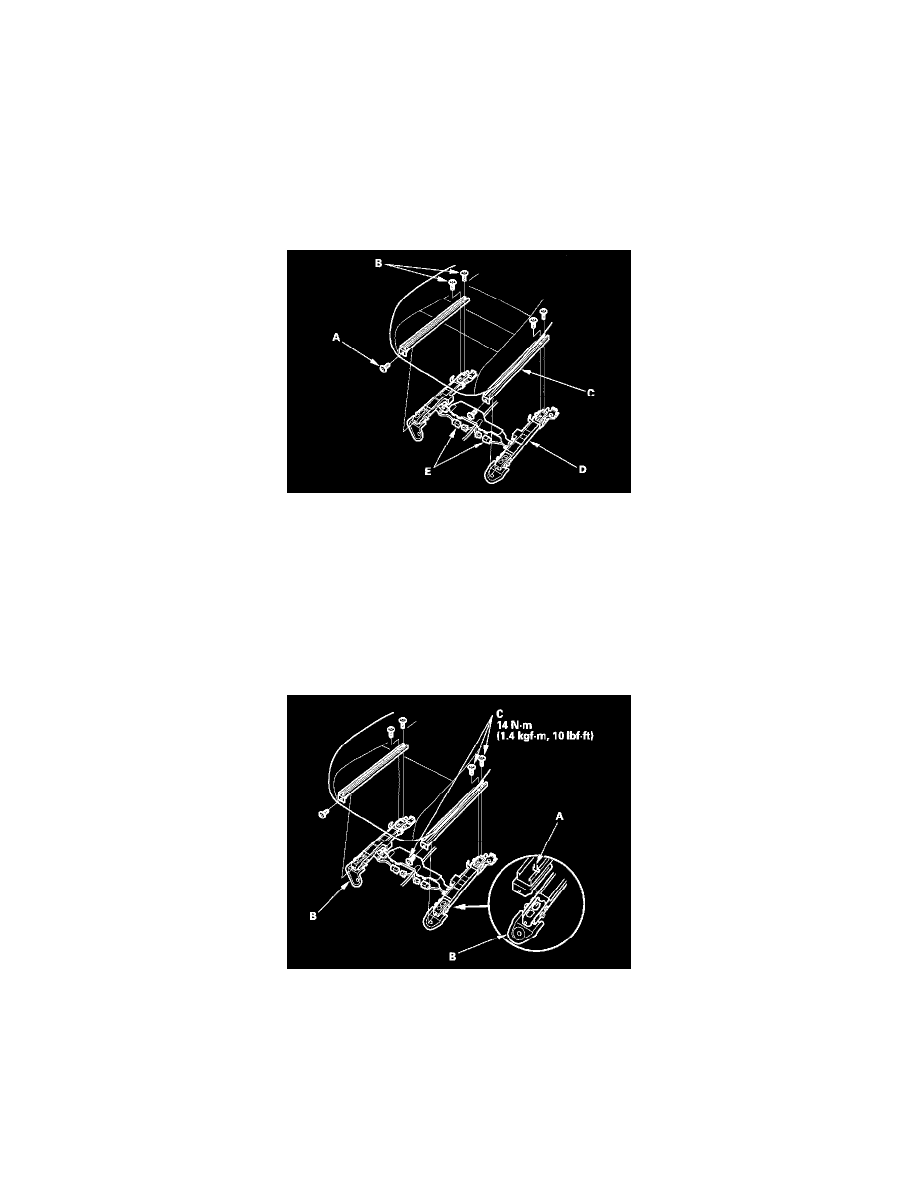
4. Using a TORX T30 bit, remove the TORX bolts (A) and using a TORX T40 bit, remove the TORX bolts (B) that attach the seat track (C) to the
weight sensors (D).
5. Disconnect the sensor connectors (E) from the ODS unit harness, then remove the front passenger's weight sensors.
Installation
NOTE:
-
Be sure to install the harness wires so they are not pinched or interfering with other parts.
-
Make sure both of the hooks (A) on the seat track are properly secured to the front bracket (B). If the hooks are not properly secured, the weight
sensors will not perform properly.
1. Install the new front passenger's weight sensors with tamper-resistant TORX bolts (C) under the seat track.
2. Reassemble the front passenger's seat cushion cover/pad.
3. Reinstall the front passenger's seat.
4. Reconnect the negative cable to the battery.
5. Calibrate the ODS unit.
6. After installing the front passenger's weight sensors, confirm proper system operation: Turn the ignition switch ON (II); the SRS indicator should
come ON for about 6 seconds and then go off.