
TL V6-3.5L (2007)
Control Module: Service and Repair
How to Substitute the PCM
Substituting the PCM
Special Tools Required
^
Honda diagnostic system (HDS)
^
Honda interface module (HIM)
^
HDS pocket tester
NOTE: Use this procedure when you need to substitute a known-good PCM during troubleshooting procedures.
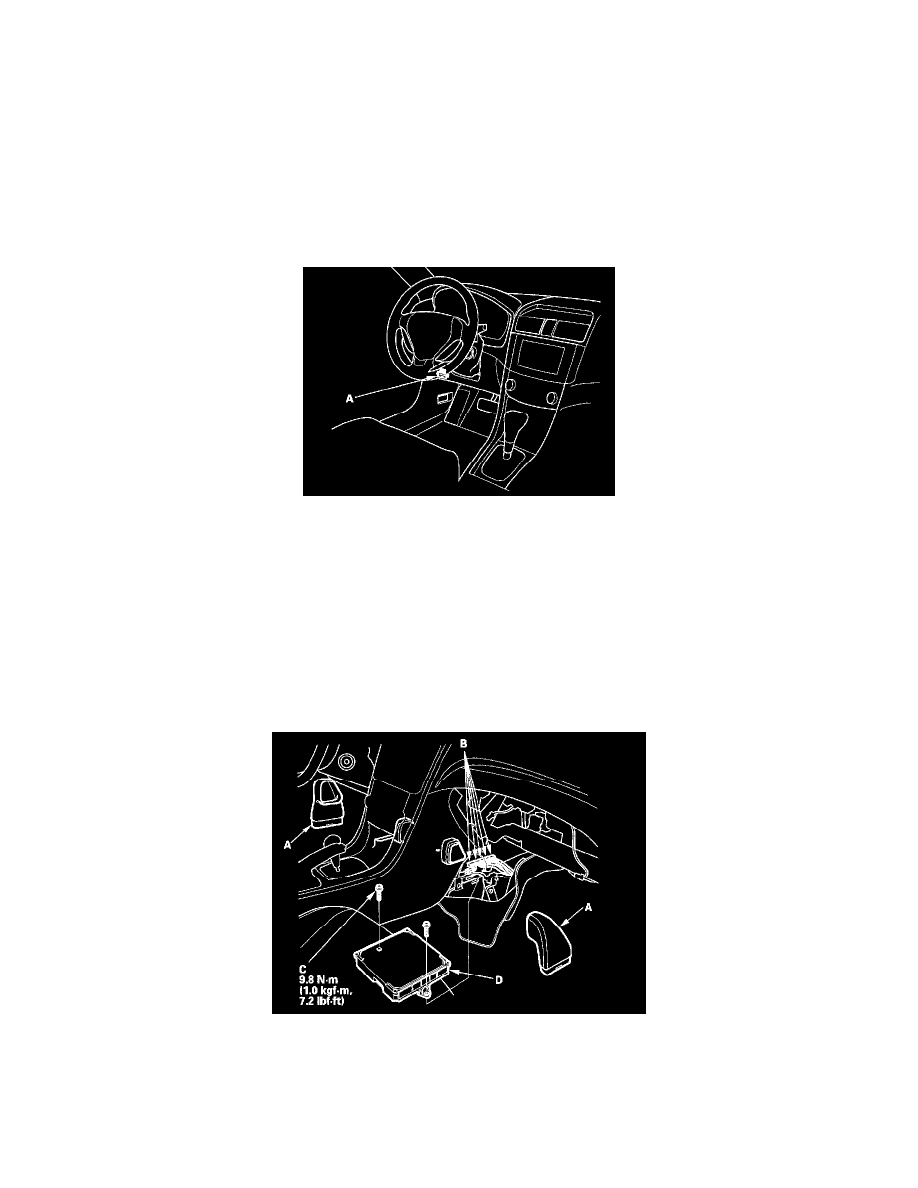
1. Connect the HDS to the data link connector (DLC) (A) located under the driver's side of the dashboard.
2. Turn the ignition switch ON (II).
3. Make sure the HDS communicates with the PCM. If it doesn't, go to the DLC circuit troubleshooting. If you are returning from DLC circuit
troubleshooting, skip steps 4 to 11, then clean the throttle body after substituting the PCM.
4. Select the INSPECTION MENU with the HDS.
5. Select the ETCS TEST, then select the TP POSITION CHECK, and follow the screen prompts.
NOTE: If the TP POSITION CHECK indicates FAILED, continue this procedure.
6. Turn the ignition switch OFF.
7. Jump the SCS line with the HDS.
8. Pull back the carpet.
9. Remove the ducts (A).
10. Disconnect the PCM connectors (B).
11. Remove the bolts (C), then remove the PCM (D).
12. Install a known-good PCM in the reverse order of removal.
13. Open the SCS line with the HDS.
14. Turn the ignition switch ON (II).
NOTE: DTC P0630 "VIN Not Programmed or Mismatch" may be stored because VIN has not been programmed into the PCM; ignore it, and