
TL V6-3206cc 3.2L SOHC MFI (1998)
Fluid - A/T: Service and Repair
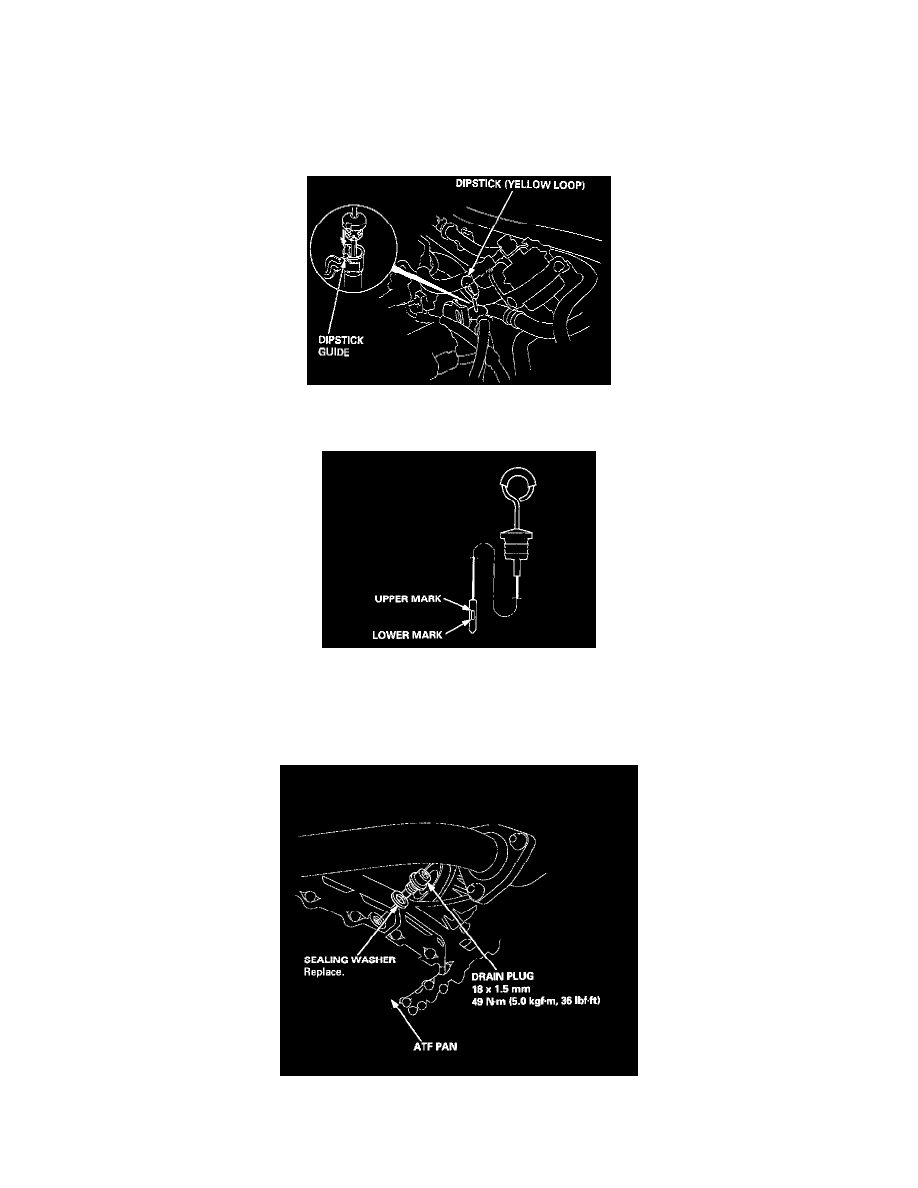
CHECKING/CHANGING
Checking
NOTE: Check the fluid level with the engine at normal operating temperature (the radiator fan comes on).
1. Park the vehicle on level ground. Turn off the engine.
2. Remove the dipstick (yellow loop) from the transmission, and wipe it with a clean cloth.
3. Insert the dipstick into the transmission. Make sure the notch in the rubber cap fits in the dipstick guide, and push the dipstick in all the way.
4. Remove the dipstick and check the fluid level. It should be between the upper and lower marks.
5. If the level is below the lower mark, pour the recommended fluid* into the dipstick tube to bring it to the upper mark.
6. Insert the dipstick back in the transmission. Make sure the notch fits in the dipstick guide, and the dipstick is down all the way.
Changing
1. Bring the transmission up to normal operating temperature (the radiator fan comes on) by driving the vehicle. Park the vehicle on level ground,
turn the engine off, and remove drain plug.
2. Reinstall the drain plug with a new washer, then refill the transmission with the recommended fluid* to the upper mark on the dipstick.