
TL AWD V6-3.7L (2010)
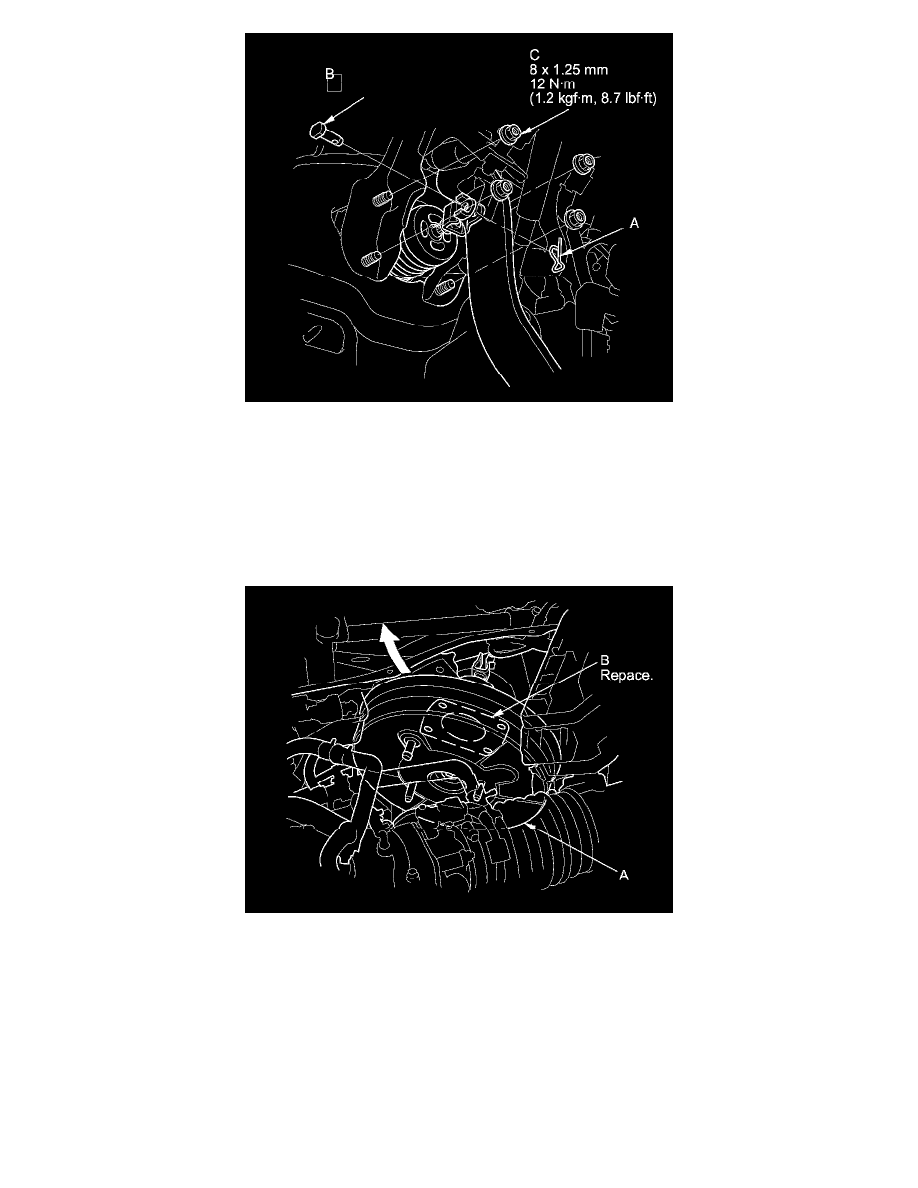
11. Remove the brake booster mounting nuts (C).
12. Remove the brake booster (A) from the engine compartment.
NOTICE
-
Be careful not to damage the brake booster mounting surfaces and the threads on the booster stud.
-
Be careful not to bend or damage the brake lines.
NOTE: Use the new brake booster gasket (B) during reassembly.
13. Install the brake booster in the reverse order of removal, and note these items:
-
Install the master cylinder after installing the brake booster See: Hydraulic System/Brake Master Cylinder/Service and Repair.
-
Check the brake pedal height and free play after installing the master cylinder, and adjust it if necessary See: Brake Pedal Assy/Adjustments.
-
Bleed the brake system See: Brake Bleeding/Service and Repair.
14. Do the battery terminal reconnection procedure See: Starting and Charging/Battery/Service and Repair/Procedures.