
TL AWD V6-3.7L (2010)
Camshaft Oil Seal: Service and Repair
Camshaft Oil Seal Installation - In Car
Camshaft Oil Seal Installation - In Car
Special Tools Required
-
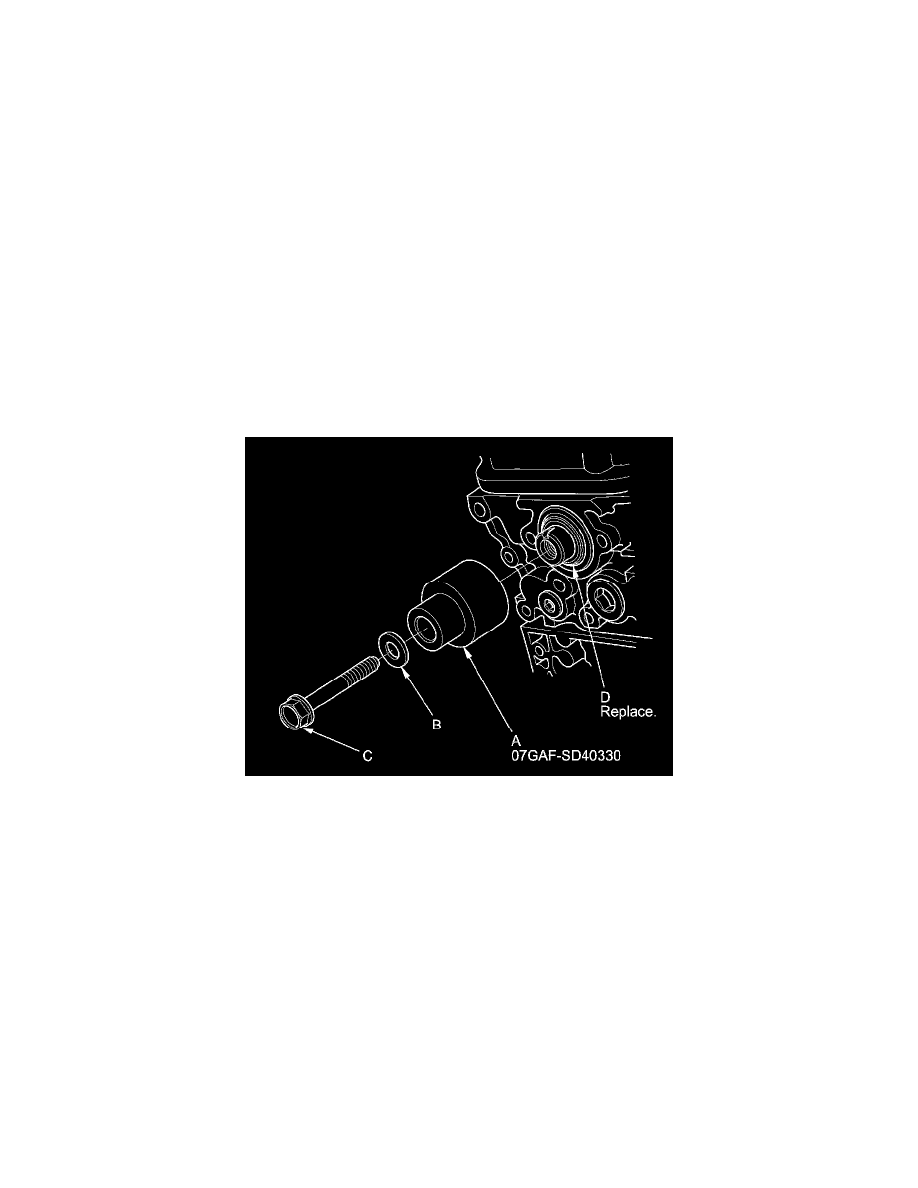
Ball Joint Remover/Installer 07GAF-SD40330
1. Remove the timing belt See: Timing Components/Timing Belt/Service and Repair/Timing Belt Removal.
2. Remove the camshaft pulley and the back cover See: Cylinder Head Assembly/Service and Repair/Removal and Replacement/Cylinder Head
Removal.
3. Remove the camshaft oil seal.
4. Clean and dry the camshaft oil seal housing.
5. Apply a light coat of new engine oil to the lip of the camshaft oil seal.
6. Using the ball joint remover/installer (A), a washer (B), and a 12 x 75 x 1.25 mm bolt (C), press in the new camshaft oil seal (D) about 0.5-1.5 mm
(0.02-0.06 in) below the surface of the cylinder head.
7. Apply new engine oil to the threads of the camshaft pulley mounting bolt. Install the back cover, then install the camshaft pulley.
-
Front See: Cylinder Head Assembly/Service and Repair/Overhaul/Camshaft, Rocker Arm Assembly, Camshaft Seal, and Pulley Installation
-
Rear See: Cylinder Head Assembly/Service and Repair/Overhaul/Camshaft, Rocker Arm Assembly, Camshaft Seal, and Pulley Installation
8. Install the timing belt See: Timing Components/Timing Belt/Service and Repair/Timing Belt Installation.